

Showing posts with label pie. Show all posts
Showing posts with label pie. Show all posts
Monday, March 14, 2016
Chocolate Mint Pi(e)s!
Hey y'all, it's Pi(e) day! That's right, March 14, 3.14, the day when nerds and geeks mark the glory that is mathematics - and also pastry. Since the most digits of pi I have memorized are in fact... 3.14 - I can't quite claim geekdom. But pastry... pastry I can do!

Thursday, April 30, 2015
Lemon Crumble Tart
No matter what the season, I love lemon desserts - the bright, mouth-puckering flavor and the tangy sweetness are the perfect way to end any meal. And when people think of a lemon tart, they almost always thing lemon-meringue, but I just don't love meringue that much. I still wanted something to top the creamy lemon curd in my tart shell, so I dreamed up a lemon crumble tart. And my dreams are good.
.JPG)
Thursday, October 25, 2012
Mini Dutch Apple Pies
I'm a sucker for individual desserts. And, I know I'm not the only one, since they always seem to disappear before my eyes when I bring them places (or from the kitchen table). And what better thing to miniaturize than one of the all time classic desserts - apple pie?


Monday, August 29, 2011
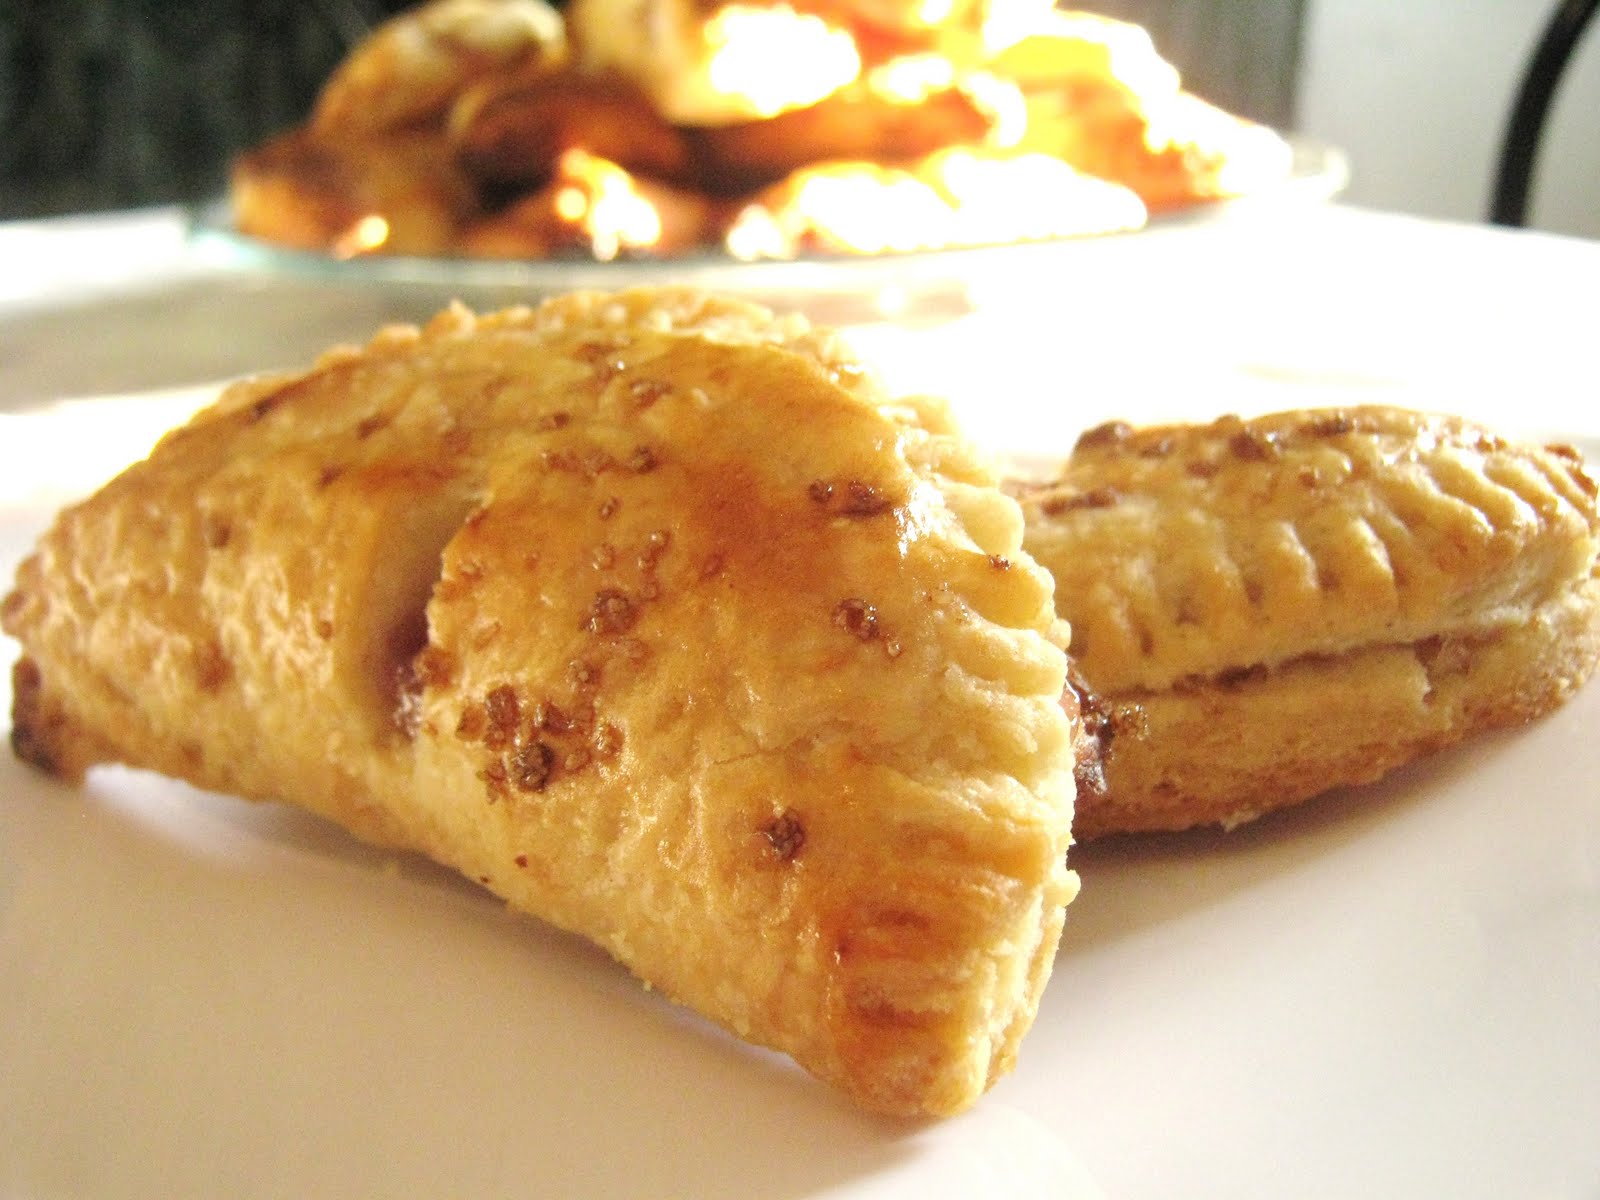
Peach Hand Pies
Over the 2 1/2 years I've been blogging, baking and mistaking, I haven't shied away from sharing some fairly total disasters with you. I've dropped cakes, I've left out key ingredients, I've made inedible yeast doughs, seven disastrous attempts at caramel, and I even ended up with ice cream all over the walls, couch, floor and counter one night. But sometimes, sometimes I just have to pat myself on the back for creating a dessert so addictively delicious, which such...limited resources. So seriously, these peach hand pies were incredible, as is the fact that I managed to whip them up in my current kitchen.

Thursday, July 21, 2011
Peach Strawberry Pie and Missing Things
Forgive me for I have sinned. It has been 10 days since I last baked. Outside of school, that is. But moving halfway around the world, starting school and a job and everything else that comes along with that is a touch time consuming. Luckily I made bread this week in class, which was great! I'm adjusting well, but often tiny little things that I never expected missing pop up. But more on that later, because lucky for you I still have pre-move baked goods to share, like peach-strawberry pie! Yes, you heard right.


Wednesday, July 6, 2011
Cherry Blueberry Pie
I love pie. And it's not just that I love eating pie - which I do. I love making pie. I love crafting pie, baking pie, smelling pie and presenting pie to people who ooh and aah over the golden brown crust, the bubbly filling and the perfect lattice. It's true. I'm in it for the glory.


Monday, March 14, 2011
Dutch Apple Pie - Happy Pi(e) Day!
Happy Pi(e) Day! I have so many more things to share with you in the coming weeks, but I had to offer you a delicious pie recipe for this holiday. For those of you who aren't math geeks or pie enthusiasts, today, March 14, is celebrated as Pie Day because the mathematical approximation of the digit π. And why would you want to celebrate Pi without Pie?


Wednesday, November 24, 2010
Pies, Pies, Pies
If you're a last minute-baker like me and you're still looking for dessert inspiration for your Thanksgiving feast - look no further! Here are some tried-and-tested pies, tarts (and one shortbread) that will be happily welcomed to any holiday table. P.S. If you're looking for new reasons to make fun of me, click here.
 1. Apple Pie
This is the classic, and this recipe will wow just about everyone. Use pie dough scraps to make decorative cutouts if you're feeling crafty.
 2. Quadruple Berry Pie
This juicy dessert is more of a summer staple - but if you use a frozen berry mix - defrosted and patted very dry, it will be a welcome surprise after dinner.

3. Pumpkin Cheesecakes
Ok, not a pie, but still a perfect addition to the banquet - pumpkin and cheesecake are a great combination.
 4. Pear-Filled Shortbread
Also not a pie, but a seriously, sweet, seriously delicious, unique dessert.

5. Snickerdoodle Pie
This is a slightly off-the-beaten-track pie, but delicious nonetheless - and really amazing when served warm.
 6. Mini Apple Pies
My last pie suggestion is the ultimate in last-minute desserts - and the quickest option here. Storebought crusts (and even store bought pie filling - I won't tell) make these a snap to whip up.
Have a great weekend!
This is the classic, and this recipe will wow just about everyone. Use pie dough scraps to make decorative cutouts if you're feeling crafty.
This juicy dessert is more of a summer staple - but if you use a frozen berry mix - defrosted and patted very dry, it will be a welcome surprise after dinner.
3. Pumpkin Cheesecakes
Ok, not a pie, but still a perfect addition to the banquet - pumpkin and cheesecake are a great combination.
Also not a pie, but a seriously, sweet, seriously delicious, unique dessert.
5. Snickerdoodle Pie
This is a slightly off-the-beaten-track pie, but delicious nonetheless - and really amazing when served warm.

My last pie suggestion is the ultimate in last-minute desserts - and the quickest option here. Storebought crusts (and even store bought pie filling - I won't tell) make these a snap to whip up.
Have a great weekend!
Monday, September 20, 2010
Quadruple Berry Pie
Quick! Make this now! Before berries disappear from the shelves, the weather turns cool, everybody starts wearing boots and you have to work out how to use your iphone/blackberry wearing gloves. Now that you've been sufficiently warned...you might have seen some triple berry pies out there. But triple is nothing to me. I see your triple berry pie, and I raise you one quadruple berry pie. Strawberries, raspberries, blackberries and blueberries.

Monday, August 23, 2010
Nectarine Raspberry Pie
I am really going to miss pies. The flaky crust, the glistening lattice, the sweet, juicy filling that ends up all over the plate. And this pie? I already miss this pie.


Wednesday, August 18, 2010
Hello Apple Pie
Holy apple pie Batman! Did you know that there was no (successful) recipe for apple pie on this humble blog? Well, I am here to fix that. Also to give you pie. Which is fixing that. Sometimes I think I could be stranded on a desert island and entertain myself purely through the strange wanderings of my mind. Although I'd rather be on a dessert island.

Thursday, August 5, 2010
Pear Filled Shortbread
Back to summer fruits! And when you work with the best, freshest and ripest ingredients, you don't want much to camouflage that. This simple shortbread crust is perfect for the sweet succulence of summer pears.


Wednesday, July 21, 2010
Peach Pie
It's summer time and the weather is fine. Which means the fruit is beyond fine, and nothing showcases fruit better than a fabulous pie. With a lattice top no less. And you can do it too!


Tuesday, April 13, 2010
The Most Extraordinary French Lemon Cream Tart
I never seem to have much success when it comes to food and thermometers. Though nothing quite tops the shattering of the glass tip of the candy thermometer while whipping my 7 minute frosting, I still was nervous when I used a (new) thermometer to fry doughnuts, and I watched as the temperature dipped up and down throughout the process, resulting in some doughnuts that were browner than others.
I can also never get the thermometer to stand upright in whatever bowl or pot I am using - it tends to slide around and fall over, resulting in a few choice words occasionally heard in the kitchen. Another problem with the thermometer is that it is often not a one person job. Though I prefer to cook in an empty kitchen, I often find myself yelling for help as I attempt to keep the thermometer up, hold the bowl steady, whisk, read the thermometer and check the consistency of the cream. It's enough to make you break a sweat.
So when I attempted The Most Extraordinary French Lemon Cream Tart (her title) from Dorie Greenspan I was nervous. And with good reason. Ultimately, with major bumps and hurdles, I got an extraordinary tart.
 The recipe is actually quite simple - the tart dough comes together quickly, requires no rolling out, and easily presses into a pan.
 The lemon curd filling - though made of only 5 ingredients - is where the tricky part comes in.
 The instructions (below) state that the mixture must come to 180 degrees F. Additionally, the book wrote, "Getting to temperature can take as long as 10 minutes." Well, after over 15 minutes of whisking and temperature checking and knocking over the thermometer and calling for help and forgetting to whisk and almost knocking over the bowl, while only reaching about 160 F, I gave up. The mixture had thickened considerably and I assumed there was no hope for me to reach 180 F, and instead I crossed my fingers and hoped for the best.
 But this was a dessert I made for my family and then left for the weekend, so I wasn't even around to see if it held up. I left my mother with strict instructions to only reveal to our guests that I had made it if it cut into neat slices. So I arrived home to find the remnants of the tart in the fridge, neat edges all around, and I assumed success.
I assumed wrong. Apparently when eaten Friday night the filling oozed all over the place with every slice, but by Saturday it had set completely - and even turned a darker (somewhat strange - thought not as strange as this picture appears) shade of yellow.
 Either way - messy or neat - it was incredibly delicious - the lemon filling was completely addictive, and I had trouble restraining myself from eating it by the spoonful before it made it into the shell, instead contenting myself with licking the bowl clean.
 Tip of the Day: Don't be afraid to recruit helpers in the kitchen when necessary (nor to kick them out when they prove unhelpful). If you must go at it alone - keep duct tape on hand to hold things in place you cannot!
Recipe: (from Baking: From My Home to Yours by Dorie Greenspan)
Note: this recipe requires hours of refrigeration and freezing time, so plan accordingly.
Filling:
1 cup sugar
zest of 3 lemons
4 eggs
1/2 cup fresh lemon juice (from 4-5 lemons)
2 sticks plus 5 tablespoons butter or margarine, softened
Crust:
1 1/2 cups flour
1/2 cup confectioners/icing sugar
1/4 tsp salt
1 stick plus 1 tbsp (9 tablespoons) frozen butter or margarine
1 egg yolk
Supplies:
heatproof bowl
pot
thermometer
food processor/blender
For the filling:
Mix the sugar and zest together with your fingers until it is moist and grainy.
Add in the eggs and lemon juice and whisk until combined.
Bring a few inches of water to boil in a saucepan and set the bowl containing the mixture on top.
Whisking constantly, cook until the thermometer reads 180 degrees. It should thicken and begin to leave tracks.
As soon as it hits 180 F, remove from heat and strain into the container of the food processor or blender. Let it stand there, stirring occasionally, until it reaches 140 F, about 10 minutes.
Turn the machine on high, and as it works add the softened butter in tablespoons, about 3 or 4 at a time. Continue until all the butter is added, and then continue to blend for another 3 minutes.
Pour the finished cream into a container, cover tightly with plastic wrap (pressed against the surface) and refrigerate at least 4 hours or overnight.
For the crust:
Put the flour, sugar and salt in the bowl of a food processor. Pulse to combine.
Scatter pieces of the frozen butter over the dry ingredients and pulse until the butter is cut in.
Break up the yolk and add it a little at a time, pulsing after each addition.
After it's all in, process in long pulses - 1o seconds at a time, until dough comes together.
Turn out of the bowl and knead any uncombined ingredients - but sparingly.
Press the dough into a oiled 9-inch tart pan. Make sure to press it up the sides of the pan.
Freeze the crust for an hour.
When frozen, tightly press an oiled piece of aluminum foil on top of the tart, and bake at 375 F for 25 minutes.
Remove the foil, and bake for an additional 8 minutes until firm and golden brown.
When crust is completely cooled, and the lemon cream has been refrigerated for at least 4 hours, spoon the filling into the shell and serve.
Wednesday, April 7, 2010
You get an Apple Pie!
Ah, the joys of baking with flour. Well, truth is I'm about to embark on a collection of recipes that I made pre-Passover, pre-tree, pre-stress. Well not really pre-stress. But you get the idea.
I have a handful of desserts that I have yet to share with you, but that's about to change.
Let's get started: everybody gets an apple pie!
Longtime readers may remember that I tried this way back in the dark ages - with canned pie filling and horrible photos. But now I'm at it again - this time with delicious (if I do say so myself) photos and homemade filling. But I start the same way: with store bought mini pie crusts.
 They are so adorable, and really not too expensive (they come in a pack of 6) that I simply can't resist. And why should I? (You can also find mini frozen pie dough crusts in most supermarkets.)
I filled each crust with the pie filling, and topping with a crumb crust. I was a little nervous about the crust before, since I've had some bad experiences with apple pies and crumb crusts before.
 But my fears were unfounded, and they all came out of the oven crispy and delicious looking. I'm getting hungry as I type.
 Well not all of them actually - I ran out of crust for the 12th pie, so I just sprinkled a little brown sugar on top and stuck it in with the rest.
 Since it obviously isn't fit for company, I got to eat it right out of the oven. Too bad.
These pies were to bring to my friend Rachel's apartment for a meal. Which ended up being in the back of the cab during Snowpocalypse 2010. I'm sure everyone appreciated the effort.
Tip of the Day: If you're looking for a really quick dessert that still looks like you put in effort - fill each mini pie crust with sliced strawberries and top with whipped cream.
Recipe:
Mini Apple Pies
12 mini graham cracker crusts (mine are Keebler)
1 egg yolk
3 golden delicious apples, cored and diced
1/2 cup sugar
1 tbsp flour
1/2 tbsp cinnamon
1/4 cup lemon juice
1/4 cup butter, melted
1/2 cup flour
1/4 cup sugar
1/4 cup brown sugar
1 teaspoon cinnamon
Lay the crusts out on a baking sheet. Beat the egg, and brush the crusts with it.
Bake at 375 F for 5 minutes. Remove from the oven and let cool.
Stir together the apples, sugar, flour, cinnamon and lemon juice.
Let sit 20 minutes in the fridge. (Can skip this step)
Divide apples evenly among crusts.
Beat together the butter, flour, sugar, brown sugar and cinnamon, until crumbly.
Add in more flour if needed. Crumble over apples.
Bake at 375 F for 30 to 35 minutes or until golden brown.
I have a handful of desserts that I have yet to share with you, but that's about to change.
Let's get started: everybody gets an apple pie!
Longtime readers may remember that I tried this way back in the dark ages - with canned pie filling and horrible photos. But now I'm at it again - this time with delicious (if I do say so myself) photos and homemade filling. But I start the same way: with store bought mini pie crusts. They are so adorable, and really not too expensive (they come in a pack of 6) that I simply can't resist. And why should I? (You can also find mini frozen pie dough crusts in most supermarkets.)
I filled each crust with the pie filling, and topping with a crumb crust. I was a little nervous about the crust before, since I've had some bad experiences with apple pies and crumb crusts before.
 But my fears were unfounded, and they all came out of the oven crispy and delicious looking. I'm getting hungry as I type.
 Well not all of them actually - I ran out of crust for the 12th pie, so I just sprinkled a little brown sugar on top and stuck it in with the rest.
 Since it obviously isn't fit for company, I got to eat it right out of the oven. Too bad.
These pies were to bring to my friend Rachel's apartment for a meal. Which ended up being in the back of the cab during Snowpocalypse 2010. I'm sure everyone appreciated the effort.
Tip of the Day: If you're looking for a really quick dessert that still looks like you put in effort - fill each mini pie crust with sliced strawberries and top with whipped cream.
Recipe:
Mini Apple Pies
12 mini graham cracker crusts (mine are Keebler)
1 egg yolk
3 golden delicious apples, cored and diced
1/2 cup sugar
1 tbsp flour
1/2 tbsp cinnamon
1/4 cup lemon juice
1/4 cup butter, melted
1/2 cup flour
1/4 cup sugar
1/4 cup brown sugar
1 teaspoon cinnamon
Lay the crusts out on a baking sheet. Beat the egg, and brush the crusts with it.
Bake at 375 F for 5 minutes. Remove from the oven and let cool.
Stir together the apples, sugar, flour, cinnamon and lemon juice.
Let sit 20 minutes in the fridge. (Can skip this step)
Divide apples evenly among crusts.
Beat together the butter, flour, sugar, brown sugar and cinnamon, until crumbly.
Add in more flour if needed. Crumble over apples.
Bake at 375 F for 30 to 35 minutes or until golden brown.
Monday, December 7, 2009
Snickerdoodle Pie
I've made snickerdoodles twice, and I've made snickerdoodle blondies, so why not try out snickerdoodle pie?
This recipe starts by coating the (store-bought!) pie crust with a cinnamon sugar mixture - to mimic the cinnamon sugar coating of a traditional snickerdoodle cookie.
 Then comes the filling, a little bit like a giant sugar cookie...
 And then you pour on the sticky, caramel topping!
 Once it's baked up, it's a golden brown, delicious looking cookie pie. It reminds me a little of my chocolate chip pie - only because it's turned a classic cookie into a pie!
 And like the chocolate chip pie, it's really best served warm. And with a scoop of ice cream. Now I'm hungry.
 Unfortunately despite my best attempts, I couldn't get a slice out without the crust falling off, but somehow my guests seemed not to mind!

Tip of the Day: If you don't have a pastry brush to spread the melted butter on the pie crust, the next best thing is just to use your (clean!) fingers.
Recipe: (from Baking Bites)
1 tsp baking powder
1/4 tsp cream of tartar
1/2 tsp salt
1 egg
1 tsp vanilla
1/2 cup milk
1 1/4 cups flour
 This recipe starts by coating the (store-bought!) pie crust with a cinnamon sugar mixture - to mimic the cinnamon sugar coating of a traditional snickerdoodle cookie.
 Then comes the filling, a little bit like a giant sugar cookie...
 And then you pour on the sticky, caramel topping!
 Once it's baked up, it's a golden brown, delicious looking cookie pie. It reminds me a little of my chocolate chip pie - only because it's turned a classic cookie into a pie!
 And like the chocolate chip pie, it's really best served warm. And with a scoop of ice cream. Now I'm hungry.
 Unfortunately despite my best attempts, I couldn't get a slice out without the crust falling off, but somehow my guests seemed not to mind!
Tip of the Day: If you don't have a pastry brush to spread the melted butter on the pie crust, the next best thing is just to use your (clean!) fingers.
Recipe: (from Baking Bites)
1 9-inch pie crust (if frozen, thawed)
2 tsp butter or margarine, melted
1 tbsp sugar
2 tbsp cinnamon
1/2 cup brown sugar
1/4 cup (1/2 stick) butter or margarine, softened
3 tbsp water
2 tbsp corn syrup
1/4 tsp ground cinnamon
1 tsp vanilla
1/4 cup butter or margarine, softened
1/2 cup sugar
1/4 cup confectioners’ sugar2 tsp butter or margarine, melted
1 tbsp sugar
2 tbsp cinnamon
1/2 cup brown sugar
1/4 cup (1/2 stick) butter or margarine, softened
3 tbsp water
2 tbsp corn syrup
1/4 tsp ground cinnamon
1 tsp vanilla
1/4 cup butter or margarine, softened
1/2 cup sugar
1 tsp baking powder
1/4 tsp cream of tartar
1/2 tsp salt
1 egg
1 tsp vanilla
1/2 cup milk
1 1/4 cups flour
Brush the inside of the pie crust with the melted butter. Combine the sugar and cinnamon and use to cover the entire inside of the crust.
Combine the brown sugar, butter, water, corn syrup and cinnamon, and bring to a boil. Boil for two minutes, then remove from heat and stir in the vanilla.
Cream together the butter, sugar and powdered sugar until light and fluffy. Blend in the baking powder, cream of tartar and salt. Beat in egg and vanilla, followed by the milk. Stir in the flour, mixing until just combined.
Pour the cookie mixture in to the crust, and carefully pour the syrup on top. Place into a 350 F oven and bake for about 45 minutes, until browned.
Cool for at least 30 minutes before serving. Serve warm.
Thursday, November 26, 2009
Mini Pumpkin-Shaped Pumpkin Cheesecakes
It just doesn't get any cuter than this people.
 Individual desserts are pretty adorable to begin with - but when they take the shape of an ingredient? Oy.
I should probably start by explaining why I have a mini pumpkin cheesecake pan. As Alton Brown would say, it isn't quite a kitchen multi-tasker.
 So I didn't purchase this baby, but I did win it on BakingBites.com! That's right, Nicole of BakingBites ran a giveaway for the pan and a copy of her cookbook, and I actually won! And of course I've been trying out things from her cookbook too - posts to come.
Anyway, back to the cheesecake. With the cream cheese and pumpkin and cinnamon and nutmeg....
 Yum.
Yum.
 These have a graham cracker crust, pressed down in to the bottom and baked first, then topped with the filling. It was really pretty simple, the most time is probably spent dividing everything up between the 12.
My friend Tali thought they weren't quite festive enough, so she decided to update it a little.
 And then I made her eat it. To each her own.
 I had no problem eating mine.
Now, obviously I don't expect you all to have your very own pumpkin cheesecake pan. I would say you can make it in a muffin pan, only hesitantly, since it may be difficult to get them out. These have removable bottoms, so you just have to lift them up and take off the plate underneath.
This amount would probably be about right for a 9 inch pie - but you may need more crust.
Recipe:
Crust:
1/2 cup graham cracker crumbs
2 tbsp butter or margarine, melted
2 tbsp sugar
Filling:
12 ounces cream cheese
1/2 cup sugar
2 eggs
1 tsp vanilla
1 cup pumpkin puree
1 tsp cinnamon
1/8 tsp nutmeg
1/4 tsp allspice
Mix together the graham cracker crumbs, butter and sugar. Divide equally among 12 muffin tins - about a heaping teaspoon in each - and press down with your fingers.
Bake on 325 for 8 to 10 minutes. Remove and let cool.
Beat together the cream cheese and sugar. Mix in the eggs one at a time, and add in the vanilla.
Mix in the pumpkin and spices. Stir until completely combined and uniform in color.
Divide equally among the pans.
Bake on 300 (note a temperature change) for 18 to 20 minutes, until set.
Let cool for 30 minutes on wire rack, then place in fridge to cool for 1 1/2 to 2 hours before removing from pan.
 Individual desserts are pretty adorable to begin with - but when they take the shape of an ingredient? Oy.
I should probably start by explaining why I have a mini pumpkin cheesecake pan. As Alton Brown would say, it isn't quite a kitchen multi-tasker.
 So I didn't purchase this baby, but I did win it on BakingBites.com! That's right, Nicole of BakingBites ran a giveaway for the pan and a copy of her cookbook, and I actually won! And of course I've been trying out things from her cookbook too - posts to come.
Anyway, back to the cheesecake. With the cream cheese and pumpkin and cinnamon and nutmeg....
 Yum.
Yum. These have a graham cracker crust, pressed down in to the bottom and baked first, then topped with the filling. It was really pretty simple, the most time is probably spent dividing everything up between the 12.
 My friend Tali thought they weren't quite festive enough, so she decided to update it a little.
 And then I made her eat it. To each her own.
 I had no problem eating mine.
Now, obviously I don't expect you all to have your very own pumpkin cheesecake pan. I would say you can make it in a muffin pan, only hesitantly, since it may be difficult to get them out. These have removable bottoms, so you just have to lift them up and take off the plate underneath.
This amount would probably be about right for a 9 inch pie - but you may need more crust.
Recipe:
Crust:
1/2 cup graham cracker crumbs
2 tbsp butter or margarine, melted
2 tbsp sugar
Filling:
12 ounces cream cheese
1/2 cup sugar
2 eggs
1 tsp vanilla
1 cup pumpkin puree
1 tsp cinnamon
1/8 tsp nutmeg
1/4 tsp allspice
Mix together the graham cracker crumbs, butter and sugar. Divide equally among 12 muffin tins - about a heaping teaspoon in each - and press down with your fingers.
Bake on 325 for 8 to 10 minutes. Remove and let cool.
Beat together the cream cheese and sugar. Mix in the eggs one at a time, and add in the vanilla.
Mix in the pumpkin and spices. Stir until completely combined and uniform in color.
Divide equally among the pans.
Bake on 300 (note a temperature change) for 18 to 20 minutes, until set.
Let cool for 30 minutes on wire rack, then place in fridge to cool for 1 1/2 to 2 hours before removing from pan.
Wednesday, October 28, 2009
The Lost Desserts
Sometimes I made a dessert, and it's delicious, and it's pretty and it all get's eaten (very rarely does this not happen), but I don't run to blog about it. Instead, the pictures sit on my hard drive, the recipe wanders around in my browser history, and I never quite get the push to share them with you.
So recently while I was going through my picture files, thinking about what to share next, I figured it was time for a little fall cleaning. Now keep in mind, these weren't bad. The complete disasters in my life I run to share with you. These were good. Just not too exciting.
First up: Apple Pie Bars.
 I made these in July. I know, July! Remember that? Weird.
 Anyway, these were a variation on these Strawberry Pie Bars. Because I'm lazy and all-around uninterested in hard work, I used a can of apple pie filling for the center. Don't knock it.
 They were tasty. After about 36 hours, they started to get a little soggy, when the apple pie filling seeped in the crust and filling. They were still tasty, but they kind of needed a fork to eat, instead of just hands.
Next up: Chocolate Chocolate Chip Muffins.

I made these on September 4th. Ah the good old days. It was the weekend before I started school, and I had no idea what the year would bring.


I honestly can't even remember what these muffins were like. They probably weren't bad. They probably weren't amazing either, or I doubt I would have forgotten them. I'm pretty sure those are my teeth marks, so I definitely ate one.
And finally: World Peace Cookies.

Ok, here's the thing. They were delicious. Really. But they weren't all that appetizing looking, and not one person at the meal I brought them to ate one, and the pictures I attempted to take just never turned out right.


Tip of the Day: Oh, where to start. Practice makes perfect?
Recipes:
Apple Pie Bars: (adapted from the Field Guide to Cookies)
Crust:
6 tbsps butter, softened
3/4 cup light brown sugar
1 egg
2 cups flour
1 tsp baking powder
1/2 tsp salt
Filling: 1 can apple pie filling, diced.
Streusel:
1/2 cup sugar
2/3 cup plus 2 tbsp flour
1/8 tsp salt
6 tbsps cold butter
Crust: cream butter and sugar together until well mixed. Add egg and mix to combine.
Gradually mix in flour, baking powder and salt.
Press into the bottom of a greased 9x13" pan, and 1/4 inch up the side.
Spread the filling evenly over the crust, stopping 1/2 inch from the edge.
Streusel: Combine sugar, flour and salt in a bowl. Cut in the butter until mix is crumbly.
Sprinkle evenly over the filling.
Bake at 350F for 35 minutes until golden brown.
Chocolate Chocolate Chip Muffins: (via Wikibooks)
1 3/4 cup flour
1 cup chocolate chips
3/4 cup sugar
1/3 cup cocoa
1 tbsp baking powder
1/2 tsp salt
1 egg
1 cup milk
1/3 cup oil
1 tsp vanilla
Stir together the flour, chocolate chips, sugar, cocoa, baking powder and salt.
Make a well in the center, and pour in the egg, milk, oil and vanilla.
Stir until all ingredients are moistened.
Fill 12 greased or paper-lined muffin cups 3/4 full.
Bake at 400F for 20 minutes.
World Peace Cookies (Dorie Greenspan)
11 tbsps (1 stick plus 3 tablespoons) butter or margarine, softened
2/3 cup packed light brown sugar
1/4 cup sugar
1/2 tsp fine sea salt
1 tsp vanilla
1 1/4 cups flour
1/3 cup unsweetened cocoa powder
1/2 tsp baking soda
5 ounces bittersweet chocolate, finely chopped, or a generous 3/4 cup mini chocolate chips
Beat the butter on high until light and fluffy.
Add in the sugars, salt and vanilla and beat until mixed.
Pour in the flour, cocoa and baking soda. Cover the mixer with a damp towel and pulse for a few seconds at a time until integrated.
Continue to mix until flour is fully mixed in. The dough will be crumbly and you'll worry these cookies will never come together. Mix in the chocolate bits.
Turn the dough out on to a surface and divide in two. Form two logs of approximately 1.5 inches in diameter. Yes, I used a ruler. No, you don't have to.
Place in fridge (I used the freezer because these were hard to slice) for a couple hours.
Slice in to 1/2 inch rounds, and place on a parchment paper lined baking sheet.
Bake on 325 F for 13 minutes. Cool on baking sheet.
Subscribe to:
Posts (Atom)