

Showing posts with label cupcakes. Show all posts
Showing posts with label cupcakes. Show all posts
Thursday, September 13, 2012
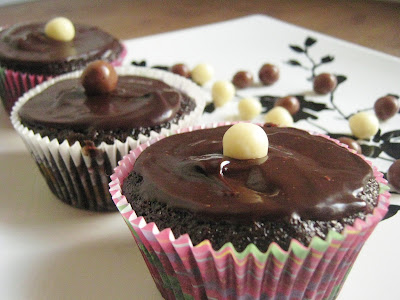
Vegan Chocolate Chocolate Cupcakes
I'm not a vegan. Not even close. But I do run out of eggs sometimes, and I do like to stretch my baking horizons. These vegan chocolate cupcakes are easy and delicious - you won't miss eggs or milk - or even butter - at all!


Tuesday, February 14, 2012
Iced Chocolate Chip Oatmeal Cupcakes
After six months of pastry school, working with pulled sugar, wedding cakes, entremet, laminated doughs and the like, it is nice to go back to simple. And while these iced chocolate chip oatmeal cupcakes are simple, they're sweet, moist and packed with flavor.

Monday, June 20, 2011
Carrot Ginger Cupcakes with Cinnamon Cream Cheese Frosting
While I'm not sure I'm quite sold on the cupcake 'craze' right now (I'm much happier knowing pie is the next big thing) I can appreciate the many conveniences of mini cakes. Firstly, the higher frosting to cake ratio. No-brainer. Second, the portability. Third, the ability to eat 3 of them and pretend it is still a snack.


Wednesday, January 26, 2011
Coconut Grapefruit Cupcakes
Winter can be a dead time for fruit desserts. No juicy pies or sweet cobblers. And while I've been getting pie with pears and apples and even cranberries, sometimes you just crave something lighter, and sweeter and more delicate. Which is why the second I saw this recipe for Coconut Grapefruit Cupcakes, I knew I would be making it soon, despite the remarks from friends and family..."coconut what?"


Thursday, December 16, 2010
Pumpkin Cupcakes with Cinnamon Cream Cheese Frosting
After I cracked open, disemboweled, cooked and pureed my 5-pound pumpkin, I made pumpkin muffins, pumpkin soup...and still had pumpkin puree to go. So I searched high and low, for the perfect recipe to highlight the remainder of my fresh pumpkin puree. And I found it, in these pumpkin cupcakes with cinnamon cream cheese frosting.


Monday, November 29, 2010
Monogrammed Cupcakes
Oh where to start? How about with this: My friend Leora is engaged! And she had a party. And I baked. Of course. Cupcakes! With their initials on them! I cannot speak in full sentences! I don't know why.


Tuesday, September 28, 2010
Red Velvet Cupcakes with Cream Cheese Frosting
I know I'm well behind the red velvet craze, but I never quite saw the appeal. From what I understood, red velvet cake is a chocolate flavored cake that is colored red. (Yes, yes, I know that original red velvet cakes needed no food coloring.) But, since I'm a generally curious person, especially when it comes to things like cupcakes, I thought I would give them a shot.


Monday, July 12, 2010
Party All The Time
Ah here I am, back in control, just the way it should be. After temporarily (and partially) seceding the controls last week, I've once again regained power. On to the food!
Today I'm going to tell you about a party I held a couple weeks ago in my backyard. You see, after oh so many celebrations, Shaya and Racheli got married. And, in Jewish tradition, the partying continues every night for a week after the wedding.
Welcome to the barbecue.
 We went with the standards - hot dogs, hamburgers, chicken; rice, potato salad, and a host of other salads - and lest you think I tackled this all by my lonesome, I had plenty of help.
But, back to what you're really here for - dessert. The requisite watermelon, of course, plus other fruit, pink-tinted rice krispie treats and mini peach cobblers provided by someone else, plus I made my classic chocolate chip cookies (though with some minor, but still edible screw-ups).
PLUS - Mini-sprinkle cupcakes:
After waxing-poetic about my new mini muffin pan that I reappropriated for tartlets, I finally put it to use for adorable tiny cupcakes.
 I'm sure they make mini cupcake liners, but I didn't have any, and I wasn't too worried about sticking, and I thought no liners would make them easier to eat, and I was always told to never write a run on sentence. Ha, good thing school is over for me.
 I certainly have more things in store for that pan - especially after my mother, who apparently reads this thing, bought me my very own tart shaper! Speaking of, she was also the guest photographer at this event, as I ran around worrying about things. Teamwork!
Anyway, up next on the menu: individual chocolate mousse cups.
 To be honest I'm not really the biggest fan of chocolate mousse - but I thought it would be cute, easy and popular. And it was. The recipe is, in the words of my least-favorite Food Network personality, "super simple" with two ingredients. Then I just divided it into little cups, and topped with whipped cream right before serving.
 Tada!
Tada!
Tip of the Day: Chocolate mousse is indeed easy, but there are a few tips that are crucial to it's success. One is the tempering of the yolks - if you add all the melted chocolate at once you run the risk of "cooking" the yolks - and have scrambled egg mousse. Adding a bit at first brings their temperature up before mixing in the rest. Another crucial point is the folding of the egg whites as supposed to mixing - use a spatula to cut and lift the mixture, folding it over itself over again until combined - but we careful not to stir it, you'll deflate the lightness of the whipped egg whites.
Recipes:
Mini cupcakes:
1/2 cup (1 stick) butter or margarine, softened
1 cups sugar
1 tsp vanilla
2 eggs
1 cup buttermilk
2 cups plus 1 tbsp flour
1 tsp baking powder
3/4 tsp baking soda
1/2 tsp salt
Beat together the butter and sugar until light and fluffy.
Add in the eggs and vanilla, beating until well mixed.
Mix in the buttermilk, then gradually stir in the flour, baking powder, baking soda and salt.
Divide among greased cupcake pans (I got about 24 mini ones and an extra 4 normal sized ones), and bake on 350 F for 12 to 15 minutes, or until tests clean. Baking time may vary so you have to keep an eye on the mini ones because they can go from just right to overdone quickly. Might be best to set for 10 minutes then start checking.
Top with frosting and sprinkles.
Chocolate Mousse:
8 eggs
10 ounces semi-sweet chocolate
Separate all the eggs into yolks and whites.
Melt the chocolate in a double boiler or microwave.
Place the egg yolks in the bottom of a large bowl. Add a small amount of chocolate to the yolks, stirring to combine. Pour in the rest of the chocolate and mix well, until completely combined.
Set aside.
Beat the egg whites on high until they form stiff peaks. Dollop a couple heaping tablespoons of the egg whites into the chocolate mixture and stir to combine.
Then, using a plastic spatula, fold in about a third of the egg whites at a time, being careful not to stir or deflate the whites. It helps to use a glass bowl so you can see if you've missed any parts that needs combining.
Pour into either a bowl or individual cups and cover, then refrigerate until set.
Note: This recipe can be scaled up and down as you would like. I generally average about 1 1/4 ounces of chocolate for 1 egg - but you don't have to be that exact. Follow all the instructions the same!
Today I'm going to tell you about a party I held a couple weeks ago in my backyard. You see, after oh so many celebrations, Shaya and Racheli got married. And, in Jewish tradition, the partying continues every night for a week after the wedding.
Welcome to the barbecue.
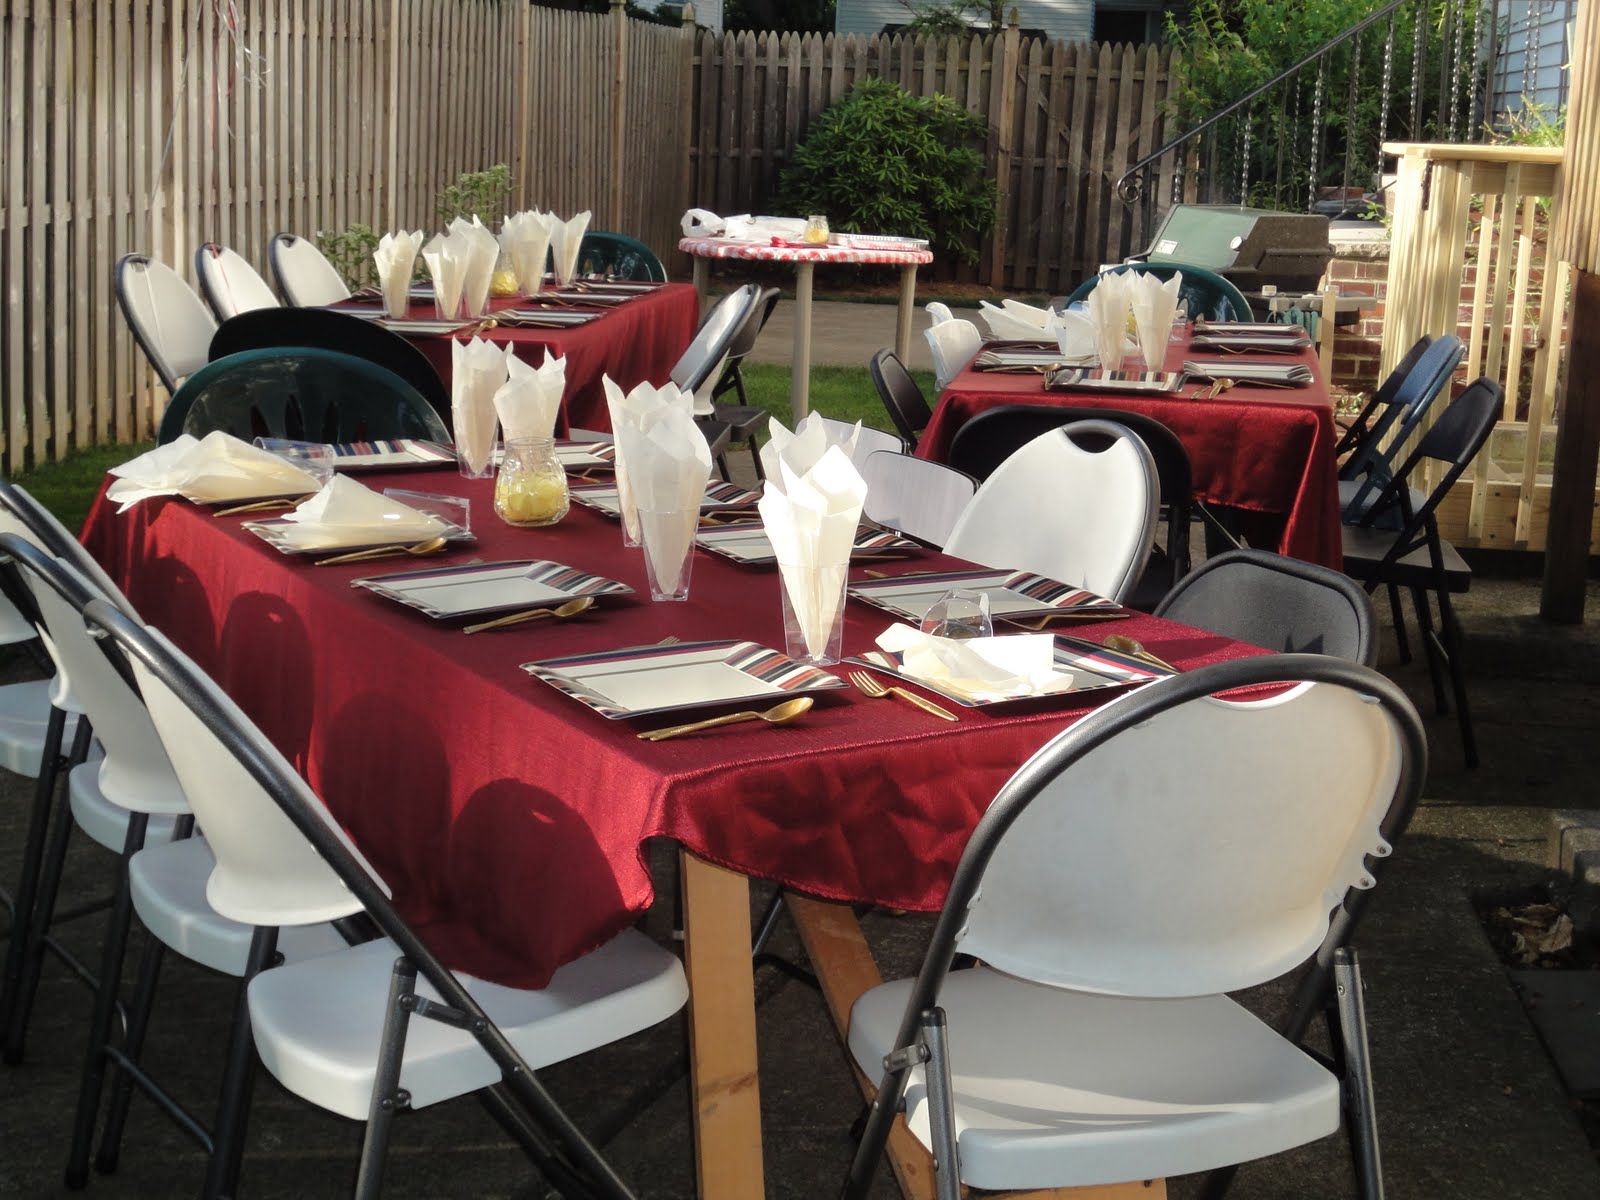 We went with the standards - hot dogs, hamburgers, chicken; rice, potato salad, and a host of other salads - and lest you think I tackled this all by my lonesome, I had plenty of help.
But, back to what you're really here for - dessert. The requisite watermelon, of course, plus other fruit, pink-tinted rice krispie treats and mini peach cobblers provided by someone else, plus I made my classic chocolate chip cookies (though with some minor, but still edible screw-ups).
PLUS - Mini-sprinkle cupcakes:
After waxing-poetic about my new mini muffin pan that I reappropriated for tartlets, I finally put it to use for adorable tiny cupcakes.
 I'm sure they make mini cupcake liners, but I didn't have any, and I wasn't too worried about sticking, and I thought no liners would make them easier to eat, and I was always told to never write a run on sentence. Ha, good thing school is over for me.
 I certainly have more things in store for that pan - especially after my mother, who apparently reads this thing, bought me my very own tart shaper! Speaking of, she was also the guest photographer at this event, as I ran around worrying about things. Teamwork!
Anyway, up next on the menu: individual chocolate mousse cups.
 To be honest I'm not really the biggest fan of chocolate mousse - but I thought it would be cute, easy and popular. And it was. The recipe is, in the words of my least-favorite Food Network personality, "super simple" with two ingredients. Then I just divided it into little cups, and topped with whipped cream right before serving.
 Tada!
Tada!Tip of the Day: Chocolate mousse is indeed easy, but there are a few tips that are crucial to it's success. One is the tempering of the yolks - if you add all the melted chocolate at once you run the risk of "cooking" the yolks - and have scrambled egg mousse. Adding a bit at first brings their temperature up before mixing in the rest. Another crucial point is the folding of the egg whites as supposed to mixing - use a spatula to cut and lift the mixture, folding it over itself over again until combined - but we careful not to stir it, you'll deflate the lightness of the whipped egg whites.
Recipes:
Mini cupcakes:
1/2 cup (1 stick) butter or margarine, softened
1 cups sugar
1 tsp vanilla
2 eggs
1 cup buttermilk
2 cups plus 1 tbsp flour
1 tsp baking powder
3/4 tsp baking soda
1/2 tsp salt
Beat together the butter and sugar until light and fluffy.
Add in the eggs and vanilla, beating until well mixed.
Mix in the buttermilk, then gradually stir in the flour, baking powder, baking soda and salt.
Divide among greased cupcake pans (I got about 24 mini ones and an extra 4 normal sized ones), and bake on 350 F for 12 to 15 minutes, or until tests clean. Baking time may vary so you have to keep an eye on the mini ones because they can go from just right to overdone quickly. Might be best to set for 10 minutes then start checking.
Top with frosting and sprinkles.
Chocolate Mousse:
8 eggs
10 ounces semi-sweet chocolate
Separate all the eggs into yolks and whites.
Melt the chocolate in a double boiler or microwave.
Place the egg yolks in the bottom of a large bowl. Add a small amount of chocolate to the yolks, stirring to combine. Pour in the rest of the chocolate and mix well, until completely combined.
Set aside.
Beat the egg whites on high until they form stiff peaks. Dollop a couple heaping tablespoons of the egg whites into the chocolate mixture and stir to combine.
Then, using a plastic spatula, fold in about a third of the egg whites at a time, being careful not to stir or deflate the whites. It helps to use a glass bowl so you can see if you've missed any parts that needs combining.
Pour into either a bowl or individual cups and cover, then refrigerate until set.
Note: This recipe can be scaled up and down as you would like. I generally average about 1 1/4 ounces of chocolate for 1 egg - but you don't have to be that exact. Follow all the instructions the same!
Thursday, July 8, 2010
Guest Post! - Sort of Petit Fours
Well, as promised, you won't be hearing from me today, instead my friend Sarah will provide Baking and Mistaking with its very first guest post! I'd introduce her, but she does a pretty good job of that herself. I'll try to keep quiet, but there is a chance I may have some things to say. Especially since Sarah and I had a twenty minute argument about this very dessert. Anyway, that's enough from me for now....


Hello online world and loyal BaM readers! My name is Sarah. Maybe you know me from the cow cake, or maybe the airplane cake, or maybe even the cupcake cones? I’ve also been mentioned in various other posts and helped boost Amy’s baking ego with my failure in hamantaschen making (although I was definitely better than Laura). I also gave Amy her apron, with the help of my mother (OK, my mom did all the work. I just picked out the fabrics). I pride myself on being Amy’s most mentioned friend on her blog, the fact that I have eaten the majority of things featured here, and the fact that I have commented on many a blog post. Am I lame? Definitely. But that is why Amy and I are such good friends. That and our sarcasm.
(Sarah! I have textual proof of the time you complained to me that you feel like you never get to eat anything on here. Let the record be clear. Carry on...)
Anyway, I am here today with a guest post! This is a first for BaM! Amy has bugged me in the past to do this, and she never thought I would! She first asked me to do it when I made ebelskivers, but that was last summer, so it’s about time I prove her wrong.

I just moved into a new apartment and it is wonderful, mainly because I have a freezer, countertops, and an oven, none of which were in my previous apartment. So this means I have been dying to bake! And to help, for my birthday/graduation, I got a beautiful KitchenAid mixer in pistachio!
(In fact you also have a kitchen now, since I don't think the previous arrangement of sink, mini fridge and microwave really qualifies as one.)

And thus I began a mission to bake. What was first on my list? My all-time favorite, lemon petit fours! The recipe is from the back of a pan my brother and I got my mother years ago from Williams-Sonoma. (Something along the lines of this.) Now, I wasn’t about to go out and spend the money on that pan so I improvised and got a mini mini muffin pan from Kmart, so you can pretty much use any small pan.
(And here the argument begins (actually continues). Sarah! These are not petit fours! Petit fours are square! These are mini cupcakes. Very cute mini cupcakes. And no, I don't care what Williams-Sonoma says. But sorry for hijacking your guest post.)
I didn’t take any pictures along the way because I wasn’t anticipating a guest post, but the recipe is super easy!

Happy Amy? I wrote a guest post.
Tip of the Day: Never piss off a friend who bakes. You will suffer.
I have no idea what you mean....
Recipe:
Batter
1 1/3 cups flour
¾ tsp baking powder
¼ tsp salt
1/2 cup (1 stick) butter or margarine
¾ cup sugar
2 eggs
1 ½ tsps lemon juice
1 ½ tsps vanilla
1/3 cup milk
Glaze
4 cups confectioners’ sugar, sifted
2 egg whites
¼ cup milk
2 tbsps lemon juice
a few drops of yellow food coloring
Beat butter well. Add sugar and beat until light and fluffy.
Add eggs, vanilla, and lemon juice.
Alternate between adding milk and flour/baking powder/salt.
Pour batter into well greased pan. Bake 350 degrees for 10 minutes or so. (Universal baking tip from my mother: Always underbake! You can always bake something more, but once it is overdone, there is nothing you can do. Always bake less than what a recipe says to allow for differences in ovens and then bake for 1 to 3 minutes more at a time.)
While they are baking, make the glaze, mixing all the ingredients together .
Once the cakes have finished baking let them cool. To help this process and to stop the baking, take the cakes out of the pan and let them rest on a cooling rack with a baking pan underneath. Once they are fully cooled, you can dip them in the glaze, which will drip, hence the cookie sheet underneath. Let the glaze sit and do a second round of dipping. Voilà!
Wednesday, May 26, 2010
Cupcake Cookies
And the celebration continues. When Racheli had her bridal shower last week, the occasion, obviously, called for something adorable and delicious.


 Next week I am on a (obviously well-deserved) vacation - but hopefully, through the magic of blogger, I'll share a couple things with you while I'm away.
If you're lucky, I'll show you what else I brought to the shower!

The cupcake cookie cutters (and ice cream cone ones) were a gift from my mom over a year ago. But I'd never really had the occasion to use them, until now.

I used my standard sugar cookie recipe, which has yet to fail me - although I did end up adding a considerable amount of flour to make it workable, so I may be changing the recipe. I worked with three colors of royal icing - pink, blue and pale green. Unfortunately the pictures aren't great, since - as usual - I work in the middle of the night.

I also somehow managed to burn a few of them, which reinvigorated the both loved and dreaded "reject pile," known for causing depression and snacking.
I experimented with the decoration used for the sprinkles on the cupcakes - a variety of sprinkles and candies. The mini m&ms were the most delicious, but didn't look as nice as some of the others. I applied each one individually, just after the icing. I did forget a couple times and to do it and then had to either leave them off, or glue them on with a little more icing.

All in all, they came out really cute, and were definitely less time consuming than writing on cookies. Success!
 Next week I am on a (obviously well-deserved) vacation - but hopefully, through the magic of blogger, I'll share a couple things with you while I'm away.
If you're lucky, I'll show you what else I brought to the shower!
Tip of the Day: Though plastic spatulas are great for many things, you really need a sturdy metal spatula for cookies - both transferring them from your workspace to the cookie sheet, and then removing them after baking. Try this one for a start.
Recipe:
Cookies:
3/4 cup (1 1/2 sticks) butter or margarine, softened
1 cup plus 2 tbsps sugar
1 egg
3/4 tsp vanilla
2 1/2 cups flour
1/3 tsp baking powder
1/3 tsp salt
Beat together butter and sugar until light and creamy.
Beat in eggs and vanilla.
Gradually mix in flour, baking powder and salt.
Shape dough into 2 balls and wrap in wax paper and refrigerate overnight (or freeze for a couple hours).
Lightly flour your counter or surface, and roll out dough 1/4 of an inch thick.
Cut out as many shapes as possible with a cookie cutter.
Transfer shapes to ungreased cookie sheet.
Reserve the trimmings for rerolling.
Reroll the dough and the remaining dough as many times as necessary.
Bake the cookies on an ungreased cookie sheet for 10 to 13 minutes at 350F, without letting them get brown.
Transfer to wire racks to cool.
Royal Icing:
3 egg whites
3 teaspoons lemon juice
4 1/2 cups confectioner's sugar, sifted
Beat the egg whites and lemon juice together.
Gradually add in the sifted sugar on low speed until smooth.
Stir in food coloring until you acquire the desired shade.
Use immediately or cover and refrigerate or it will begin to harden.
Recipe:
Cookies:
3/4 cup (1 1/2 sticks) butter or margarine, softened
1 cup plus 2 tbsps sugar
1 egg
3/4 tsp vanilla
2 1/2 cups flour
1/3 tsp baking powder
1/3 tsp salt
Beat together butter and sugar until light and creamy.
Beat in eggs and vanilla.
Gradually mix in flour, baking powder and salt.
Shape dough into 2 balls and wrap in wax paper and refrigerate overnight (or freeze for a couple hours).
Lightly flour your counter or surface, and roll out dough 1/4 of an inch thick.
Cut out as many shapes as possible with a cookie cutter.
Transfer shapes to ungreased cookie sheet.
Reserve the trimmings for rerolling.
Reroll the dough and the remaining dough as many times as necessary.
Bake the cookies on an ungreased cookie sheet for 10 to 13 minutes at 350F, without letting them get brown.
Transfer to wire racks to cool.
Royal Icing:
3 egg whites
3 teaspoons lemon juice
4 1/2 cups confectioner's sugar, sifted
Beat the egg whites and lemon juice together.
Gradually add in the sifted sugar on low speed until smooth.
Stir in food coloring until you acquire the desired shade.
Use immediately or cover and refrigerate or it will begin to harden.
Wednesday, March 3, 2010
Hot Molten Chocolate Cakes
Molten chocolate cakes - those with a warm, runny, chocolatey center, have always been the quintessential restaurant dessert. It arrives at the table perfectly formed, piping hot, with a scoop of just-beginning-to-melt vanilla ice cream and a drizzle of chocolate sauce. I can recreate that in my kitchen, right? Well surprisingly, I just about can.
 I'd always assumed there was some difficult trick to making these - multiple batters, filling, flipping, hiding, running around in a circle three times - but it turns out there isn't. Here's the secret. They're just underbaked in the center.
If you cook these to just the right time, the outside will have baked into a soft chocolate cake, while the middles remain a glossy, chocolatey sauce, that oozes out when you dig in with a spoon. Though this recipe should make 12, I somehow managed to just squeak out 13 of them. Which is perfect, because I was having 12 people for lunch, but I definitely needed to taste test this.
 I reheated these the next day, and they turned out better than I thought. I left them in the pan, and reheated them for a few minutes. However I should have waited a little bit after pulled them out before getting them out of the pan, to help them stay intact. Still, I didn't hear any complaints. Or see any uncleaned plates.
Tip of the Day: You could use just about any chocolate in these. Some people will want to spend the dough and get the super fancy chocolate, which will make super fancy cakes. I'm happy to melt some Trader Joes chocolate chips and have delicious cakes. You could probably try these with milk chocolate too - let me know if you do!
Recipe: (from Martha Stewart)
1 stick (1/2 cup) butter or margarine, softened
2/3 cup sugar
6 eggs
2/3 cup flour
1/2 tsp salt
16 ounces bittersweet chocolate, melted (I used semi-sweet)
Spray or butter a 12-cup muffin pan, then sprinkle with sugar, set aside.
Beat the butter and sugar together until light and fluffy.
Add in eggs, one at a time, until well combined.
Mix in the flour and salt until just combined.
Beat in the melted chocolate until just combined.
Divided between the 12 cups, bake at 400 F for 12 to 14 minutes.
When you pull them out, the outsides should be cooked and pulling away from the sides, and the insides should be shiny and slightly jiggly.
If serving immediately, let stand for 10 minutes before removing from pan and serving.
 I'd always assumed there was some difficult trick to making these - multiple batters, filling, flipping, hiding, running around in a circle three times - but it turns out there isn't. Here's the secret. They're just underbaked in the center.
If you cook these to just the right time, the outside will have baked into a soft chocolate cake, while the middles remain a glossy, chocolatey sauce, that oozes out when you dig in with a spoon.
 Though this recipe should make 12, I somehow managed to just squeak out 13 of them. Which is perfect, because I was having 12 people for lunch, but I definitely needed to taste test this.
  I reheated these the next day, and they turned out better than I thought. I left them in the pan, and reheated them for a few minutes. However I should have waited a little bit after pulled them out before getting them out of the pan, to help them stay intact. Still, I didn't hear any complaints. Or see any uncleaned plates.
Tip of the Day: You could use just about any chocolate in these. Some people will want to spend the dough and get the super fancy chocolate, which will make super fancy cakes. I'm happy to melt some Trader Joes chocolate chips and have delicious cakes. You could probably try these with milk chocolate too - let me know if you do!
Recipe: (from Martha Stewart)
1 stick (1/2 cup) butter or margarine, softened
2/3 cup sugar
6 eggs
2/3 cup flour
1/2 tsp salt
16 ounces bittersweet chocolate, melted (I used semi-sweet)
Spray or butter a 12-cup muffin pan, then sprinkle with sugar, set aside.
Beat the butter and sugar together until light and fluffy.
Add in eggs, one at a time, until well combined.
Mix in the flour and salt until just combined.
Beat in the melted chocolate until just combined.
Divided between the 12 cups, bake at 400 F for 12 to 14 minutes.
When you pull them out, the outsides should be cooked and pulling away from the sides, and the insides should be shiny and slightly jiggly.
If serving immediately, let stand for 10 minutes before removing from pan and serving.
Wednesday, February 10, 2010
Snowcrastination
As I sit here on what is officially Wednesday but still feels like Tuesday, I feel the pangs of guilt for neglecting you dear reader(s). Posts this past month have been sporadic, infrequent, and it is downright rude. I could make excuses - work, school, endless hours of watching American Idol, but the truth is I'm just Lazy. With a capital L. Somehow I always get in the kitchen, but I don't always get online. And now I'm sitting here, hoping against hope, for a snow day. Which, in this stage of my life, means a day in which I decide that snow prevents me from leaving the house. It could happen.
One thing that drags me in to the kitchen every time is an Occasion. With a capital O. (Sensing a trend?) I love to bake for something. I'd love to bake for the greater good of humanity, but it's more likely a birthday, an engagement, a dinner party or any Jewish holiday.
On Sunday, my friend Rachel (who along with her mother Debby are most valuable readers) celebrated her birthday, which also fell on Superbowl Sunday. Now, while I don't really know much about football except that it rarely involves feet, I never refuse a chance to cook. So, along with delicious mushroom barley soup (which I tweeted about) I made these festive birthday cupcakes! Of course since my failures at writing on baked goods are well documented, I attempted two letters and gave up, letting Sarah finish the task. Meanwhile, poor Alana sat directly in front of the cupcake tray, staring and them until Rachel showed up to claim her treat. Let's just say, I came close to wishing her a Happy B-da. But she held off, and was rewarded. At the end of the night, I was left with HE.
 Meanwhile, poor Esti had her birthday back in JANUARY and has yet to see her delicious cake posted here. Next "snow day," my dear.
Word of the Day:
One thing that drags me in to the kitchen every time is an Occasion. With a capital O. (Sensing a trend?) I love to bake for something. I'd love to bake for the greater good of humanity, but it's more likely a birthday, an engagement, a dinner party or any Jewish holiday.
On Sunday, my friend Rachel (who along with her mother Debby are most valuable readers) celebrated her birthday, which also fell on Superbowl Sunday. Now, while I don't really know much about football except that it rarely involves feet, I never refuse a chance to cook. So, along with delicious mushroom barley soup (which I tweeted about) I made these festive birthday cupcakes!
 Of course since my failures at writing on baked goods are well documented, I attempted two letters and gave up, letting Sarah finish the task. Meanwhile, poor Alana sat directly in front of the cupcake tray, staring and them until Rachel showed up to claim her treat. Let's just say, I came close to wishing her a Happy B-da. But she held off, and was rewarded. At the end of the night, I was left with HE.
 Meanwhile, poor Esti had her birthday back in JANUARY and has yet to see her delicious cake posted here. Next "snow day," my dear.
Word of the Day:
- Snowcrastination: accomplishing nothing under the assumption that tomorrow will be a snow day and you won't have to leave the house.
Wednesday, December 16, 2009
Baked Jelly Doughnut Muffins
While I'm all for having a deep-fried jelly doughnut every night of Chanukah (unfortunately I missed Sunday and today), I understand that it's probably not the healthiest option.
Instead, I present you with baked doughnut muffins! Of course, you may think without the deep frying, these lose their significance for Chanukah, but there is oil in the batter - and Chanukah is about oil, not frying!
 Now, I'm not going to pretend that if you close your eyes, that this tastes like a jelly doughnut, but they are sweet, delicious, and slightly healthier. My jelly sank a little, probably because I didn't have quite enough flour in the batter. Measuring isn't my strong point. Eating is.
 Whatever resemblance these do have to doughnuts, comes from the quick bath they take in granulated sugar while still warm. I gave them about a minute after I pulled them out of the oven to cool down, but they're still pretty hot when you do it, so you'll need strong fingers.
 If you're not a jelly fan (which I am, and obviously used raspberry), you could always leave that out.
  Tip of the Day: After 24 hours, the sugar coating on this begins to crust a little, so you'd better eat them all up quickly!
Recipe:
3/4 cup sugar
1 egg
1 1/2 cups flour
2 tsp baking power
1/4 tsp salt
1/4 tsp cinnamon
1/4 cup oil
3/4 cup milk
1 tsp vanilla
1/2 cup jelly
1/2 cup sugar, for rolling
Beat together the sugar and egg until pale yellow.
Add in the flour, baking powder, salt and cinnamon and stir to combine.
Pour in the oil, milk and vanilla, and mix until combined
Fill 12 muffin cups halfway full (don't use paper liners!), and place a teaspoon of jelly on top.
Top with remaining batter.
Bake on 350F for 15 to 18 minutes, until done.
After removing from oven, roll each muffin in sugar and place on wire rack to cool.
Instead, I present you with baked doughnut muffins! Of course, you may think without the deep frying, these lose their significance for Chanukah, but there is oil in the batter - and Chanukah is about oil, not frying!
 Now, I'm not going to pretend that if you close your eyes, that this tastes like a jelly doughnut, but they are sweet, delicious, and slightly healthier. My jelly sank a little, probably because I didn't have quite enough flour in the batter. Measuring isn't my strong point. Eating is.
 Whatever resemblance these do have to doughnuts, comes from the quick bath they take in granulated sugar while still warm. I gave them about a minute after I pulled them out of the oven to cool down, but they're still pretty hot when you do it, so you'll need strong fingers.
 If you're not a jelly fan (which I am, and obviously used raspberry), you could always leave that out.
  Tip of the Day: After 24 hours, the sugar coating on this begins to crust a little, so you'd better eat them all up quickly!
Recipe:
3/4 cup sugar
1 egg
1 1/2 cups flour
2 tsp baking power
1/4 tsp salt
1/4 tsp cinnamon
1/4 cup oil
3/4 cup milk
1 tsp vanilla
1/2 cup jelly
1/2 cup sugar, for rolling
Beat together the sugar and egg until pale yellow.
Add in the flour, baking powder, salt and cinnamon and stir to combine.
Pour in the oil, milk and vanilla, and mix until combined
Fill 12 muffin cups halfway full (don't use paper liners!), and place a teaspoon of jelly on top.
Top with remaining batter.
Bake on 350F for 15 to 18 minutes, until done.
After removing from oven, roll each muffin in sugar and place on wire rack to cool.
Tuesday, October 6, 2009
Chocolate Filled Cupcakes
I like chocolate. A lot of people like chocolate. I also like vanilla. I'm guessing a lot of people like vanilla too. So when I made cupcakes to bring to the office a few weeks ago, I frosted them half in chocolate, and half in vanilla.
 And every single chocolate cupcake was gone before even one vanilla was taken. Of course soon after that, every single vanilla cupcake was gone too. Hmmmm.
Anyway these were filled cupcakes - which really means that I dropped a few chocolate chips in to the middle of each one before I baked them.
 If I'd mixed the chocolate chips in to the batter, these would be chocolate chip cupcakes, but because they're only in the middle, they're chocolate filled? Right? Work with me here.
 Ah look, hidden filling! Of course anything would be hidden by the time I frosted them.
Frosting, which, by the way, came from a can. Oops. Back to school means back to more storebought for me. But it'll be our little secret, OK?
Well once I was done I just had to eat a chocolate one. I know, those vanillas are getting jealous.
 You can't tell though, right?

Recipe:
1 1/3 cups flour
1 cup sugar
1 1/2 tsp baking powder
1/2 tsp salt
1/3 cup shortening
1/2 cup milk
2 tsps vanilla
1 egg
chocolate chips
frosting
Stir together the flour, sugar, baking powder and salt.
Beat in the shortening, milk, vanilla and egg until well mixed.
Divided the batter among 12, paper-lined muffin cups.
Drop five or six chocolate chips in to the center of each cupcake.
Bake on 350 F for 20 minutes.
Cool in the pan for 2 minutes then remove to wire rack to cool completely.
Frost.
 So when I made cupcakes to bring to the office a few weeks ago, I frosted them half in chocolate, and half in vanilla.
 And every single chocolate cupcake was gone before even one vanilla was taken. Of course soon after that, every single vanilla cupcake was gone too. Hmmmm.
Anyway these were filled cupcakes - which really means that I dropped a few chocolate chips in to the middle of each one before I baked them.
 If I'd mixed the chocolate chips in to the batter, these would be chocolate chip cupcakes, but because they're only in the middle, they're chocolate filled? Right? Work with me here.
 Ah look, hidden filling! Of course anything would be hidden by the time I frosted them.
Frosting, which, by the way, came from a can. Oops. Back to school means back to more storebought for me. But it'll be our little secret, OK?
Well once I was done I just had to eat a chocolate one. I know, those vanillas are getting jealous.
 You can't tell though, right?
Recipe:
1 1/3 cups flour
1 cup sugar
1 1/2 tsp baking powder
1/2 tsp salt
1/3 cup shortening
1/2 cup milk
2 tsps vanilla
1 egg
chocolate chips
frosting
Stir together the flour, sugar, baking powder and salt.
Beat in the shortening, milk, vanilla and egg until well mixed.
Divided the batter among 12, paper-lined muffin cups.
Drop five or six chocolate chips in to the center of each cupcake.
Bake on 350 F for 20 minutes.
Cool in the pan for 2 minutes then remove to wire rack to cool completely.
Frost.
Wednesday, September 16, 2009
Cookie Cupcakes
I'm always looking to try something new, and when I stumbled across these cookie cupcakes (a cookie! But in a cupcake!) I just had to add them to my list.
 This recipe has basically two parts - the batter, that goes in the muffin tins first, and is baked for ten minutes - then the filling, which is added to the half-baked cupcakes and then they're returned to the oven.
 Now, the original recipe called for chopped walnuts, which of course I omitted, but I caved and added some chopped almonds (all we had in the house!) to 4 out of the 12 cupcakes. That is 4 less I couldn't eat.
 These were pretty interesting and different- very heavy and dense - cookie like when you expect a cupcake, but great flavor overall.
I would know:
 Tip of the Day: The quality of your chocolate (chips) can make all the difference in a recipe. Just as they say with wine, don't bake with chocolate you wouldn't want to eat. I recommend Trader Joe's semi-sweet chocolate chips for relatively inexpensive quality.
Recipe: (from Bakin' Bits)
Cupcakes:
1/2 cup (1 stick) butter or margarine, softened
6 tbsps sugar
6 tbsps packed dark brown sugar
1 egg
1/2 tsp vanilla
1 cup plus 2 tbsps flour
1/2 tsp baking soda
1/2 tsp salt
Filling:
1/2 cup packed brown sugar
1 egg
1/8 tsp salt
1 cup (6 oz) semisweet chocolate chips
1/2 cup chopped walnuts (I omitted)
Cream the butter and sugars together until light and fluffy. Beat in egg and vanilla.
Gradually mix in the flour, baking soda and salt.
Fill 12 paper-lined cupcakes about halfway full. Bake at 350F for 10 minutes.
While they're baking, beat the brown sugar, egg and salt together. Stir in chocolate chips and nuts.
When the cupcakes come out of the oven, drop the filling by rounded tablespoonful in to the center of each. Bake an additional 10 minutes.
Cool in the pan for 10 minutes and then remove to a wire rack to cool completely.
 This recipe has basically two parts - the batter, that goes in the muffin tins first, and is baked for ten minutes - then the filling, which is added to the half-baked cupcakes and then they're returned to the oven.
 Now, the original recipe called for chopped walnuts, which of course I omitted, but I caved and added some chopped almonds (all we had in the house!) to 4 out of the 12 cupcakes. That is 4 less I couldn't eat.
 These were pretty interesting and different- very heavy and dense - cookie like when you expect a cupcake, but great flavor overall.
I would know:
 Tip of the Day: The quality of your chocolate (chips) can make all the difference in a recipe. Just as they say with wine, don't bake with chocolate you wouldn't want to eat. I recommend Trader Joe's semi-sweet chocolate chips for relatively inexpensive quality.
Recipe: (from Bakin' Bits)
Cupcakes:
1/2 cup (1 stick) butter or margarine, softened
6 tbsps sugar
6 tbsps packed dark brown sugar
1 egg
1/2 tsp vanilla
1 cup plus 2 tbsps flour
1/2 tsp baking soda
1/2 tsp salt
Filling:
1/2 cup packed brown sugar
1 egg
1/8 tsp salt
1 cup (6 oz) semisweet chocolate chips
1/2 cup chopped walnuts (I omitted)
Cream the butter and sugars together until light and fluffy. Beat in egg and vanilla.
Gradually mix in the flour, baking soda and salt.
Fill 12 paper-lined cupcakes about halfway full. Bake at 350F for 10 minutes.
While they're baking, beat the brown sugar, egg and salt together. Stir in chocolate chips and nuts.
When the cupcakes come out of the oven, drop the filling by rounded tablespoonful in to the center of each. Bake an additional 10 minutes.
Cool in the pan for 10 minutes and then remove to a wire rack to cool completely.
Monday, September 7, 2009
Chocolate Chocolate Cupcakes
While I do love frosting, sometimes its nice to have a cupcake with just a little decoration.
 These chocolate, chocolate cupcakes are just the thing, really simple and without that big mound of buttercream on top.
The recipe called for 12, but I only got 11 out of it. Guess mine were a little too big.
 They baked up with beautiful domes, nice and high which I like. Flat cupcakes are boring.
 To decorate these, I used my trusty chocolate frosting (recipe below), and a ziploc bag. That's right, just a plastic bag. Sure, I have fancy decorating bags and tips and couplers and all that stuff, and I do use them, but really, for something like this, a plastic bag with the tip snipped is all you need.
 This is also a great tip to give a finishing touch to almost practically any baked good - what couldn't be improved by a chocolate drizzle?
 Tip of the Day: If you're all out of toothpicks and you need to check if your cake or cupcakes are done, press gently on the dome. It should be firm, and spring back within a second or two.
Recipe:
Cake (from Food and Wine)
4 tbsp (1/2 stick) butter or margarine
1/4 cup vegetable oil
1/2 cup water
1 cup flour
1 cup sugar
1/4 cup plus 2 tblsps cocoa powder
3/4 tsp baking soda
1/8 tsp salt
1 egg
1/4 cup milk
1 tsp vanilla
Melt the butter, oil and water together. Add it to the flour, sugar, cocoa powder, baking soda and salt, and beat together until well mixed.
Add the egg and beat until incorporated.
Mix in the milk and vanilla. Pour the batter into 12 cupcake tins lined with paper cases (I got 11). they should be about 3/4 full.
Bake on 350 for about 25 minutes.
Frosting: (from smitten kitchen)
6 ounces semisweet chocolate, finely chopped
6 tbsp heavy cream
3/4 tbsp sugar
3/4 tbsp light corn syrup
1 1/2 tbsp butter
Bring the sugar, corn syrup and cream to a boil.
Remove from heat and stir in chocolate until melted.
Add butter and mix until melted.
 These chocolate, chocolate cupcakes are just the thing, really simple and without that big mound of buttercream on top.
The recipe called for 12, but I only got 11 out of it. Guess mine were a little too big.
 They baked up with beautiful domes, nice and high which I like. Flat cupcakes are boring.
 To decorate these, I used my trusty chocolate frosting (recipe below), and a ziploc bag. That's right, just a plastic bag. Sure, I have fancy decorating bags and tips and couplers and all that stuff, and I do use them, but really, for something like this, a plastic bag with the tip snipped is all you need.
 This is also a great tip to give a finishing touch to almost practically any baked good - what couldn't be improved by a chocolate drizzle?
 Tip of the Day: If you're all out of toothpicks and you need to check if your cake or cupcakes are done, press gently on the dome. It should be firm, and spring back within a second or two.
Recipe:
Cake (from Food and Wine)
4 tbsp (1/2 stick) butter or margarine
1/4 cup vegetable oil
1/2 cup water
1 cup flour
1 cup sugar
1/4 cup plus 2 tblsps cocoa powder
3/4 tsp baking soda
1/8 tsp salt
1 egg
1/4 cup milk
1 tsp vanilla
Melt the butter, oil and water together. Add it to the flour, sugar, cocoa powder, baking soda and salt, and beat together until well mixed.
Add the egg and beat until incorporated.
Mix in the milk and vanilla. Pour the batter into 12 cupcake tins lined with paper cases (I got 11). they should be about 3/4 full.
Bake on 350 for about 25 minutes.
Frosting: (from smitten kitchen)
6 ounces semisweet chocolate, finely chopped
6 tbsp heavy cream
3/4 tbsp sugar
3/4 tbsp light corn syrup
1 1/2 tbsp butter
Bring the sugar, corn syrup and cream to a boil.
Remove from heat and stir in chocolate until melted.
Add butter and mix until melted.
Wednesday, June 17, 2009
Raspberry Cupcakes with Vanilla Frosting
I'm not really one for creating my own recipes - I prefer to follow the instructions of others, tweaking things here and there - usually if I've run out of the proper ingredients, but still.
But I thought I would make an attempt at creating my own raspberry cupcakes.
 Well, creating might be a strong word, since I really just took a basic cupcake recipe, and mixed in some melted seedless raspberry jam (recipe at the end of the post).
I mixed up the cupcake batter in my mixer (yes, I finally used it since the move!), and stuck the jam in the microwave until it was pourable.
 Best part of this recipe? Pink batter! I'm not such a pink girl myself, but seeing it in the bowl of my mixer was pretty exciting. I don't usually bake with food colorings, but maybe now I should reconsider.
 After the jam was completely incorporated into the batter, I used a cookie scoop to fill the cupcake liners. I put about two scoops into every cup. Not that they were each even.
 It made 24 cupcakes, which unfortunately I had to bake them separately in my teeny oven. And lengthways. But I'm not complaining.
 They baked up decidedly less pink, but still cute. And almost all even. Score one for the cookie scoop.
 After this, I didn't quite have the time to make my own frosting, so I went with the store-bought stuff from a can. Not great, but not bad either. Plus I like having it around afterward to eat with honey-wheat pretzels.
But wait. Why did I pick cupcakes to make, this auspicious evening?
Because of this:
 That's right, I am now the proud owner of a Chefmate 24-count cupcake carrier. Heaven.
The bottom layer is an actual muffin pan, and on top is balanced a plastic tray that is locked into place when you snap the dome lid on top.
Here are the last two cupcakes in my new favorite toy. I see alot more cupcakes and muffins in my future.
 Anyway, back to the cupcakes. When they initially came out, I thought the texture was a bit strange - a little sticky - but the taste was good. After my second cupcake though, it was growing on me and by my last, I was a big fan.
They were a little heavier than normal cupcakes, but the taste was sweet and satisfying.
Tip of the Day: Make sure to purchase large, not small, medium or jumbo eggs for baking. Most recipes, unless otherwise specified, are calibrated for that size.
Recipe:
2 cups flour
1.5 cups sugar
2.5 tsp baking powder
1 tsp salt
1/2 cup shortening, softened
3/4 cup milk
1 tbsp vanilla
2 eggs
1 1/4 cups raspberry jam
Mix the flour, sugar, baking powder and salt in the bowl of a stand mixer.
Beat in shortening, milk, vanilla and eggs.
Heat the jam in the microwave until it is pourable.
Gradually mix into the batter until it is imperceptible.
Pour batter evenly into 24 muffins cups.
Bake at 350 F for 22 to 24 minutes.
But I thought I would make an attempt at creating my own raspberry cupcakes.
 Well, creating might be a strong word, since I really just took a basic cupcake recipe, and mixed in some melted seedless raspberry jam (recipe at the end of the post).
I mixed up the cupcake batter in my mixer (yes, I finally used it since the move!), and stuck the jam in the microwave until it was pourable.
 Best part of this recipe? Pink batter! I'm not such a pink girl myself, but seeing it in the bowl of my mixer was pretty exciting. I don't usually bake with food colorings, but maybe now I should reconsider.
 After the jam was completely incorporated into the batter, I used a cookie scoop to fill the cupcake liners. I put about two scoops into every cup. Not that they were each even.
 It made 24 cupcakes, which unfortunately I had to bake them separately in my teeny oven. And lengthways. But I'm not complaining.
 They baked up decidedly less pink, but still cute. And almost all even. Score one for the cookie scoop.
 After this, I didn't quite have the time to make my own frosting, so I went with the store-bought stuff from a can. Not great, but not bad either. Plus I like having it around afterward to eat with honey-wheat pretzels.
But wait. Why did I pick cupcakes to make, this auspicious evening?
Because of this:
 That's right, I am now the proud owner of a Chefmate 24-count cupcake carrier. Heaven.
The bottom layer is an actual muffin pan, and on top is balanced a plastic tray that is locked into place when you snap the dome lid on top.
Here are the last two cupcakes in my new favorite toy. I see alot more cupcakes and muffins in my future.
 Anyway, back to the cupcakes. When they initially came out, I thought the texture was a bit strange - a little sticky - but the taste was good. After my second cupcake though, it was growing on me and by my last, I was a big fan.
They were a little heavier than normal cupcakes, but the taste was sweet and satisfying.
Tip of the Day: Make sure to purchase large, not small, medium or jumbo eggs for baking. Most recipes, unless otherwise specified, are calibrated for that size.
Recipe:
2 cups flour
1.5 cups sugar
2.5 tsp baking powder
1 tsp salt
1/2 cup shortening, softened
3/4 cup milk
1 tbsp vanilla
2 eggs
1 1/4 cups raspberry jam
Mix the flour, sugar, baking powder and salt in the bowl of a stand mixer.
Beat in shortening, milk, vanilla and eggs.
Heat the jam in the microwave until it is pourable.
Gradually mix into the batter until it is imperceptible.
Pour batter evenly into 24 muffins cups.
Bake at 350 F for 22 to 24 minutes.
Subscribe to:
Posts (Atom)