

Showing posts with label failure. Show all posts
Showing posts with label failure. Show all posts
Monday, February 14, 2011
Chocolate Caramel Tart
They say your brain can react to pain before you even feel it: you jerk your hand away from a hot flame before the pain registers in your mind. Basically, your brain is telling you to stop doing something really stupid before you seriously hurt yourself. Unfortunately, my brain doesn't stop me from doing other really stupid things in the kitchen. Things, that just moments after they happen, make me smack my hand against my forehead and wonder why I'm even allowed to go near the stove. This is the tale of the two Chocolate Caramel Tarts.


Tuesday, December 14, 2010
Disaster Zone!
You see that big banner up there? It says Baking and Mistaking. But I haven't exactly been living up to that lately. I've been holding back on all the mistaking. I've been mistaking, of course, I just haven't been blogging about it, mostly because it makes me sad. But I'm over it now, so get ready, for an all out, play-by-play, no-holds barred, tale of disasters.
1. Peanut Butter Pie
 The recipe for this peanut butter pie came from a Good Housekeeping cookbook. It wasn't...awful, it was just kind of strange. It is basically a pie shell with a peanut butter custard filling. To start with, there was just way too much filling. Simply cutting the amount in half would have vastly improved this dessert, but it still wouldn't have been great. Obviously some chocolate would be nice, but I'm not sure how I would incorporate it. I think I'd like to try a more mousse-type peanut butter tart in the future.
2. Lemon Coconut Bars
 I like lemon. I like coconut. I should have liked these bars. I think their biggest problem was the vast gap between my expectations and reality. The recipe for these bars came from a blog, which had these beautiful photos of a crisp, coconut layer, then the lemon, and a cookie crust at the bottom. But my coconut and lemon layers completely melded into one, with none of the crispness I was looking for. The flavors were pretty good, so I'll just have to find other coconut lemon things. Although these cookies are kind of the best thing ever.
3. Fruit Pie
 This pie is probably the most disastrous thing on this list. The recipe was ripped out of a magazine - which one I can't remember - and it was truly awful. I'm not sure why I even attempted this, since I have such amazing pies in my repertoire, but it looks quick and easy, so I gave it a shot. It is basically a store bought pie crust, filled with peaches and raspberries, with a custard-y mixture poured on top. Well, despite cooking it much longer than the recipe indicated, it was still runny and soggy and truly gross. Refrigerating it to try to get it to firm up just made it cold and soggy, which was not much of an improvement. Blech.
4. Chocolate Filled Scones
 I've never made scones before. I've always thought of scones as dry and tasteless - and it turns out I was right! At least for this recipe. Part of the fault lies with me - I definitely didn't use enough chocolate in the middle of the scones, but I still felt like they weren't great. The drop off was also significant on day two, which I guess is par for the course with scones, but not everything in my house is really eaten day 1. I'm not quite giving up on scones in general - I'll have to re-imagine these, and make sure they're all eaten quick!
Anyway, that's what's been going on in my kitchen after hours. None of these really eclipses my top disasters though: for sheer inedibility - babke attempt 1; for biggest mess - exploding ice cream and for sheer frustration: complete meltdown.
Have you had any major disasters lately? Let me know so we can all feel bad together!
1. Peanut Butter Pie
 The recipe for this peanut butter pie came from a Good Housekeeping cookbook. It wasn't...awful, it was just kind of strange. It is basically a pie shell with a peanut butter custard filling. To start with, there was just way too much filling. Simply cutting the amount in half would have vastly improved this dessert, but it still wouldn't have been great. Obviously some chocolate would be nice, but I'm not sure how I would incorporate it. I think I'd like to try a more mousse-type peanut butter tart in the future.
 2. Lemon Coconut Bars
 I like lemon. I like coconut. I should have liked these bars. I think their biggest problem was the vast gap between my expectations and reality. The recipe for these bars came from a blog, which had these beautiful photos of a crisp, coconut layer, then the lemon, and a cookie crust at the bottom. But my coconut and lemon layers completely melded into one, with none of the crispness I was looking for. The flavors were pretty good, so I'll just have to find other coconut lemon things. Although these cookies are kind of the best thing ever.
 3. Fruit Pie
 This pie is probably the most disastrous thing on this list. The recipe was ripped out of a magazine - which one I can't remember - and it was truly awful. I'm not sure why I even attempted this, since I have such amazing pies in my repertoire, but it looks quick and easy, so I gave it a shot. It is basically a store bought pie crust, filled with peaches and raspberries, with a custard-y mixture poured on top. Well, despite cooking it much longer than the recipe indicated, it was still runny and soggy and truly gross. Refrigerating it to try to get it to firm up just made it cold and soggy, which was not much of an improvement. Blech.
 4. Chocolate Filled Scones

Anyway, that's what's been going on in my kitchen after hours. None of these really eclipses my top disasters though: for sheer inedibility - babke attempt 1; for biggest mess - exploding ice cream and for sheer frustration: complete meltdown.
Have you had any major disasters lately? Let me know so we can all feel bad together!
Friday, June 25, 2010
A Tale of Two Crumb Cakes
Entenmann's Ultimate Crumb Cake has long held a special place in my heart. I'd never turn down a piece of all-butter loaf or cheese danish, but bring me a box of crumb cake and I'll love you forever. Or until I finish the cake.
So I started out on a quest to recreate my favorite cake in the kitchen. Usually when I'm looking for a recipe for something specific, I'll head to RecipeZaar to see what I find. Well it didn't disappoint, and I located a recipe for New York Crumb Cake with almost all positive reviews.
 Well maybe I did something wrong but I sure wouldn't give it a positive review. The cake layer was so thick and there was barely any of it - I had to struggle to spread it across the bottom of the pan.
 Then the topping was dry and crunchy - nothing like the soft, thick crumbs I'd been yearning for. It certainly looked pretty, and a few pieces got eaten, but I was left quite unsatisfied.
So when I saw this recipe on Piece of Cake for, once again, New York Crumb Cake, this time with the seal of approval from America's Test Kitchen, I figured I would give it another shot.
 Of course since I rarely follow instructions, I made this in a round pan which was all I had on hand. Please don't question the emptiness of my kitchen. It makes me cry. Anyway, this was certainly a marked improvement, but with a great deal of effort - as I was warned on Piece of Cake. The topping is formed by carefully rolling the topping into little pieces and placing them on the batter. I hoped that this step could be skipped, but I was assured otherwise.
 As I said, this still didn't quite hit the Entenmann's mark for me, but it was good, and my friends devoured it. That is basically a theme on this blog - I made a recipe, it was OK, and then it was consumed in thirty minutes. I imagine that an Entenmann's worthy recipe would have enough butter for a three-course Paula Deen feast, so I'll be satisfied with this for now.
P.S. If you've been paying attention, you'll notice Baking and Mistaking has had a little bit of a facelift! Let me know what you think, and what else you'd like to see around here - leave me a comment or shoot me an e-mail at Bakingandmistaking [AT] gmail [DOT] com.
Tip of the Day: A 9-inch round pan has the same area as an 8-inch square, so you can substitute them without any changes to temperature or baking time. You can use your high school algebra to prove me bright!
Recipe:
I won't rewrite the first, unsuccessful recipe here, but feel free to follow the link above and see if you can tell where I may have gone wrong. Below is the second recipe, from America's Test Kitchen.
Topping:
1/3 cup white sugar
1/3 cup dark brown sugar
1/8 tsp salt
3/4 tsp cinnamon
1/2 cup (1 stick) butter or margarine, melted
1 3/4 cups cake flour [I used all-purpose, perhaps I shouldn't have]
Cake:
1 1/4 cups cake flour
1/2 cup sugar
1/4 tsp baking soda
1/4 tsp salt
6 tbsps (3/4 stick) butter or margarine, softened
1 egg
1 egg yolk
1 tsp vanilla
1/3 cup buttermilk
Stir together the topping ingredients until they come together. Set aside.
Stir the flour, sugar, baking soda and salt together. Gradually add in the butter, beating until combined.
Then add the egg, egg yolk, vanilla and buttermilk. Beat until light and fluffy.
Spread the batter into the bottom of a parchment paper or foil-lined 8-inch square pan.
Break apart the crumb topping into large pea-sized pieces, rolling them between your fingertips to get them to hold their shape. Spread the crumbs in even layer over the batter.
Bake on 325 F for 35 to 40 minues, until the crumbs are golden. Cool on wire rack for 30 minutes, then dust with confectioner's sugar before serving.
So I started out on a quest to recreate my favorite cake in the kitchen. Usually when I'm looking for a recipe for something specific, I'll head to RecipeZaar to see what I find. Well it didn't disappoint, and I located a recipe for New York Crumb Cake with almost all positive reviews.
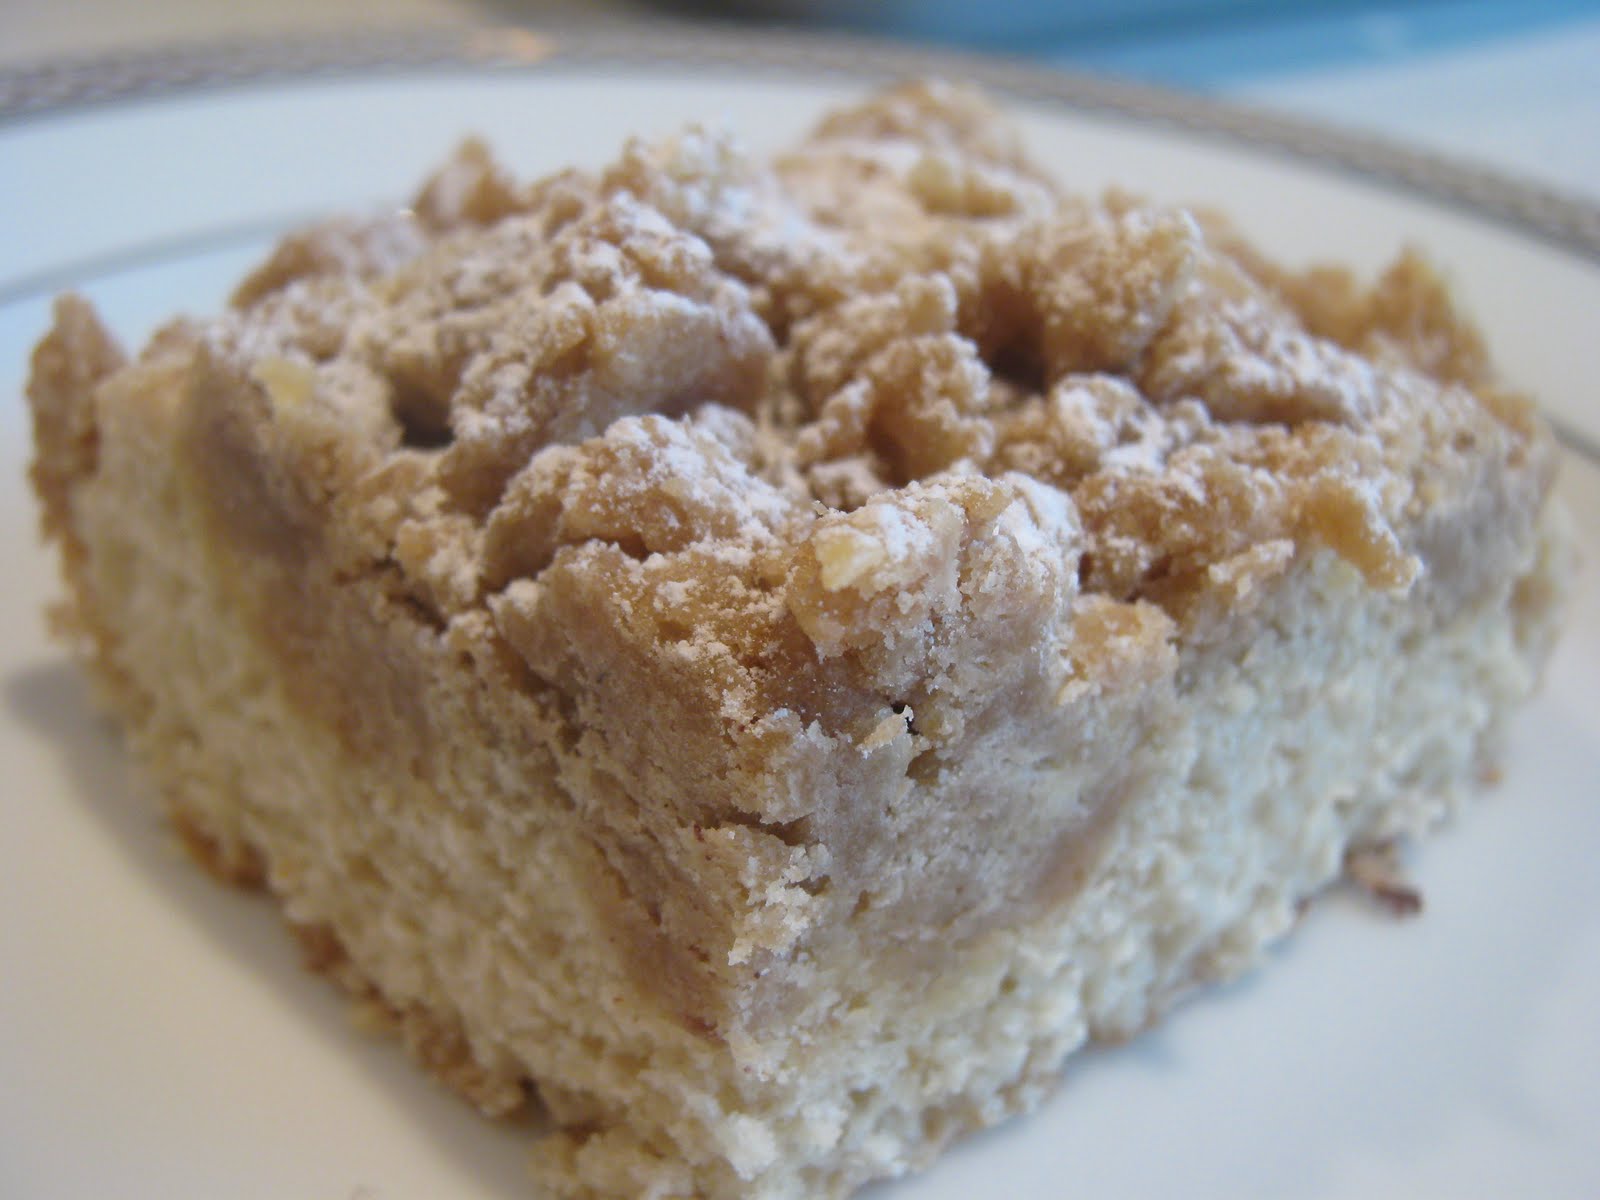 Well maybe I did something wrong but I sure wouldn't give it a positive review. The cake layer was so thick and there was barely any of it - I had to struggle to spread it across the bottom of the pan.
 Then the topping was dry and crunchy - nothing like the soft, thick crumbs I'd been yearning for. It certainly looked pretty, and a few pieces got eaten, but I was left quite unsatisfied.
So when I saw this recipe on Piece of Cake for, once again, New York Crumb Cake, this time with the seal of approval from America's Test Kitchen, I figured I would give it another shot.
 Of course since I rarely follow instructions, I made this in a round pan which was all I had on hand. Please don't question the emptiness of my kitchen. It makes me cry. Anyway, this was certainly a marked improvement, but with a great deal of effort - as I was warned on Piece of Cake. The topping is formed by carefully rolling the topping into little pieces and placing them on the batter. I hoped that this step could be skipped, but I was assured otherwise.
 As I said, this still didn't quite hit the Entenmann's mark for me, but it was good, and my friends devoured it. That is basically a theme on this blog - I made a recipe, it was OK, and then it was consumed in thirty minutes. I imagine that an Entenmann's worthy recipe would have enough butter for a three-course Paula Deen feast, so I'll be satisfied with this for now.
P.S. If you've been paying attention, you'll notice Baking and Mistaking has had a little bit of a facelift! Let me know what you think, and what else you'd like to see around here - leave me a comment or shoot me an e-mail at Bakingandmistaking [AT] gmail [DOT] com.
Tip of the Day: A 9-inch round pan has the same area as an 8-inch square, so you can substitute them without any changes to temperature or baking time. You can use your high school algebra to prove me bright!
Recipe:
I won't rewrite the first, unsuccessful recipe here, but feel free to follow the link above and see if you can tell where I may have gone wrong. Below is the second recipe, from America's Test Kitchen.
Topping:
1/3 cup white sugar
1/3 cup dark brown sugar
1/8 tsp salt
3/4 tsp cinnamon
1/2 cup (1 stick) butter or margarine, melted
1 3/4 cups cake flour [I used all-purpose, perhaps I shouldn't have]
Cake:
1 1/4 cups cake flour
1/2 cup sugar
1/4 tsp baking soda
1/4 tsp salt
6 tbsps (3/4 stick) butter or margarine, softened
1 egg
1 egg yolk
1 tsp vanilla
1/3 cup buttermilk
Stir together the topping ingredients until they come together. Set aside.
Stir the flour, sugar, baking soda and salt together. Gradually add in the butter, beating until combined.
Then add the egg, egg yolk, vanilla and buttermilk. Beat until light and fluffy.
Spread the batter into the bottom of a parchment paper or foil-lined 8-inch square pan.
Break apart the crumb topping into large pea-sized pieces, rolling them between your fingertips to get them to hold their shape. Spread the crumbs in even layer over the batter.
Bake on 325 F for 35 to 40 minues, until the crumbs are golden. Cool on wire rack for 30 minutes, then dust with confectioner's sugar before serving.
Sunday, April 25, 2010
To Babke and Bust
I haven't had a total kitchen meltdown for a while now. Which means either I'm getting better or I'm not being very adventurous. Presumably the latter. But this latest endeavor falls squarely in the "mistaking" category. A failed, hard-as-a-rock, completely inedible babke - chocolate yeast cake.
 This disaster actually happened a couple months ago, for my mother's birthday, but like many things (books, shoes, furniture) it got lost in the post tree shuffle. The fact that this was for an "occasion" makes the failure even more acute.
I have a healthy fear of yeast. And by healthy fear I mean I cower in the corner shivering when asked to bake with it. It's scary. It's alive. And sometimes, it doesn't work. The instructions for this recipe require the yeast to be mixed with warm water and left for ten minutes, when bubbles should form. How many bubbles? What size bubbles? How close together are the bubbles? Bubbles bubbles?
 Sorry, where was I? Right, yeast. Well, I don't know if the yeast was the problem here, or I over kneaded, or under kneaded, or didn't roll it out well enough, or any combination of the above, but this was totally inedible. And I had a hunch it wasn't going to turn out well earlier. But stupidly, as usual, I persevered. And was not rewarded. Seriously, it was impossible to even saw through this thing.
 What was even worse was that the recipe made two! Luckily, this was not the only dessert in the making for my mother's birthday weekend, and I had a trusty Dorie Greenspan recipe also on hand that delivered, as usual. But more on that later!
 Since this happened I have been too afraid to try babke again, but there is a Smitten Kitchen recipe I have my eye on that may be in my future. Maybe.
Tip of the Day: Know when to give up. And don't use old yeast! It only has a shelf life of 3 to 4 months.
 This disaster actually happened a couple months ago, for my mother's birthday, but like many things (books, shoes, furniture) it got lost in the post tree shuffle. The fact that this was for an "occasion" makes the failure even more acute.
I have a healthy fear of yeast. And by healthy fear I mean I cower in the corner shivering when asked to bake with it. It's scary. It's alive. And sometimes, it doesn't work. The instructions for this recipe require the yeast to be mixed with warm water and left for ten minutes, when bubbles should form. How many bubbles? What size bubbles? How close together are the bubbles? Bubbles bubbles?
 Sorry, where was I? Right, yeast. Well, I don't know if the yeast was the problem here, or I over kneaded, or under kneaded, or didn't roll it out well enough, or any combination of the above, but this was totally inedible. And I had a hunch it wasn't going to turn out well earlier. But stupidly, as usual, I persevered. And was not rewarded. Seriously, it was impossible to even saw through this thing.
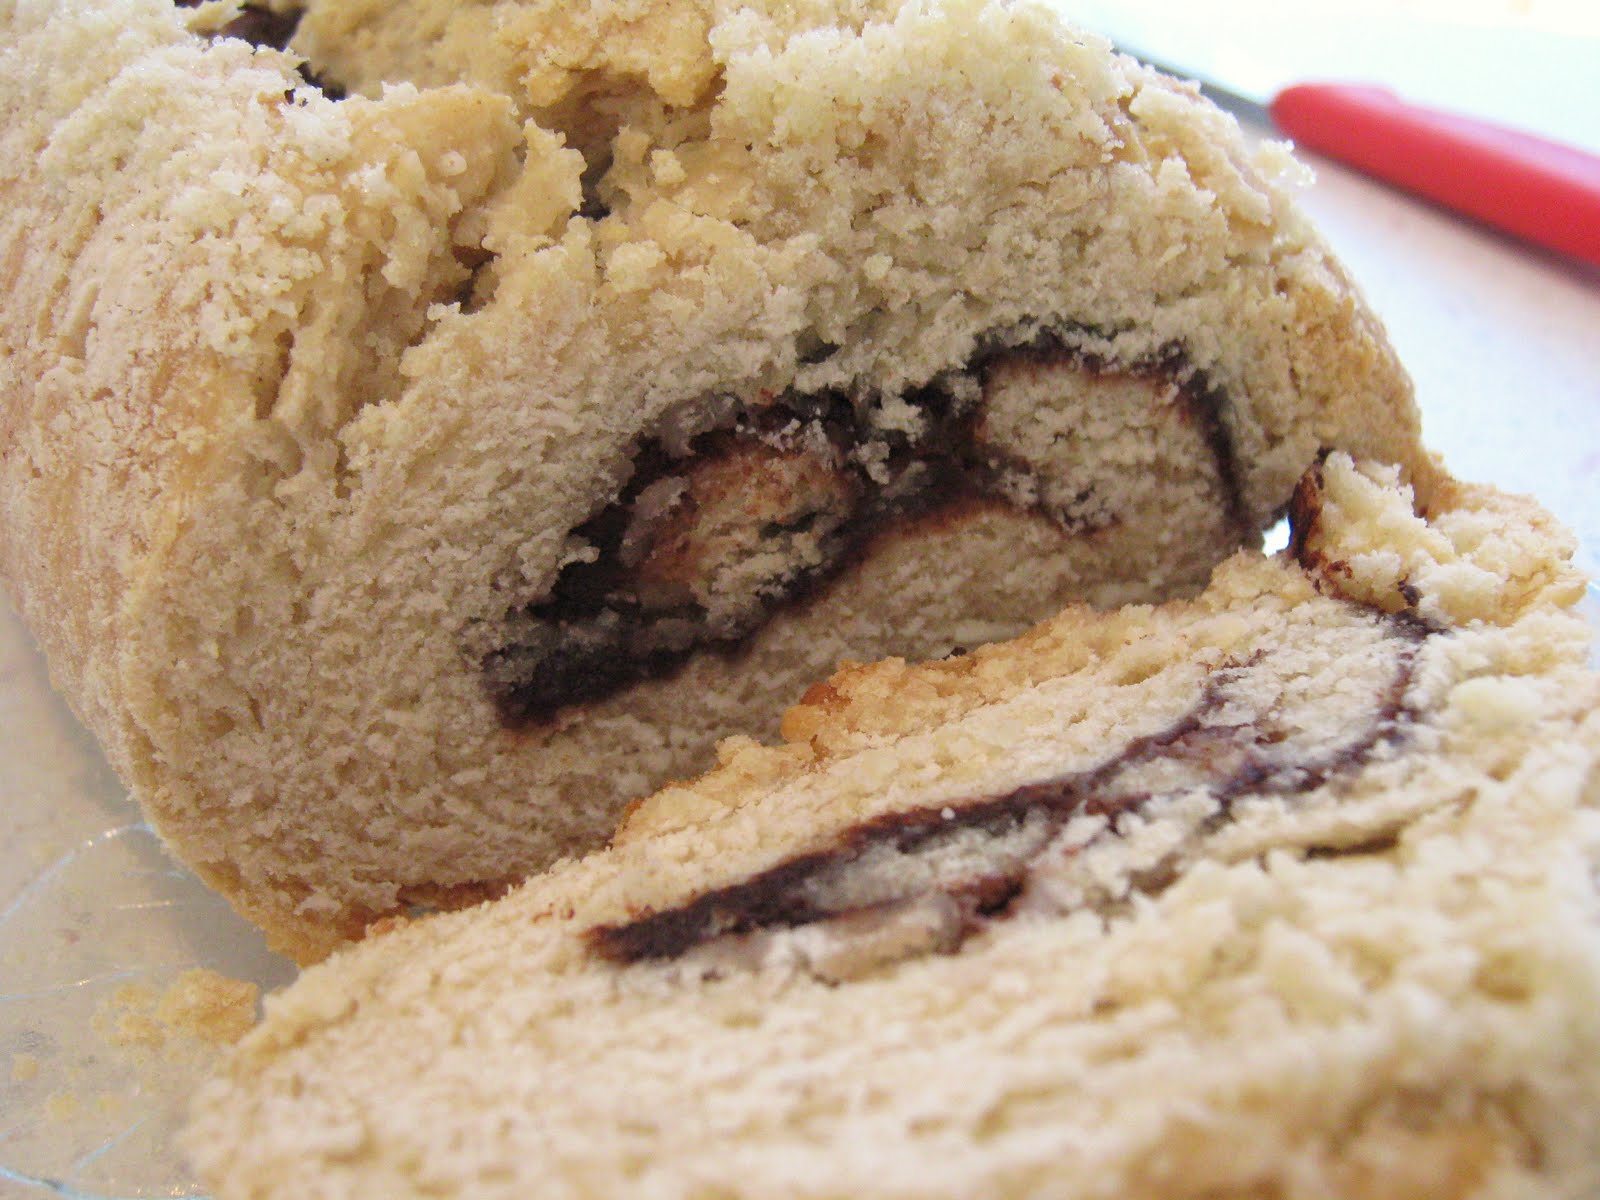 What was even worse was that the recipe made two! Luckily, this was not the only dessert in the making for my mother's birthday weekend, and I had a trusty Dorie Greenspan recipe also on hand that delivered, as usual. But more on that later!
 Since this happened I have been too afraid to try babke again, but there is a Smitten Kitchen recipe I have my eye on that may be in my future. Maybe.
Tip of the Day: Know when to give up. And don't use old yeast! It only has a shelf life of 3 to 4 months.
Tuesday, January 12, 2010
Friend Request Accepted...
I always like to ask friends what they would like me to make. Friends, family, coworkers, classmates - I want to know what you want, because, as much as I'd like to, I'm not going to eat everything myself. Just a lot of it.
There are some requests that I know by now - anything with peanut butter for Esti (who will certainly get her wish for her birthday on Friday!), anything without peanut butter for Ariel and Sarah, anything with lemon for Racheli, anything with nuts for my parents, anything without nuts for my brother, anything without nuts, mango and citrus fruits for Naomi, anything with blue sugar for Laura (Yes, blue sugar. More on that another day), just about anything for Miriam... and the list goes on.
There are some requests that are not happening (sorry, I don't have all the ingredients for a trifle, it is 2 a.m.) (no, I'm not making you petit fours, I don't have 8 hours) and some times where I make things just for me (or how they make my apartment smell).
But what is the most requested dessert? Well the conversation goes something like this:
Me: What should I make?
You: Chocolate chip cookies!
Me: Seriously? But that's so boring!
You: Uhhhh, sorry?
Because while we all love a great chocolate chip cookie, I don't love making chocolate chip cookies, because, well, they're a bit boring. I'd rather experiment. Try something new. Make something that may end up in the garbage - heck, I wasted 4 hours, 12 eggs and my sanity, but at least it was exciting!
So when I saw this recipe for browned butter chocolate chip cookies, I got excited. Browned butter refers to cooking - "browning" the butter used in a recipe in a pan or skillet before incorporating it with the other ingredients, giving it a nutty, enhanced flavor.
 Sounds great, right? Right. But unfortunately me, in my naivete, used margarine instead of butter, which, is a big no-no. Apparently its something in science with the words protein and clarified and particles and things like that - but it didn't work.
 So I bow my head in shame, and I'll just have to try these again soon with real butter. Overall, these were a good cookie - just nothing exceptional. I'll post the recipe below for those of you who want to try, otherwise I can always count on these.
If you have a request of your own for me to make - let me know in the comments (or e-mail) and you might see it here soon!
---------------------------------------------------------------------------
Speaking of friend requests, come check me out over at Twitter! If you follow me, you'll get to hear about my obsession with American Idol, how I love to bake in high heels despite the risk, and what ends up on the wall instead of the oven. I'm @BakingMistaking, come visit!
Tip of the Day: I like to shape my drop cookies in the bowl of a tablespoon measurement - they're all uniform, they have a flat bottom so they don't roll around on the tray, and a tablespoon is a good amount for most - not all - cookies.
Recipe: (from the Baking Bites cookbook)
3/4 cup (1 1/2 sticks) butter
2/3 cup sugar
2/3 cup packed brown sugar
2 eggs
1 tsp vanilla
2 cups flour
1/2 cup oatmeal
1/2 tsp baking soda
1 tsp salt
2 cups (12 ounces) chocolate chips
Melt butter in a small pan and cook over low-medium heat until turned an amber color.
Let cool for 10 to 15 minutes.
Whisk together with the sugars, eggs and vanilla.
Add the flour, oatmeal, baking soda and salt, mix until combined.
Stir in the chocolate chips.
Bake cookies on parchment paper lined baking sheets on 350 F for 12 to 15 minutes.
Cool for five minutes on the baking sheet and then transfer to a wire rack to cool completely.
There are some requests that I know by now - anything with peanut butter for Esti (who will certainly get her wish for her birthday on Friday!), anything without peanut butter for Ariel and Sarah, anything with lemon for Racheli, anything with nuts for my parents, anything without nuts for my brother, anything without nuts, mango and citrus fruits for Naomi, anything with blue sugar for Laura (Yes, blue sugar. More on that another day), just about anything for Miriam... and the list goes on.
There are some requests that are not happening (sorry, I don't have all the ingredients for a trifle, it is 2 a.m.) (no, I'm not making you petit fours, I don't have 8 hours) and some times where I make things just for me (or how they make my apartment smell).
But what is the most requested dessert? Well the conversation goes something like this:
Me: What should I make?
You: Chocolate chip cookies!
Me: Seriously? But that's so boring!
You: Uhhhh, sorry?
Because while we all love a great chocolate chip cookie, I don't love making chocolate chip cookies, because, well, they're a bit boring. I'd rather experiment. Try something new. Make something that may end up in the garbage - heck, I wasted 4 hours, 12 eggs and my sanity, but at least it was exciting!
So when I saw this recipe for browned butter chocolate chip cookies, I got excited. Browned butter refers to cooking - "browning" the butter used in a recipe in a pan or skillet before incorporating it with the other ingredients, giving it a nutty, enhanced flavor.
 Sounds great, right? Right. But unfortunately me, in my naivete, used margarine instead of butter, which, is a big no-no. Apparently its something in science with the words protein and clarified and particles and things like that - but it didn't work.
 So I bow my head in shame, and I'll just have to try these again soon with real butter. Overall, these were a good cookie - just nothing exceptional. I'll post the recipe below for those of you who want to try, otherwise I can always count on these.
If you have a request of your own for me to make - let me know in the comments (or e-mail) and you might see it here soon!
---------------------------------------------------------------------------
Speaking of friend requests, come check me out over at Twitter! If you follow me, you'll get to hear about my obsession with American Idol, how I love to bake in high heels despite the risk, and what ends up on the wall instead of the oven. I'm @BakingMistaking, come visit!
Tip of the Day: I like to shape my drop cookies in the bowl of a tablespoon measurement - they're all uniform, they have a flat bottom so they don't roll around on the tray, and a tablespoon is a good amount for most - not all - cookies.
Recipe: (from the Baking Bites cookbook)
3/4 cup (1 1/2 sticks) butter
2/3 cup sugar
2/3 cup packed brown sugar
2 eggs
1 tsp vanilla
2 cups flour
1/2 cup oatmeal
1/2 tsp baking soda
1 tsp salt
2 cups (12 ounces) chocolate chips
Melt butter in a small pan and cook over low-medium heat until turned an amber color.
Let cool for 10 to 15 minutes.
Whisk together with the sugars, eggs and vanilla.
Add the flour, oatmeal, baking soda and salt, mix until combined.
Stir in the chocolate chips.
Bake cookies on parchment paper lined baking sheets on 350 F for 12 to 15 minutes.
Cool for five minutes on the baking sheet and then transfer to a wire rack to cool completely.
Tuesday, December 22, 2009
Chocolate Peanut Butter Bundt Cake Collapse
Before our short Chanukah interlude, I was discussing bundts, and how they often have some difficulty dropping out of the pan. Well, that was nothing compared to this cake. Though perhaps, this was my fault.
I set out to make a chocolate peanut butter bundt cake. But, as I am super human (duh), I decided not to follow a specific recipe, but to mix and match several recipes and create my own, supercalafragilisticexpialidocious chocolate peanut butter cake.
That didn't go so well.
I made the chocolate batter, and made the peanut butter filling. After putting about half the batter in, I piped the peanut butter filling and covered it with the rest of the batter.
 I assumed it would sink a little, but I didn't know it would make it all the way through and stick to the bottom of my pan.
 So I was nervous from the start about it coming out, despite the fact that I greased it well.
I tried my best to loosen it with a knife, running it around the edge. I then flipped it over, holding my breath, hoping for the best.
 The best did not happen. This is the bottom half of the cake.
 And never the twain shall meet.
Well...not on my watch.
 So after I managed to reassemble the Frankenstein cake, I still knew I couldn't serve it like this.
But, with a little frosting....
 Ok a lot of frosting...
 ...I had a masterpiece! Ok, well, a somewhat presentable cake. That still tasted delicious.
Now, I'm definitely not going to give you the recipe I followed, here are some you can try yourself if this gives you a hankering for a chocolate peanut butter cake:
Culinary in the Desert
Smitten Kitchen
Smells Like Home
Good luck!
I set out to make a chocolate peanut butter bundt cake. But, as I am super human (duh), I decided not to follow a specific recipe, but to mix and match several recipes and create my own, supercalafragilisticexpialidocious chocolate peanut butter cake.
That didn't go so well.
I made the chocolate batter, and made the peanut butter filling. After putting about half the batter in, I piped the peanut butter filling and covered it with the rest of the batter.
 I assumed it would sink a little, but I didn't know it would make it all the way through and stick to the bottom of my pan.
 So I was nervous from the start about it coming out, despite the fact that I greased it well.
I tried my best to loosen it with a knife, running it around the edge. I then flipped it over, holding my breath, hoping for the best.
 The best did not happen. This is the bottom half of the cake.
 And never the twain shall meet.
Well...not on my watch.
 So after I managed to reassemble the Frankenstein cake, I still knew I couldn't serve it like this.
But, with a little frosting....
 Ok a lot of frosting...
 ...I had a masterpiece! Ok, well, a somewhat presentable cake. That still tasted delicious.
Now, I'm definitely not going to give you the recipe I followed, here are some you can try yourself if this gives you a hankering for a chocolate peanut butter cake:
Culinary in the Desert
Smitten Kitchen
Smells Like Home
Good luck!
Thursday, November 19, 2009
About Last Night...
I don't have a recipe to share with you. I don't have any baking tips to advise you with.
But I do have a story. And some pictures. If you'll bear with me.
It was late last night, (read: closer to this morning) when I set out to make ice cream in my stand mixer. (Yes, it can be done without an ice cream maker, but that is so not the point of this story.)
I had my mixer set up on my kitchen counter, my ingredients all in, and I turned it up high to beat together, and walked, oh, about 10 feet away to send an e-mail.
About thirty seconds after I sat down, I heard a loud crash. As if in slow motion, my head swiveled, and what I saw before me was a scene straight from my worst nightmare. (Besides for being attacked by spiders in a crowded elevator while watching Jumanji.)
The mixer was on the floor, and huge splatters of potential ice cream were all over the couch, wall, floor, lamp and anything else in sight. Meanwhile the mixer was still happily spinning away.
I leapt from my chair and ran to the corner, where I grabbed to unplug it, first unplugging the lamp instead, then finally stopping the mixer from its reign of destruction.
As I surveyed my surroundings I didn't know whether to laugh or cry. I did a little of both, then quickly got to work, sponging off the worst of the couch and moving other items out of the path of the flowing ice cream monster.
After the couch and wall were wiped clean, I stopped in my tracks and realized I had missed the most important thing. Photographing the event!
At this point I reached for my camera, capturing the moment about ten minutes in to the clean-up process.
 Then the clean up continued, moving the couch away from the wall to catch what had already seeped underneath.
 Approximately one thousand paper towels and 45 minutes later, all was again right with the world. Actually, it was probably cleaner than it was before!
 Which meant I could then turn my attention back to the kitchen. And this:
 Luckily, the mixer is very detachable, and everything but the top went straight to the sink to soak.
Let's just say...I am never stepping away from that thing again!
But I do have a story. And some pictures. If you'll bear with me.
It was late last night, (read: closer to this morning) when I set out to make ice cream in my stand mixer. (Yes, it can be done without an ice cream maker, but that is so not the point of this story.)
I had my mixer set up on my kitchen counter, my ingredients all in, and I turned it up high to beat together, and walked, oh, about 10 feet away to send an e-mail.
About thirty seconds after I sat down, I heard a loud crash. As if in slow motion, my head swiveled, and what I saw before me was a scene straight from my worst nightmare. (Besides for being attacked by spiders in a crowded elevator while watching Jumanji.)
The mixer was on the floor, and huge splatters of potential ice cream were all over the couch, wall, floor, lamp and anything else in sight. Meanwhile the mixer was still happily spinning away.
I leapt from my chair and ran to the corner, where I grabbed to unplug it, first unplugging the lamp instead, then finally stopping the mixer from its reign of destruction.
As I surveyed my surroundings I didn't know whether to laugh or cry. I did a little of both, then quickly got to work, sponging off the worst of the couch and moving other items out of the path of the flowing ice cream monster.
After the couch and wall were wiped clean, I stopped in my tracks and realized I had missed the most important thing. Photographing the event!
At this point I reached for my camera, capturing the moment about ten minutes in to the clean-up process.
 Then the clean up continued, moving the couch away from the wall to catch what had already seeped underneath.
 Approximately one thousand paper towels and 45 minutes later, all was again right with the world. Actually, it was probably cleaner than it was before!
 Which meant I could then turn my attention back to the kitchen. And this:
 Luckily, the mixer is very detachable, and everything but the top went straight to the sink to soak.
Let's just say...I am never stepping away from that thing again!
Wednesday, October 28, 2009
The Lost Desserts
Sometimes I made a dessert, and it's delicious, and it's pretty and it all get's eaten (very rarely does this not happen), but I don't run to blog about it. Instead, the pictures sit on my hard drive, the recipe wanders around in my browser history, and I never quite get the push to share them with you.
So recently while I was going through my picture files, thinking about what to share next, I figured it was time for a little fall cleaning. Now keep in mind, these weren't bad. The complete disasters in my life I run to share with you. These were good. Just not too exciting.
First up: Apple Pie Bars.
 I made these in July. I know, July! Remember that? Weird.
 Anyway, these were a variation on these Strawberry Pie Bars. Because I'm lazy and all-around uninterested in hard work, I used a can of apple pie filling for the center. Don't knock it.
 They were tasty. After about 36 hours, they started to get a little soggy, when the apple pie filling seeped in the crust and filling. They were still tasty, but they kind of needed a fork to eat, instead of just hands.
Next up: Chocolate Chocolate Chip Muffins.

I made these on September 4th. Ah the good old days. It was the weekend before I started school, and I had no idea what the year would bring.


I honestly can't even remember what these muffins were like. They probably weren't bad. They probably weren't amazing either, or I doubt I would have forgotten them. I'm pretty sure those are my teeth marks, so I definitely ate one.
And finally: World Peace Cookies.

Ok, here's the thing. They were delicious. Really. But they weren't all that appetizing looking, and not one person at the meal I brought them to ate one, and the pictures I attempted to take just never turned out right.


Tip of the Day: Oh, where to start. Practice makes perfect?
Recipes:
Apple Pie Bars: (adapted from the Field Guide to Cookies)
Crust:
6 tbsps butter, softened
3/4 cup light brown sugar
1 egg
2 cups flour
1 tsp baking powder
1/2 tsp salt
Filling: 1 can apple pie filling, diced.
Streusel:
1/2 cup sugar
2/3 cup plus 2 tbsp flour
1/8 tsp salt
6 tbsps cold butter
Crust: cream butter and sugar together until well mixed. Add egg and mix to combine.
Gradually mix in flour, baking powder and salt.
Press into the bottom of a greased 9x13" pan, and 1/4 inch up the side.
Spread the filling evenly over the crust, stopping 1/2 inch from the edge.
Streusel: Combine sugar, flour and salt in a bowl. Cut in the butter until mix is crumbly.
Sprinkle evenly over the filling.
Bake at 350F for 35 minutes until golden brown.
Chocolate Chocolate Chip Muffins: (via Wikibooks)
1 3/4 cup flour
1 cup chocolate chips
3/4 cup sugar
1/3 cup cocoa
1 tbsp baking powder
1/2 tsp salt
1 egg
1 cup milk
1/3 cup oil
1 tsp vanilla
Stir together the flour, chocolate chips, sugar, cocoa, baking powder and salt.
Make a well in the center, and pour in the egg, milk, oil and vanilla.
Stir until all ingredients are moistened.
Fill 12 greased or paper-lined muffin cups 3/4 full.
Bake at 400F for 20 minutes.
World Peace Cookies (Dorie Greenspan)
11 tbsps (1 stick plus 3 tablespoons) butter or margarine, softened
2/3 cup packed light brown sugar
1/4 cup sugar
1/2 tsp fine sea salt
1 tsp vanilla
1 1/4 cups flour
1/3 cup unsweetened cocoa powder
1/2 tsp baking soda
5 ounces bittersweet chocolate, finely chopped, or a generous 3/4 cup mini chocolate chips
Beat the butter on high until light and fluffy.
Add in the sugars, salt and vanilla and beat until mixed.
Pour in the flour, cocoa and baking soda. Cover the mixer with a damp towel and pulse for a few seconds at a time until integrated.
Continue to mix until flour is fully mixed in. The dough will be crumbly and you'll worry these cookies will never come together. Mix in the chocolate bits.
Turn the dough out on to a surface and divide in two. Form two logs of approximately 1.5 inches in diameter. Yes, I used a ruler. No, you don't have to.
Place in fridge (I used the freezer because these were hard to slice) for a couple hours.
Slice in to 1/2 inch rounds, and place on a parchment paper lined baking sheet.
Bake on 325 F for 13 minutes. Cool on baking sheet.
Tuesday, October 20, 2009
Caramel Bars
I wanted to love these. I really did. They look great, don't they? But they just didn't taste as amazing as they look. And it's all my fault.
 See, I found this recipe over at Piece of Cake, and it looked amazing. Actually, everything over there looked amazing, but I chose this one to try. But I changed it up. Though I used her crust recipe, I found a different recipe online for the caramel filling. Why, you may ask?
Well, basically, I wanted to make this recipe non-dairy, and her recipe called for sweetened, condensed milk, an ingredient that is basically impossible to substitute for. So instead I found one that called for butter - for which I used margarine, and heavy cream - for which I used non-dairy whip topping (Rich's is great).
We'll get back to the cookie later, but now that we're discussing caramel...oy.
My first trial at making it did not go particularly well. See, though the instructions clearly stated not to stir once it began boiling, I, clearly having a far superior intellect, could not prevent myself from stirring, and the whole thing quickly seized up in to a big, white mess. Finished product = disaster.
 By try two, I reluctantly admitted that I may be human after all, and have to follow the instructions of mere mortals. Guess what? It worked perfectly. Thick, beautiful, delicious caramel was mine.
 So after patting the crust into a pan, I got to pour it on top.
 And pour.
 It was at this point that I realized I hadn't paid enough attention to the recipe. The crust recipe called for 2 1/2 cups of flour, so when it came time to add the flour to the other ingredients, that's what I added. Only afterwards, did I realize that I was only supposed to add 2 1/4 cups, and save 1/4 to add to the reserved crumb topping.
Oops. I forged on anyhow.
 Now here's where things get interesting once more.
When I pulled the baked bars out of the oven, I was a little nervous because the caramel seemed very soft and runny. And perhaps a little too plentiful as well. Even when it cooled to room temperature, it still didn't look like it would hold together when I cut it up. So I stuck it in the fridge.
 When refrigerated, they totally held their shape, but biting in to them, I wasn't...thrilled. They weren't bad, but they were just a little too...much. There was too much caramel, I didn't love how it tasted cold, and the crust was a little too oily and heavy.
Basically, it was all my fault. I think that the amounts of filling didn't stand with my switching out recipes, and the filling itself was a little runnier than the original would have been.
I strongly recommend that you try the original recipe out - and let me know how it is!
 Tip of the Day: Always use a non-stick saucepan when making sauces, syrups and toppings. And if your non-stick pan is scratched and worn, realize that it's likely lost much of it's "non-stickness."
 See, I found this recipe over at Piece of Cake, and it looked amazing. Actually, everything over there looked amazing, but I chose this one to try. But I changed it up. Though I used her crust recipe, I found a different recipe online for the caramel filling. Why, you may ask?
Well, basically, I wanted to make this recipe non-dairy, and her recipe called for sweetened, condensed milk, an ingredient that is basically impossible to substitute for. So instead I found one that called for butter - for which I used margarine, and heavy cream - for which I used non-dairy whip topping (Rich's is great).
We'll get back to the cookie later, but now that we're discussing caramel...oy.
My first trial at making it did not go particularly well. See, though the instructions clearly stated not to stir once it began boiling, I, clearly having a far superior intellect, could not prevent myself from stirring, and the whole thing quickly seized up in to a big, white mess. Finished product = disaster.
 By try two, I reluctantly admitted that I may be human after all, and have to follow the instructions of mere mortals. Guess what? It worked perfectly. Thick, beautiful, delicious caramel was mine.
 So after patting the crust into a pan, I got to pour it on top.
 And pour.
 It was at this point that I realized I hadn't paid enough attention to the recipe. The crust recipe called for 2 1/2 cups of flour, so when it came time to add the flour to the other ingredients, that's what I added. Only afterwards, did I realize that I was only supposed to add 2 1/4 cups, and save 1/4 to add to the reserved crumb topping.
Oops. I forged on anyhow.
 Now here's where things get interesting once more.
When I pulled the baked bars out of the oven, I was a little nervous because the caramel seemed very soft and runny. And perhaps a little too plentiful as well. Even when it cooled to room temperature, it still didn't look like it would hold together when I cut it up. So I stuck it in the fridge.
 When refrigerated, they totally held their shape, but biting in to them, I wasn't...thrilled. They weren't bad, but they were just a little too...much. There was too much caramel, I didn't love how it tasted cold, and the crust was a little too oily and heavy.
Basically, it was all my fault. I think that the amounts of filling didn't stand with my switching out recipes, and the filling itself was a little runnier than the original would have been.
I strongly recommend that you try the original recipe out - and let me know how it is!
 Tip of the Day: Always use a non-stick saucepan when making sauces, syrups and toppings. And if your non-stick pan is scratched and worn, realize that it's likely lost much of it's "non-stickness."
Crust:
1 cup (2 sticks) butter or margarine, softened
1/2 cup sugar
1/4 tsp salt
1 tsp vanilla
2 1/2 cups flour (spooned and leveled), divided
Caramel:
1 cup sugar
1 tbsp corn syrup
1/4 cup water
1/2 cup heavy cream, heated
2 tbsp unsalted butter or margarine, softened
1 tsp vanilla
Crust:
Beat the butter, sugar and salt together. Add in the vanilla.
Gradually mix in to low and gradually mix in 2 1/4 cups of flour.
Press 3/4 of the dough in to the bottom of a greased 9x13" pan.
Chill the pan in the fridge while you prepare the topping.
Caramel:
In a saucepan, stir together the sugar, corn syrup and water.
While stirring constantly, heat about 5 minutes until it begins to bubble.
Stop stirring, and allow to boil undisturbed until it turns a deep amber color.
Remove from the heat and slowly pour in the heated cream.
Stir until smooth, making sure to mix well.
Stir in the butter, mixing well.
Allow to cool for three minutes, then stir in the vanilla.
Pour most of the caramel topping over the chilled pan.
Top with the remaining 1/4 of the crust, mixed with 1/4 cup of flour and crumbled.
Bake on 350F for about 30 minutes. Cool in the pan for 20 minutes.
1 cup (2 sticks) butter or margarine, softened
1/2 cup sugar
1/4 tsp salt
1 tsp vanilla
2 1/2 cups flour (spooned and leveled), divided
Caramel:
1 cup sugar
1 tbsp corn syrup
1/4 cup water
1/2 cup heavy cream, heated
2 tbsp unsalted butter or margarine, softened
1 tsp vanilla
Crust:
Beat the butter, sugar and salt together. Add in the vanilla.
Gradually mix in to low and gradually mix in 2 1/4 cups of flour.
Press 3/4 of the dough in to the bottom of a greased 9x13" pan.
Chill the pan in the fridge while you prepare the topping.
Caramel:
In a saucepan, stir together the sugar, corn syrup and water.
While stirring constantly, heat about 5 minutes until it begins to bubble.
Stop stirring, and allow to boil undisturbed until it turns a deep amber color.
Remove from the heat and slowly pour in the heated cream.
Stir until smooth, making sure to mix well.
Stir in the butter, mixing well.
Allow to cool for three minutes, then stir in the vanilla.
Pour most of the caramel topping over the chilled pan.
Top with the remaining 1/4 of the crust, mixed with 1/4 cup of flour and crumbled.
Bake on 350F for about 30 minutes. Cool in the pan for 20 minutes.
Friday, September 25, 2009
A Note on Cake Decorating
Cake decorating isn't really my thing. I'd like it to be - I'd love to whip up stunning wedding cakes and beautiful fondant creations and birthday cake perfections - but I can't.
I've got some things down - I can spread some nice frosting, I've even covered a couple cakes in fondant, and I was pleasantly surprised by my wedding cookies.
But one thing that really eludes me? Writing. What birthday cake is complete without a beautifully scrawled message across? But somehow my skill is writing on cake are severely lacking.
So when I created my friend Alana's birthday cake I was determined to get it right. Her cake was another thing entirely - I won't bore you with the burned fingers, oozing filling or near-drop experience, but I will tell you about the writing.
I tried.

I failed. I tried again.
 Moral of the story? If at first you don't succeed, try, try again. Sounds familiar, right? I used to think that it didn't really apply to cake decorating - that one shot was all you got. But with the right techniques, you can fix, hide, redo and cover your mistakes.
Or run to the store.
I've got some things down - I can spread some nice frosting, I've even covered a couple cakes in fondant, and I was pleasantly surprised by my wedding cookies.
But one thing that really eludes me? Writing. What birthday cake is complete without a beautifully scrawled message across? But somehow my skill is writing on cake are severely lacking.
So when I created my friend Alana's birthday cake I was determined to get it right. Her cake was another thing entirely - I won't bore you with the burned fingers, oozing filling or near-drop experience, but I will tell you about the writing.
I tried.

I failed.
 I tried again.
 Moral of the story? If at first you don't succeed, try, try again. Sounds familiar, right? I used to think that it didn't really apply to cake decorating - that one shot was all you got. But with the right techniques, you can fix, hide, redo and cover your mistakes.
Or run to the store.
Tuesday, August 25, 2009
Blueberry Boy Bait Bummer
After the disaster of the charlotte royale, I was hoping to put my baking mishaps behind me. That was not the case. But this one was the result of plain old forgetfulness.
 This recipe for blueberry boy bait, (great name, no?) is the first blueberry baked good I'm sharing with you here. I don't do them too often, because I'm just not a huge blueberry fan. If I had to reach for a bowl of fresh berries, I'll go for raspberries or blackberries first.
But just look at these!
 The batter was simple and made of the basics, and called for me to mix 1/2 of the berries in, and sprinkle half on top. Done.
 It was about five minutes after I slid the pan into the oven, that I began to bash my head against the nearest wall. I'd forgotten the eggs. Oh well. What was I supposed to do? I let it keep baking and figured it couldn't be inedible. At least I didn't forget the sugar.
Five minutes after that, I began the head-bashing in earnest once more. I'd forgotten the baking powder. Why? Why, this time, had I forgotten these key ingredients that I've used hundreds of times in the past?
Well, it came out of the oven, and it looked gorgeous. I couldn't wait to eat it. Both because it looked so nice and because I was curious what it would taste like.
 And it was...OK. The flavor was really nice - the brown sugar in the batter, the cinnamon and sugar sprinkled on top - it was the right balance of sweetness with the slight tartness of the berries.
But the texture, predictably, was a little off. It was pretty dense and heavy, and by the next day had the slightest hint of rubberiness.
Of course while I'm listing its faults, I'm omitting the fact that 3/4 of it was eventually eaten by me and hungry family members.
I can only think how much better it would have been with all of the ingredients.

Tip of the Day: As my mother repeated several times after this disaster: "Always take out all your ingredients before you start."
Recipe: (from Smitten Kitchen)
2 cups and 1 tsp flour, divided
1 tbsp baking powder
1 tsp salt
1 cup (2 sticks) butter or margarine, softened
3/4 cup packed light brown sugar
1/2 cup granulated sugar
3 eggs
1 cup milk
1 cup blueberries, fresh or frozen (don't defrost), divided
1/4 cup granulated sugar
1/2 teaspoon ground cinnamon
Beat butter and sugars on high until light and fluffy.
Add eggs, one at a time, and beat until incorporated.
Gradually add in 2 cups of flour, baking powder and salt until mixed.
Pour in milk.
Toss 1/2 cup of blueberries with 1 tsp flour. Stir gently into batter.
Spread batter in greased 9x13" pan.
Scatter remaining 1/2 cup of blueberries on top, and mix sugar and cinnamon together and sprinkle on top.
Bake at 350 F for 45 to 50 minutes.
 This recipe for blueberry boy bait, (great name, no?) is the first blueberry baked good I'm sharing with you here. I don't do them too often, because I'm just not a huge blueberry fan. If I had to reach for a bowl of fresh berries, I'll go for raspberries or blackberries first.
But just look at these!
 The batter was simple and made of the basics, and called for me to mix 1/2 of the berries in, and sprinkle half on top. Done.
 It was about five minutes after I slid the pan into the oven, that I began to bash my head against the nearest wall. I'd forgotten the eggs. Oh well. What was I supposed to do? I let it keep baking and figured it couldn't be inedible. At least I didn't forget the sugar.
Five minutes after that, I began the head-bashing in earnest once more. I'd forgotten the baking powder. Why? Why, this time, had I forgotten these key ingredients that I've used hundreds of times in the past?
Well, it came out of the oven, and it looked gorgeous. I couldn't wait to eat it. Both because it looked so nice and because I was curious what it would taste like.
 And it was...OK. The flavor was really nice - the brown sugar in the batter, the cinnamon and sugar sprinkled on top - it was the right balance of sweetness with the slight tartness of the berries.
But the texture, predictably, was a little off. It was pretty dense and heavy, and by the next day had the slightest hint of rubberiness.
Of course while I'm listing its faults, I'm omitting the fact that 3/4 of it was eventually eaten by me and hungry family members.
I can only think how much better it would have been with all of the ingredients.

Tip of the Day: As my mother repeated several times after this disaster: "Always take out all your ingredients before you start."
Recipe: (from Smitten Kitchen)
2 cups and 1 tsp flour, divided
1 tbsp baking powder
1 tsp salt
1 cup (2 sticks) butter or margarine, softened
3/4 cup packed light brown sugar
1/2 cup granulated sugar
3 eggs
1 cup milk
1 cup blueberries, fresh or frozen (don't defrost), divided
1/4 cup granulated sugar
1/2 teaspoon ground cinnamon
Beat butter and sugars on high until light and fluffy.
Add eggs, one at a time, and beat until incorporated.
Gradually add in 2 cups of flour, baking powder and salt until mixed.
Pour in milk.
Toss 1/2 cup of blueberries with 1 tsp flour. Stir gently into batter.
Spread batter in greased 9x13" pan.
Scatter remaining 1/2 cup of blueberries on top, and mix sugar and cinnamon together and sprinkle on top.
Bake at 350 F for 45 to 50 minutes.
Subscribe to:
Posts (Atom)