

Showing posts with label cake. Show all posts
Showing posts with label cake. Show all posts
Wednesday, August 17, 2011
Marbled Coconut Bread and adapting
There are still a whole bunch of delicious recipes I have to share with you from my pre-move days, but I wanted to tell you about this one first. A simple, homey and uncomplicated cake, this marbled coconut bread is the first thing I have baked in my newly adopted kitchen, a place that is, well...not without restrictions.


Monday, June 20, 2011
Carrot Ginger Cupcakes with Cinnamon Cream Cheese Frosting
While I'm not sure I'm quite sold on the cupcake 'craze' right now (I'm much happier knowing pie is the next big thing) I can appreciate the many conveniences of mini cakes. Firstly, the higher frosting to cake ratio. No-brainer. Second, the portability. Third, the ability to eat 3 of them and pretend it is still a snack.


Wednesday, June 15, 2011
Lime Strawberry Swirl Cheesecake
Last week was the Jewish holiday of Shavuot. Shavuot means a lot of things to a lot of people, but I'm going to inch out in to heresy here and say that to me, Shavuot means cheesecake. Cheesecake, cheesecake, cheesecake. Seriously, I started thinking about cheesecake in March. And I made them* in June.


Tuesday, May 10, 2011
Tropical Loaf Cake
Do you like pina coladas? And getting caught in the rain? While I'm more likely to answer yes to the second question than the first, I can certainly get behind this tropical loaf cake made with fresh pineapple and fragrant toasted coconut. Sorry, I'm missing the rum.


Wednesday, April 27, 2011
Lemon Strawberry Chiffon Layer Cake
It's over. Passover has come and gone, and I am more than happy to return to cakes, cakes and more cakes. So while I haven't managed to whip up any confections since the holiday ended...yesterday, I do have several things I've been counting down the days until I could share with you. Like this towering layer cake...a delicate chiffon cake filled with lemon curd and covered in a lemon-strawberry buttercream.


Friday, April 22, 2011
Flourless Hazelnut Cake with Chocolate Ganache

6 eggs, separated
8 ounces ground hazelnuts
½ cup plus 2 tablespoons sugar
2 teaspoons baking powder
2 cups chocolate ganache (recipe below)
Beat the egg yolks and sugar together until pale yellow. Add in the hazelnuts and baking powder and mix until incorporated.
Beat the egg whites until stiff peaks form. Stir 1/3 of the egg whites in to the hazelnut mixture, then gently fold the remaining egg whites in until completely combined.
Pour the mixture in to a greased 9-inch springform pan* and bake on 325 for 50 to 60 minutes, until the top springs back when lightly pressed.
Let cool completely, slice in half, and fill with half the chocolate ganache mixture. Top with remaining mixture.
Chocolate ganache:
10 ounces semi-sweet chocolate, chips or finely chopped
1 cup cream or milk**
Place the chocolate in a glass or metal bowl.
Heat the cream or milk until just boiling. Pour it over the chocolate, and let sit for five minutes. Whisk the mixture gently until it becomes a smooth, silky frosting (this may take several minutes). Let cool to room temperature before using on cake.
*I realize many people will not have a springform pan, for Passover or at all. You can bake it in a regular 9-inch pan, but it may be difficult to remove which means you won’t be able to slice it in half. If you bake it in a different size pan, make sure to adjust the baking time accordingly.
Monday, January 10, 2011
Pear Cake
I'm often guilty of over complicating things. Does that sandwich cookie need an extra glaze? Should I drizzle white chocolate over the semi-sweet chocolate ganache on top of the cheesecake? But often, it's the simplest, unadorned baked goods that offer the sweetest, most unadulterated flavors. Such is the case with this classic, elegant pear cake.


Monday, November 15, 2010
Pear and Bittersweet Chocolate Cake
I feel bad. I feel really awful that I made this cake so long ago, and haven't shared it with you yet. It's that good. It's just the right balance of fluffy and dense, it's sweet, but not too sweet, it uses both fresh fruit and chocolate...basically heaven.
This pear and bittersweet chocolate cake is a way to take some pretty simple ingredients, and turn them into something extraordinary. One of the keys to this recipe is having the eggs and room temperature - since that will help them attain the volume they need.

This pear and bittersweet chocolate cake is a way to take some pretty simple ingredients, and turn them into something extraordinary. One of the keys to this recipe is having the eggs and room temperature - since that will help them attain the volume they need.

Monday, November 8, 2010
Butternut Squash Bread - Two Ways
I love cooking seasonally. Using what I find on the supermarket shelves, produce that is really at it's peak - nothing frozen or canned. Lately there has been a butternut squash on my dining room table almost constantly - I'll buy a new one as soon as I use the old one. And when I made this recipe for butternut squash bread, I only needed about half the puree. So I made another one - but I changed one key ingredient, to conduct a little experiment.


Tuesday, October 19, 2010
Double Apple Bundt Drop
I drop things. I break things. I forget things. I lose things. Sometimes I break things and then lose them. I'm looking at you, one earring.
Anyway, it was just one of those days, and I made a cake. And it smelled delicious. And I was pretty sure it was going to taste delicious. And then I dropped it.

Anyway, it was just one of those days, and I made a cake. And it smelled delicious. And I was pretty sure it was going to taste delicious. And then I dropped it.

Thursday, July 8, 2010
Guest Post! - Sort of Petit Fours
Well, as promised, you won't be hearing from me today, instead my friend Sarah will provide Baking and Mistaking with its very first guest post! I'd introduce her, but she does a pretty good job of that herself. I'll try to keep quiet, but there is a chance I may have some things to say. Especially since Sarah and I had a twenty minute argument about this very dessert. Anyway, that's enough from me for now....


Hello online world and loyal BaM readers! My name is Sarah. Maybe you know me from the cow cake, or maybe the airplane cake, or maybe even the cupcake cones? I’ve also been mentioned in various other posts and helped boost Amy’s baking ego with my failure in hamantaschen making (although I was definitely better than Laura). I also gave Amy her apron, with the help of my mother (OK, my mom did all the work. I just picked out the fabrics). I pride myself on being Amy’s most mentioned friend on her blog, the fact that I have eaten the majority of things featured here, and the fact that I have commented on many a blog post. Am I lame? Definitely. But that is why Amy and I are such good friends. That and our sarcasm.
(Sarah! I have textual proof of the time you complained to me that you feel like you never get to eat anything on here. Let the record be clear. Carry on...)
Anyway, I am here today with a guest post! This is a first for BaM! Amy has bugged me in the past to do this, and she never thought I would! She first asked me to do it when I made ebelskivers, but that was last summer, so it’s about time I prove her wrong.

I just moved into a new apartment and it is wonderful, mainly because I have a freezer, countertops, and an oven, none of which were in my previous apartment. So this means I have been dying to bake! And to help, for my birthday/graduation, I got a beautiful KitchenAid mixer in pistachio!
(In fact you also have a kitchen now, since I don't think the previous arrangement of sink, mini fridge and microwave really qualifies as one.)

And thus I began a mission to bake. What was first on my list? My all-time favorite, lemon petit fours! The recipe is from the back of a pan my brother and I got my mother years ago from Williams-Sonoma. (Something along the lines of this.) Now, I wasn’t about to go out and spend the money on that pan so I improvised and got a mini mini muffin pan from Kmart, so you can pretty much use any small pan.
(And here the argument begins (actually continues). Sarah! These are not petit fours! Petit fours are square! These are mini cupcakes. Very cute mini cupcakes. And no, I don't care what Williams-Sonoma says. But sorry for hijacking your guest post.)
I didn’t take any pictures along the way because I wasn’t anticipating a guest post, but the recipe is super easy!

Happy Amy? I wrote a guest post.
Tip of the Day: Never piss off a friend who bakes. You will suffer.
I have no idea what you mean....
Recipe:
Batter
1 1/3 cups flour
¾ tsp baking powder
¼ tsp salt
1/2 cup (1 stick) butter or margarine
¾ cup sugar
2 eggs
1 ½ tsps lemon juice
1 ½ tsps vanilla
1/3 cup milk
Glaze
4 cups confectioners’ sugar, sifted
2 egg whites
¼ cup milk
2 tbsps lemon juice
a few drops of yellow food coloring
Beat butter well. Add sugar and beat until light and fluffy.
Add eggs, vanilla, and lemon juice.
Alternate between adding milk and flour/baking powder/salt.
Pour batter into well greased pan. Bake 350 degrees for 10 minutes or so. (Universal baking tip from my mother: Always underbake! You can always bake something more, but once it is overdone, there is nothing you can do. Always bake less than what a recipe says to allow for differences in ovens and then bake for 1 to 3 minutes more at a time.)
While they are baking, make the glaze, mixing all the ingredients together .
Once the cakes have finished baking let them cool. To help this process and to stop the baking, take the cakes out of the pan and let them rest on a cooling rack with a baking pan underneath. Once they are fully cooled, you can dip them in the glaze, which will drip, hence the cookie sheet underneath. Let the glaze sit and do a second round of dipping. Voilà!
Tuesday, July 6, 2010
Apple Cake with Brown Sugar Meringue
About a month ago I decided I was bored of apple cakes. They're all the same, with chunks of apple and a cinnamon flavored cake batter, moist but tending toward soggy after a few days.
 Well I spoke too soon. This apple cake is nothing short of a revelation - with grated apple moistening the cake batter evenly with no heavy chunks, and - oh! - a delicate brown sugar meringue topping, providing a crisp lid to the cake and a sweet counterbalance to the dish.
 The cake itself is not too sweet, which is perfect for the light and sugary meringue - plus the gooey layer that forms between the two.
 You could whip out the food processor if you'd like, but apples are so easy to grate (unlike those stubborn potatoes) and the recipe only calls for two so I went straight for the box grater.
Note: Come back later this week for a Baking and Mistaking first - an exciting guest post!
Tip of the Day: Opt for apples that are relatively firm for easy grating - and I would go for a sweet variety like Golden Delicious.
Recipe: (from Food52)
Topping:
2 large egg whites
1 1/2 cups packed brown sugar
2 tbsps water
Cake:
1/2 cup (1 stick) butter or margarine, softened
1 cup packed brown sugar
2 egg yolks
1 tsp baking soda
1/2 tsp salt
1 tsp cinnamon
1/2 tsp ground ginger
2 large apples, peeled and grated
1/2 cup raisins - options
2 cups flour
Topping:
Place egg whites, brown sugar and water in the bottom of a double boiler - with enough water underneath to touch the bottom of the bowl.
Over high heat, beat with an electric mixer until peaks form, 3 to 5 minutes. Set aside.
Cake:
Beat the butter and sugar until light and fluffy.
Add in egg yolks and beat until combined.
Stir in the baking soda, salt, cinnamon, ginger, grated apple and raisins if using.
Fold in the flour until just combined - don't overmix.
Spoon batter into greased 9x9 inch baking pan. Spread meringue evenly over the top.
Bake on 350 F for 35 to 45 minutes.
 Well I spoke too soon. This apple cake is nothing short of a revelation - with grated apple moistening the cake batter evenly with no heavy chunks, and - oh! - a delicate brown sugar meringue topping, providing a crisp lid to the cake and a sweet counterbalance to the dish.
 The cake itself is not too sweet, which is perfect for the light and sugary meringue - plus the gooey layer that forms between the two.
 You could whip out the food processor if you'd like, but apples are so easy to grate (unlike those stubborn potatoes) and the recipe only calls for two so I went straight for the box grater.
Note: Come back later this week for a Baking and Mistaking first - an exciting guest post!
Tip of the Day: Opt for apples that are relatively firm for easy grating - and I would go for a sweet variety like Golden Delicious.
Recipe: (from Food52)
Topping:
2 large egg whites
1 1/2 cups packed brown sugar
2 tbsps water
Cake:
1/2 cup (1 stick) butter or margarine, softened
1 cup packed brown sugar
2 egg yolks
1 tsp baking soda
1/2 tsp salt
1 tsp cinnamon
1/2 tsp ground ginger
2 large apples, peeled and grated
1/2 cup raisins - options
2 cups flour
Topping:
Place egg whites, brown sugar and water in the bottom of a double boiler - with enough water underneath to touch the bottom of the bowl.
Over high heat, beat with an electric mixer until peaks form, 3 to 5 minutes. Set aside.
Cake:
Beat the butter and sugar until light and fluffy.
Add in egg yolks and beat until combined.
Stir in the baking soda, salt, cinnamon, ginger, grated apple and raisins if using.
Fold in the flour until just combined - don't overmix.
Spoon batter into greased 9x9 inch baking pan. Spread meringue evenly over the top.
Bake on 350 F for 35 to 45 minutes.
Friday, June 25, 2010
A Tale of Two Crumb Cakes
Entenmann's Ultimate Crumb Cake has long held a special place in my heart. I'd never turn down a piece of all-butter loaf or cheese danish, but bring me a box of crumb cake and I'll love you forever. Or until I finish the cake.
So I started out on a quest to recreate my favorite cake in the kitchen. Usually when I'm looking for a recipe for something specific, I'll head to RecipeZaar to see what I find. Well it didn't disappoint, and I located a recipe for New York Crumb Cake with almost all positive reviews.
 Well maybe I did something wrong but I sure wouldn't give it a positive review. The cake layer was so thick and there was barely any of it - I had to struggle to spread it across the bottom of the pan.
 Then the topping was dry and crunchy - nothing like the soft, thick crumbs I'd been yearning for. It certainly looked pretty, and a few pieces got eaten, but I was left quite unsatisfied.
So when I saw this recipe on Piece of Cake for, once again, New York Crumb Cake, this time with the seal of approval from America's Test Kitchen, I figured I would give it another shot.
 Of course since I rarely follow instructions, I made this in a round pan which was all I had on hand. Please don't question the emptiness of my kitchen. It makes me cry. Anyway, this was certainly a marked improvement, but with a great deal of effort - as I was warned on Piece of Cake. The topping is formed by carefully rolling the topping into little pieces and placing them on the batter. I hoped that this step could be skipped, but I was assured otherwise.
 As I said, this still didn't quite hit the Entenmann's mark for me, but it was good, and my friends devoured it. That is basically a theme on this blog - I made a recipe, it was OK, and then it was consumed in thirty minutes. I imagine that an Entenmann's worthy recipe would have enough butter for a three-course Paula Deen feast, so I'll be satisfied with this for now.
P.S. If you've been paying attention, you'll notice Baking and Mistaking has had a little bit of a facelift! Let me know what you think, and what else you'd like to see around here - leave me a comment or shoot me an e-mail at Bakingandmistaking [AT] gmail [DOT] com.
Tip of the Day: A 9-inch round pan has the same area as an 8-inch square, so you can substitute them without any changes to temperature or baking time. You can use your high school algebra to prove me bright!
Recipe:
I won't rewrite the first, unsuccessful recipe here, but feel free to follow the link above and see if you can tell where I may have gone wrong. Below is the second recipe, from America's Test Kitchen.
Topping:
1/3 cup white sugar
1/3 cup dark brown sugar
1/8 tsp salt
3/4 tsp cinnamon
1/2 cup (1 stick) butter or margarine, melted
1 3/4 cups cake flour [I used all-purpose, perhaps I shouldn't have]
Cake:
1 1/4 cups cake flour
1/2 cup sugar
1/4 tsp baking soda
1/4 tsp salt
6 tbsps (3/4 stick) butter or margarine, softened
1 egg
1 egg yolk
1 tsp vanilla
1/3 cup buttermilk
Stir together the topping ingredients until they come together. Set aside.
Stir the flour, sugar, baking soda and salt together. Gradually add in the butter, beating until combined.
Then add the egg, egg yolk, vanilla and buttermilk. Beat until light and fluffy.
Spread the batter into the bottom of a parchment paper or foil-lined 8-inch square pan.
Break apart the crumb topping into large pea-sized pieces, rolling them between your fingertips to get them to hold their shape. Spread the crumbs in even layer over the batter.
Bake on 325 F for 35 to 40 minues, until the crumbs are golden. Cool on wire rack for 30 minutes, then dust with confectioner's sugar before serving.
So I started out on a quest to recreate my favorite cake in the kitchen. Usually when I'm looking for a recipe for something specific, I'll head to RecipeZaar to see what I find. Well it didn't disappoint, and I located a recipe for New York Crumb Cake with almost all positive reviews.
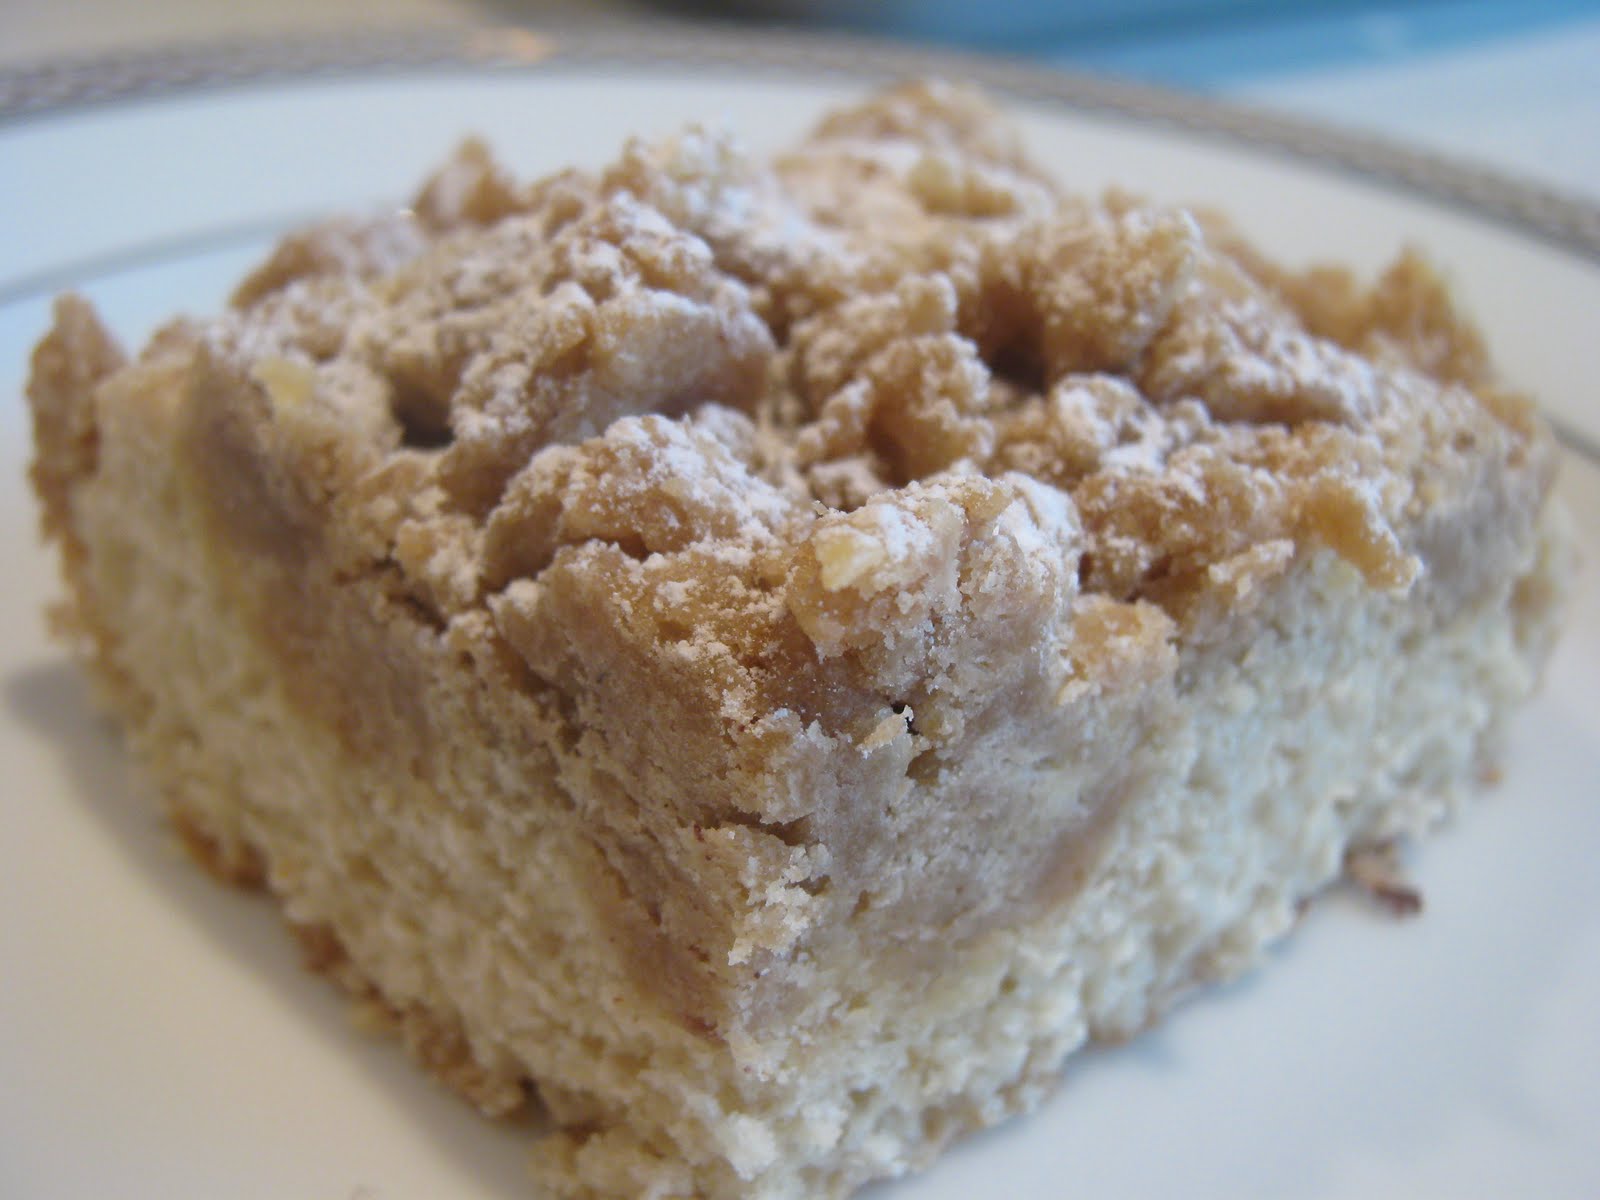 Well maybe I did something wrong but I sure wouldn't give it a positive review. The cake layer was so thick and there was barely any of it - I had to struggle to spread it across the bottom of the pan.
 Then the topping was dry and crunchy - nothing like the soft, thick crumbs I'd been yearning for. It certainly looked pretty, and a few pieces got eaten, but I was left quite unsatisfied.
So when I saw this recipe on Piece of Cake for, once again, New York Crumb Cake, this time with the seal of approval from America's Test Kitchen, I figured I would give it another shot.
 Of course since I rarely follow instructions, I made this in a round pan which was all I had on hand. Please don't question the emptiness of my kitchen. It makes me cry. Anyway, this was certainly a marked improvement, but with a great deal of effort - as I was warned on Piece of Cake. The topping is formed by carefully rolling the topping into little pieces and placing them on the batter. I hoped that this step could be skipped, but I was assured otherwise.
 As I said, this still didn't quite hit the Entenmann's mark for me, but it was good, and my friends devoured it. That is basically a theme on this blog - I made a recipe, it was OK, and then it was consumed in thirty minutes. I imagine that an Entenmann's worthy recipe would have enough butter for a three-course Paula Deen feast, so I'll be satisfied with this for now.
P.S. If you've been paying attention, you'll notice Baking and Mistaking has had a little bit of a facelift! Let me know what you think, and what else you'd like to see around here - leave me a comment or shoot me an e-mail at Bakingandmistaking [AT] gmail [DOT] com.
Tip of the Day: A 9-inch round pan has the same area as an 8-inch square, so you can substitute them without any changes to temperature or baking time. You can use your high school algebra to prove me bright!
Recipe:
I won't rewrite the first, unsuccessful recipe here, but feel free to follow the link above and see if you can tell where I may have gone wrong. Below is the second recipe, from America's Test Kitchen.
Topping:
1/3 cup white sugar
1/3 cup dark brown sugar
1/8 tsp salt
3/4 tsp cinnamon
1/2 cup (1 stick) butter or margarine, melted
1 3/4 cups cake flour [I used all-purpose, perhaps I shouldn't have]
Cake:
1 1/4 cups cake flour
1/2 cup sugar
1/4 tsp baking soda
1/4 tsp salt
6 tbsps (3/4 stick) butter or margarine, softened
1 egg
1 egg yolk
1 tsp vanilla
1/3 cup buttermilk
Stir together the topping ingredients until they come together. Set aside.
Stir the flour, sugar, baking soda and salt together. Gradually add in the butter, beating until combined.
Then add the egg, egg yolk, vanilla and buttermilk. Beat until light and fluffy.
Spread the batter into the bottom of a parchment paper or foil-lined 8-inch square pan.
Break apart the crumb topping into large pea-sized pieces, rolling them between your fingertips to get them to hold their shape. Spread the crumbs in even layer over the batter.
Bake on 325 F for 35 to 40 minues, until the crumbs are golden. Cool on wire rack for 30 minutes, then dust with confectioner's sugar before serving.
Monday, June 14, 2010
Jam Cake
Summer is upon us, or so says the humidity frizzing my hair, the bug bites on my legs and the decadent smell of Manhattan above 14th Street.
But, in fact, summer brings us good things - like outdoor weddings, barbecues with friends, tanning on the beach...and fruit! Delicious things like cherries and peaches and plums and berries. Now granted, this recipe doesn't call for any fresh fruit per se, but you can get fresh jam at your local farmer's market or even make your own if you are feeling adventurous. And then there's always trusty Smucker's....
 Either way, this cake is equal parts simple and interesting, a winning combination. The batter is classic and moist, and you can use whichever and how ever many jams you would like for a tasty blend.
 Then the simple topping adds another dimension - the original recipe also called for chopped nuts which you can include if you're so inclined.

Tip of the Day: Because this cake is topped with jam, it may appear to not be set even though the cake itself is - so be careful not to overbake.
Recipe: (Adapted from Framed)
Cake:
2 cups flour
1/2 cup sugar
1 tbsp baking powder
1/2 tsp salt
1/3 cup (5 1/3 tbsps) butter or margarine
1 egg
3/4 cup milk
1 cup jam of any variety, or mixed
Topping:
1/3 cup light brown sugar, firmly packed
2 tbsps flour
2 tbsps butter
Stir together the flour, sugar, baking powder and salt.
With a pastry cutter or a fork, cut in the butter until crumbly. Or use a food processor.
Stir in the egg and milk until combined.
Spread the batter evenly in a greased 9 inch square pan.
Dollops spoonfuls of jam on top and swirl it into the batter.
With a pastry cutter or the tips of your fingers mix the topping ingredients and sprinkle over the cake.
Bake at 400 F for 20 to 30 minutes.
But, in fact, summer brings us good things - like outdoor weddings, barbecues with friends, tanning on the beach...and fruit! Delicious things like cherries and peaches and plums and berries. Now granted, this recipe doesn't call for any fresh fruit per se, but you can get fresh jam at your local farmer's market or even make your own if you are feeling adventurous. And then there's always trusty Smucker's....
 Either way, this cake is equal parts simple and interesting, a winning combination. The batter is classic and moist, and you can use whichever and how ever many jams you would like for a tasty blend.
 Then the simple topping adds another dimension - the original recipe also called for chopped nuts which you can include if you're so inclined.
Tip of the Day: Because this cake is topped with jam, it may appear to not be set even though the cake itself is - so be careful not to overbake.
Recipe: (Adapted from Framed)
Cake:
2 cups flour
1/2 cup sugar
1 tbsp baking powder
1/2 tsp salt
1/3 cup (5 1/3 tbsps) butter or margarine
1 egg
3/4 cup milk
1 cup jam of any variety, or mixed
Topping:
1/3 cup light brown sugar, firmly packed
2 tbsps flour
2 tbsps butter
Stir together the flour, sugar, baking powder and salt.
With a pastry cutter or a fork, cut in the butter until crumbly. Or use a food processor.
Stir in the egg and milk until combined.
Spread the batter evenly in a greased 9 inch square pan.
Dollops spoonfuls of jam on top and swirl it into the batter.
With a pastry cutter or the tips of your fingers mix the topping ingredients and sprinkle over the cake.
Bake at 400 F for 20 to 30 minutes.
Wednesday, March 3, 2010
Hot Molten Chocolate Cakes
Molten chocolate cakes - those with a warm, runny, chocolatey center, have always been the quintessential restaurant dessert. It arrives at the table perfectly formed, piping hot, with a scoop of just-beginning-to-melt vanilla ice cream and a drizzle of chocolate sauce. I can recreate that in my kitchen, right? Well surprisingly, I just about can.
 I'd always assumed there was some difficult trick to making these - multiple batters, filling, flipping, hiding, running around in a circle three times - but it turns out there isn't. Here's the secret. They're just underbaked in the center.
If you cook these to just the right time, the outside will have baked into a soft chocolate cake, while the middles remain a glossy, chocolatey sauce, that oozes out when you dig in with a spoon. Though this recipe should make 12, I somehow managed to just squeak out 13 of them. Which is perfect, because I was having 12 people for lunch, but I definitely needed to taste test this.
 I reheated these the next day, and they turned out better than I thought. I left them in the pan, and reheated them for a few minutes. However I should have waited a little bit after pulled them out before getting them out of the pan, to help them stay intact. Still, I didn't hear any complaints. Or see any uncleaned plates.
Tip of the Day: You could use just about any chocolate in these. Some people will want to spend the dough and get the super fancy chocolate, which will make super fancy cakes. I'm happy to melt some Trader Joes chocolate chips and have delicious cakes. You could probably try these with milk chocolate too - let me know if you do!
Recipe: (from Martha Stewart)
1 stick (1/2 cup) butter or margarine, softened
2/3 cup sugar
6 eggs
2/3 cup flour
1/2 tsp salt
16 ounces bittersweet chocolate, melted (I used semi-sweet)
Spray or butter a 12-cup muffin pan, then sprinkle with sugar, set aside.
Beat the butter and sugar together until light and fluffy.
Add in eggs, one at a time, until well combined.
Mix in the flour and salt until just combined.
Beat in the melted chocolate until just combined.
Divided between the 12 cups, bake at 400 F for 12 to 14 minutes.
When you pull them out, the outsides should be cooked and pulling away from the sides, and the insides should be shiny and slightly jiggly.
If serving immediately, let stand for 10 minutes before removing from pan and serving.
 I'd always assumed there was some difficult trick to making these - multiple batters, filling, flipping, hiding, running around in a circle three times - but it turns out there isn't. Here's the secret. They're just underbaked in the center.
If you cook these to just the right time, the outside will have baked into a soft chocolate cake, while the middles remain a glossy, chocolatey sauce, that oozes out when you dig in with a spoon.
 Though this recipe should make 12, I somehow managed to just squeak out 13 of them. Which is perfect, because I was having 12 people for lunch, but I definitely needed to taste test this.
  I reheated these the next day, and they turned out better than I thought. I left them in the pan, and reheated them for a few minutes. However I should have waited a little bit after pulled them out before getting them out of the pan, to help them stay intact. Still, I didn't hear any complaints. Or see any uncleaned plates.
Tip of the Day: You could use just about any chocolate in these. Some people will want to spend the dough and get the super fancy chocolate, which will make super fancy cakes. I'm happy to melt some Trader Joes chocolate chips and have delicious cakes. You could probably try these with milk chocolate too - let me know if you do!
Recipe: (from Martha Stewart)
1 stick (1/2 cup) butter or margarine, softened
2/3 cup sugar
6 eggs
2/3 cup flour
1/2 tsp salt
16 ounces bittersweet chocolate, melted (I used semi-sweet)
Spray or butter a 12-cup muffin pan, then sprinkle with sugar, set aside.
Beat the butter and sugar together until light and fluffy.
Add in eggs, one at a time, until well combined.
Mix in the flour and salt until just combined.
Beat in the melted chocolate until just combined.
Divided between the 12 cups, bake at 400 F for 12 to 14 minutes.
When you pull them out, the outsides should be cooked and pulling away from the sides, and the insides should be shiny and slightly jiggly.
If serving immediately, let stand for 10 minutes before removing from pan and serving.
Wednesday, February 17, 2010
Chocolate Covered Marble Pound Cake
I love making marble cake. It's my go to when I'm baking for people whose preferences I don't know - who doesn't like marble? And this recipe really delivered. I've been taught to be skeptical of cake recipes that call for cocoa powder instead of chocolate, but this was moist and delicious.
 One thing that was strange about this recipe was the baking directions - it baked for a while at 350, then more at 325, then even more covered. I don't think I've ever baked a cake covered before, but I figured I would follow the instructions as they were written, and I wasn't sorry. I guess because loaf pans are so deep, they take a while to cook through, and you don't want the top to burn.
 Luckily the cake popped right out of the pan, and once it cooled I covered it with a thick chocolate glaze, that set up hard. There's something about a loaf cake that I like too - maybe it's the neat slices. I really hate cutting up my own cakes - not because I can't bear to slice in to them, but because I usually make a mess of it. Luckily I can usually find someone else to slice.
 Time to go back to watching ice skating. And ski jumping. And snowboarding. And bobsled.
Tip of the Day: Most loaf pans are either 9x3 or 8x4, which can be used interchangeably. If you double a loaf pan recipe, you can use a standard bundt or tube pan, though baking times will likely be less.
Recipe:
Marble Pound Cake (from RecipeZaar)
3/4 cup (1 1/2 sticks) butter or margarine, softened
1 1/3 cups sugar
2 eggs
1 tbsp vanilla
2 cups flour
2 tsp baking powder
1/4 tsp salt
1/2 cup milk
2 tbsp melted butter
2 tbsp cocoa powder
Beat together the softened butter and sugar. Add in eggs, one at a time, beating until well mixed. Stir in vanilla.
Add in flour, baking powder and salt and mix until just combined. Mix in milk until smooth.
[Alternatively, process in food processor.]
Stir together the melted butter and cocoa until smooth. Mix with 1 cup of the batter.
Pour half the remaining batter in to a greased loaf pan, top with half the cocoa batter and swirl, repeating with the remaining batter.
Bake at 350 F for 25 minutes. Then reduce temperature to 325 F and bake for another 25 minutes. Loosely cover with foil, and bake an additional 15 to 20 minutes.
Chocolate Glaze:
1 stick (1/2 cup) butter or margarine
10 ounces semi-sweet chocolate
Heat together until melted and smooth. Allow to cool slightly before applying to completely cooled cake.
 One thing that was strange about this recipe was the baking directions - it baked for a while at 350, then more at 325, then even more covered. I don't think I've ever baked a cake covered before, but I figured I would follow the instructions as they were written, and I wasn't sorry. I guess because loaf pans are so deep, they take a while to cook through, and you don't want the top to burn.
 Luckily the cake popped right out of the pan, and once it cooled I covered it with a thick chocolate glaze, that set up hard. There's something about a loaf cake that I like too - maybe it's the neat slices. I really hate cutting up my own cakes - not because I can't bear to slice in to them, but because I usually make a mess of it. Luckily I can usually find someone else to slice.
 Time to go back to watching ice skating. And ski jumping. And snowboarding. And bobsled.
 Tip of the Day: Most loaf pans are either 9x3 or 8x4, which can be used interchangeably. If you double a loaf pan recipe, you can use a standard bundt or tube pan, though baking times will likely be less.
Recipe:
Marble Pound Cake (from RecipeZaar)
3/4 cup (1 1/2 sticks) butter or margarine, softened
1 1/3 cups sugar
2 eggs
1 tbsp vanilla
2 cups flour
2 tsp baking powder
1/4 tsp salt
1/2 cup milk
2 tbsp melted butter
2 tbsp cocoa powder
Beat together the softened butter and sugar. Add in eggs, one at a time, beating until well mixed. Stir in vanilla.
Add in flour, baking powder and salt and mix until just combined. Mix in milk until smooth.
[Alternatively, process in food processor.]
Stir together the melted butter and cocoa until smooth. Mix with 1 cup of the batter.
Pour half the remaining batter in to a greased loaf pan, top with half the cocoa batter and swirl, repeating with the remaining batter.
Bake at 350 F for 25 minutes. Then reduce temperature to 325 F and bake for another 25 minutes. Loosely cover with foil, and bake an additional 15 to 20 minutes.
Chocolate Glaze:
1 stick (1/2 cup) butter or margarine
10 ounces semi-sweet chocolate
Heat together until melted and smooth. Allow to cool slightly before applying to completely cooled cake.
Sunday, January 31, 2010
Snowy Village
For Chanukah this year, my ever thoughtful brother bought me this "Snowy Village Cakelet Pan" from Williams-Sonoma (which is unfortunately no longer available). I bought him a robot, so I think it was a good deal. In any case, I've been having a great deal of fun with my new toy.
 The greatest thing about them is that they look uber-adorable and presentable with the least amount of effort: just a sprinkling of "snow" and you're set.
Each of the six "cakelet" molds is unique, with a different roof, chimneys and door.


 They popped out of the pan with little rounded bottoms, which I sliced off so they all sat evenly instead of wobbling around like Russian nesting dolls.
Which of course, meant snack time!
 Once I had my village set up....
 ...it was time to bring on the blizzard.
 Thank goodness I don't have to shovel. (Ha, like I ever shovel).
 Which is a good thing, since the snow is just getting heavier!
 Residents are requested to remain indoors.
 The walkway isn't cleared!
 Put some entrepeneurial soul managed to get out to build a snowman.
 How brave.
Anywho, I couldn't possibly tell you what cake recipe I used for these since I can't remember at all (and I doubt many of you have a snowy village cakelet pan in your possession). There was a recipe that came with the pan, but I found it didn't make nearly enough to fill them the first time around. So that batch went straight in to our mouth shaped garbage.
So...anyone having a housewarming party soon? I have the perfect gift.
 In any case, I've been having a great deal of fun with my new toy.
 The greatest thing about them is that they look uber-adorable and presentable with the least amount of effort: just a sprinkling of "snow" and you're set.
Each of the six "cakelet" molds is unique, with a different roof, chimneys and door.


 They popped out of the pan with little rounded bottoms, which I sliced off so they all sat evenly instead of wobbling around like Russian nesting dolls.
Which of course, meant snack time!
 Once I had my village set up....
 ...it was time to bring on the blizzard.
 Thank goodness I don't have to shovel. (Ha, like I ever shovel).
 Which is a good thing, since the snow is just getting heavier!
 Residents are requested to remain indoors.
 The walkway isn't cleared!
 Put some entrepeneurial soul managed to get out to build a snowman.
 How brave.
Anywho, I couldn't possibly tell you what cake recipe I used for these since I can't remember at all (and I doubt many of you have a snowy village cakelet pan in your possession). There was a recipe that came with the pan, but I found it didn't make nearly enough to fill them the first time around. So that batch went straight in to our mouth shaped garbage.
So...anyone having a housewarming party soon? I have the perfect gift.
Sunday, January 3, 2010
Busy Day Cake
Between work and school and all my time spent in the kitchen, any recipe titled "Busy Day Cake" is bound to catch my eye. And it did.
 From Edna Lewis' "The Taste of Country Cooking," this Busy Day Cake is designed to be thrown together in a few minutes, and then topped with whatever fruit or jam you have lying around.
 I certainly managed to throw it together quickly, but after my friends and I each sampled it with our favorite toppings - jam, frosting, ganache - I wasn't all that impressed. But I don't know if it was something I did, or just the recipe.
 I wasn't supposed to bake it in a bundt tin, but I did anyway. Perhaps it cooked too quickly in here? I also substituted cinnamon for the nutmeg, but that's more of a personal thing. Maybe I'm just too used to complicated cakes with mix-ins and fillings and frostings and icing and glazes? Not sure. Perhaps I just left it in the oven too long and will never know the goodness of this cake? The mystery continues...
Either way, this cake was nothing to write home about. Good thing blogs don't need stamps.
Tip of the Day: Butter softens best sitting out for an hour at room temperature, but if you need to speed it up use the microwave, but make sure to put it on a lower setting or a "soften" setting or you'll end up with melted butter.
Recipe:
1/2 cup (1 stick) butter or margarine, softened
1 1/3 cups sugar
3 eggs
2 tsps vanilla
2 cups flour
3 tsps baking powder
¼ tsp. salt
1 good pinch freshly grated nutmeg
½ cup milk, at room temperature
Beat the butter and sugar together until light and fluffy. Add in the eggs, one by one, until well mixed. Add in the vanilla.
Mix together the flour, baking powder, salt and nutmeg.
Add about 1/4 of the flour mixture to the batter and beat together.
Add 1/3 of the milk, and then alternate adding the flour and milk until all mixed.
Bake in a 9x9" pan for 30 to 35 minutes on 375F.
 From Edna Lewis' "The Taste of Country Cooking," this Busy Day Cake is designed to be thrown together in a few minutes, and then topped with whatever fruit or jam you have lying around.
 I certainly managed to throw it together quickly, but after my friends and I each sampled it with our favorite toppings - jam, frosting, ganache - I wasn't all that impressed. But I don't know if it was something I did, or just the recipe.
 I wasn't supposed to bake it in a bundt tin, but I did anyway. Perhaps it cooked too quickly in here? I also substituted cinnamon for the nutmeg, but that's more of a personal thing. Maybe I'm just too used to complicated cakes with mix-ins and fillings and frostings and icing and glazes? Not sure. Perhaps I just left it in the oven too long and will never know the goodness of this cake? The mystery continues...
Either way, this cake was nothing to write home about. Good thing blogs don't need stamps.
Tip of the Day: Butter softens best sitting out for an hour at room temperature, but if you need to speed it up use the microwave, but make sure to put it on a lower setting or a "soften" setting or you'll end up with melted butter.
Recipe:
1/2 cup (1 stick) butter or margarine, softened
1 1/3 cups sugar
3 eggs
2 tsps vanilla
2 cups flour
3 tsps baking powder
¼ tsp. salt
1 good pinch freshly grated nutmeg
½ cup milk, at room temperature
Beat the butter and sugar together until light and fluffy. Add in the eggs, one by one, until well mixed. Add in the vanilla.
Mix together the flour, baking powder, salt and nutmeg.
Add about 1/4 of the flour mixture to the batter and beat together.
Add 1/3 of the milk, and then alternate adding the flour and milk until all mixed.
Bake in a 9x9" pan for 30 to 35 minutes on 375F.
Tuesday, December 22, 2009
Chocolate Peanut Butter Bundt Cake Collapse
Before our short Chanukah interlude, I was discussing bundts, and how they often have some difficulty dropping out of the pan. Well, that was nothing compared to this cake. Though perhaps, this was my fault.
I set out to make a chocolate peanut butter bundt cake. But, as I am super human (duh), I decided not to follow a specific recipe, but to mix and match several recipes and create my own, supercalafragilisticexpialidocious chocolate peanut butter cake.
That didn't go so well.
I made the chocolate batter, and made the peanut butter filling. After putting about half the batter in, I piped the peanut butter filling and covered it with the rest of the batter.
 I assumed it would sink a little, but I didn't know it would make it all the way through and stick to the bottom of my pan.
 So I was nervous from the start about it coming out, despite the fact that I greased it well.
I tried my best to loosen it with a knife, running it around the edge. I then flipped it over, holding my breath, hoping for the best.
 The best did not happen. This is the bottom half of the cake.
 And never the twain shall meet.
Well...not on my watch.
 So after I managed to reassemble the Frankenstein cake, I still knew I couldn't serve it like this.
But, with a little frosting....
 Ok a lot of frosting...
 ...I had a masterpiece! Ok, well, a somewhat presentable cake. That still tasted delicious.
Now, I'm definitely not going to give you the recipe I followed, here are some you can try yourself if this gives you a hankering for a chocolate peanut butter cake:
Culinary in the Desert
Smitten Kitchen
Smells Like Home
Good luck!
I set out to make a chocolate peanut butter bundt cake. But, as I am super human (duh), I decided not to follow a specific recipe, but to mix and match several recipes and create my own, supercalafragilisticexpialidocious chocolate peanut butter cake.
That didn't go so well.
I made the chocolate batter, and made the peanut butter filling. After putting about half the batter in, I piped the peanut butter filling and covered it with the rest of the batter.
 I assumed it would sink a little, but I didn't know it would make it all the way through and stick to the bottom of my pan.
 So I was nervous from the start about it coming out, despite the fact that I greased it well.
I tried my best to loosen it with a knife, running it around the edge. I then flipped it over, holding my breath, hoping for the best.
 The best did not happen. This is the bottom half of the cake.
 And never the twain shall meet.
Well...not on my watch.
 So after I managed to reassemble the Frankenstein cake, I still knew I couldn't serve it like this.
But, with a little frosting....
 Ok a lot of frosting...
 ...I had a masterpiece! Ok, well, a somewhat presentable cake. That still tasted delicious.
Now, I'm definitely not going to give you the recipe I followed, here are some you can try yourself if this gives you a hankering for a chocolate peanut butter cake:
Culinary in the Desert
Smitten Kitchen
Smells Like Home
Good luck!
Subscribe to:
Posts (Atom)