

Showing posts with label no bake. Show all posts
Showing posts with label no bake. Show all posts
Tuesday, July 24, 2012
No-bake Oatmeal Coconut Bars
This probably won't come as a groundbreaking statement to most of you, but it is hot. With temperatures passing 90 F almost every day, and without the advanced modern technology of... air conditioning, I'm not jumping to turn the oven on. But, my sweet tooth hasn't waned with the rising temperatures, so no-bake recipes have major appeal. And this bar cookie with oatmeal, coconut and chocolate fits the bill perfectly.


Tuesday, July 26, 2011
No-Bake Treats
I know what you're thinking right now. Yes, I have the powers of mind reading. But I am using them for good. Because I know that right now you're thinking: "I'm hot." There's a pretty good chance, that wherever you are in the world, the temperatures are high, and the prospect of turning on the oven is not an exciting one. To that end, here are nine recipes that have no (or little) oven use to keep you just a little bit cooler this season.
The frozen:
These two treats have the added bonus of not only requiring no oven, but being deliciously cooling as well. Plus, neither require an ice cream machine, so get to it right away!
1. Strawberry Sorbet

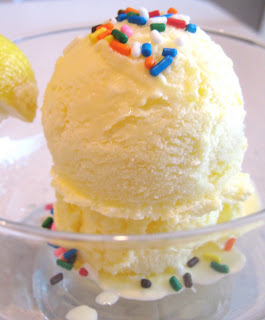
2. Lemon Ice Cream
The frozen:
These two treats have the added bonus of not only requiring no oven, but being deliciously cooling as well. Plus, neither require an ice cream machine, so get to it right away!
1. Strawberry Sorbet
2. Lemon Ice Cream
Thursday, April 7, 2011
Lemon Ice Cream
I was all set to tell you about this completely addicting ice cream last summer, but some way or another, time escaped me, and I had to tell you about this incredible pie and that amazing cobbler. But it's all worked out in the end, because this recipe is perfect for Passover, and will get you so hooked you will make it all year round. I promise. This ice cream is actually a permanent member of my freezer. And it doesn't even need an ice cream maker!


Wednesday, August 11, 2010
Keep the Oven Off!
It is August. Oh boy is it ever August. It is hot and sweaty and my hair is enormous and there are bugs flying everywhere and Manhattan smells like warm garbage and the subway platforms are like saunas and I sometimes wander into stores just to enjoy the air conditioning.
Sorry, where was I? Right, August. Well this kind of weather makes me want to veg out in front of the TV in shorts and a t-shirt and never venture outside during daylight hours. Alas I must. But it also makes me want to keep the oven firmly set at zero degrees. Always.
So in honor of the dog days of summer, here are a few no-bake recipes I've featured on Baking and Mistaking:
1) Chocolate Covered Pretzels
 2) Cookie Dough Truffles
 3) Chocolate Peanut Butter Rice Krispie Treats
 Please do not let the awful cell-phone photo discourage you from making these - they are amazing, and if you keep them in the freezer like I do, perfect for these hot sticky days.
Readers -stay cool and I'll be back later this week with a no-bake, easy and refreshing dessert. See you then!
Sorry, where was I? Right, August. Well this kind of weather makes me want to veg out in front of the TV in shorts and a t-shirt and never venture outside during daylight hours. Alas I must. But it also makes me want to keep the oven firmly set at zero degrees. Always.
So in honor of the dog days of summer, here are a few no-bake recipes I've featured on Baking and Mistaking:
1) Chocolate Covered Pretzels
2) Cookie Dough Truffles3) Chocolate Peanut Butter Rice Krispie TreatsPlease do not let the awful cell-phone photo discourage you from making these - they are amazing, and if you keep them in the freezer like I do, perfect for these hot sticky days.Readers -stay cool and I'll be back later this week with a no-bake, easy and refreshing dessert. See you then!
Monday, May 31, 2010
Chocolate Covered Pretzels
Alongside the cupcake cookies at Racheli's shower, were my favorite snack, chocolate covered pretzels.  I think it's the salty-sweet combination that I love, and the satisfying mix of crunch pretzel and creamy chocolate. I think I could talk about chocolate covered pretzels all day, but I'll spare you.
  I tried a few different coatings, some successful, some not. The mini m&ms were just too heavy to stay on. The large round sprinkles looked cute, but were a bit hard to eat.
 Obviously there's no baking involved here, but these are a cute thing to serve at any party - and aren't too time consuming. Other potential add ons: shredded coconut, chopped nuts or crushed Oreo pieces.
Tip of the Day: Melt the chocolate in a tall container so you can dip the pretzel rod, then scrape off the excess and roll in the topping of your choice.
 I think it's the salty-sweet combination that I love, and the satisfying mix of crunch pretzel and creamy chocolate. I think I could talk about chocolate covered pretzels all day, but I'll spare you.
  I tried a few different coatings, some successful, some not. The mini m&ms were just too heavy to stay on. The large round sprinkles looked cute, but were a bit hard to eat.
 Obviously there's no baking involved here, but these are a cute thing to serve at any party - and aren't too time consuming. Other potential add ons: shredded coconut, chopped nuts or crushed Oreo pieces.
Tip of the Day: Melt the chocolate in a tall container so you can dip the pretzel rod, then scrape off the excess and roll in the topping of your choice.
Monday, February 22, 2010
Cookie Dough Truffles
While I'm constantly firing up the oven, I'm also just as happy to create something without it - and these no-bake cookie dough truffles are just the thing.
 They're really pretty simple: an eggless cookie dough batter, flash frozen in to balls and rolled in chocolate. But you can't really eat more than one or two at a time, because they are certainly very sweet and rich.
 I started out with a plan to cover half the truffles in semi-sweet chocolate and half in white chocolate. For the semi-sweet, I melted some chocolate and stirred in a little bit of oil. (They didn't start to temper until about 3 days later). For the white, I had some candy melts, that I microwaved until melted. However, I found that they really didn't look as nice - they didn't cover the center as well, and they were too transparent. So I stopped after two.
 These are topped with a little sprinkling of blue sugar - a gift from my friend Laura. For reasons unbeknown to me, Laura has an obsession with blue decorating sugar, urging me to use it in every dessert I make. This is the first so far, but I do have some faraway dreams of blue palmiers....
 Tip of the Day: "Tempering" chocolate is a method of melting chocolate that will ensure it is shiny and that it will not "bloom" later on - develop those white, chalky spots we've all seen. The process of tempering is long and complicated and not something I would ever put myself through. Getting the shiny coat is easy - stir a little vegetable oil in to the melted chocolate. Preventing blooming is also easy - eat within a few days.
Recipe: (from Baked Perfection)
1 cup flour
1/4 tsp salt
dash of cinnamon
1/2 cup (1 stick) butter or margarine, melted
1/2 cup packed brown sugar
1 cup crushed oreos or sandwich cookies
candy melts or baking chocolate
Beat together the butter, sugars and vanilla in a bowl.
Mix in the flour, salt and cinnamon.
Stir in the crushed cookies.
Form in to quarter sized balls and place on a cookie sheet covered with wax paper.
Freeze for 15 to 20 minutes until firm.
Melt the chocolate or candy melts and roll each ball in it.
Place on the wax paper.
If decorating with sugar, apply while still wet.
If drizzling additional chocolate on, wait until they set.
 They're really pretty simple: an eggless cookie dough batter, flash frozen in to balls and rolled in chocolate. But you can't really eat more than one or two at a time, because they are certainly very sweet and rich.
 I started out with a plan to cover half the truffles in semi-sweet chocolate and half in white chocolate. For the semi-sweet, I melted some chocolate and stirred in a little bit of oil. (They didn't start to temper until about 3 days later). For the white, I had some candy melts, that I microwaved until melted. However, I found that they really didn't look as nice - they didn't cover the center as well, and they were too transparent. So I stopped after two.
 These are topped with a little sprinkling of blue sugar - a gift from my friend Laura. For reasons unbeknown to me, Laura has an obsession with blue decorating sugar, urging me to use it in every dessert I make. This is the first so far, but I do have some faraway dreams of blue palmiers....
 Tip of the Day: "Tempering" chocolate is a method of melting chocolate that will ensure it is shiny and that it will not "bloom" later on - develop those white, chalky spots we've all seen. The process of tempering is long and complicated and not something I would ever put myself through. Getting the shiny coat is easy - stir a little vegetable oil in to the melted chocolate. Preventing blooming is also easy - eat within a few days.
Recipe: (from Baked Perfection)
1 cup flour
1/4 tsp salt
dash of cinnamon
1/2 cup (1 stick) butter or margarine, melted
1/2 cup packed brown sugar
1/4 cup sugar
1/2 tsp vanilla1 cup crushed oreos or sandwich cookies
candy melts or baking chocolate
Beat together the butter, sugars and vanilla in a bowl.
Mix in the flour, salt and cinnamon.
Stir in the crushed cookies.
Form in to quarter sized balls and place on a cookie sheet covered with wax paper.
Freeze for 15 to 20 minutes until firm.
Melt the chocolate or candy melts and roll each ball in it.
Place on the wax paper.
If decorating with sugar, apply while still wet.
If drizzling additional chocolate on, wait until they set.
Tuesday, July 14, 2009
Peanut Butter Fudge Bars
All the no-bake recipes I have seem kind of similar: rice krispies, peanut butter, chocolate. So while these peanut butter fudge bars aren't all that revolutionary, they were in fact delicious. And still a little different than these.
 This recipe, which came from cookiemadness.net, makes bars that have three distinct layers, but each layer still has all of the great flavors throughout.
The bottom layer, has chocolate and peanut butter and rice krispies. The trifecta, if you will.
 Mix that up together over heat with some butter, and press it into the bottom of the pan.
Next up is a layer that has butter, peanut butter and icing sugar. Why icing sugar? No idea. But it works. Trust me. Spread that evenly over the bottom layer.
 After that, sprinkle some more rice krispies on top - why on top instead of mixing them in? Got me again! I wouldn't question this recipe though.
 After that is the final step, which involves a chocolate and peanut butter coating for the top. This one is a little more tricky to spread, since the rice krispies you just sprinkled on top really want to mix in with the chocolate. But you can do it.
 After that, just pop in into the fridge for a little while to chill, and voila, you have crispy peanut butter fudge bars. What a treat.
 They were really delicious, and I happen to like mine chilled, but you could eat them at room temperature as well. A few of them separated their layers a little, and lost their tops or bottoms, but most of them stuck together pretty well. I used a 9x5" loaf pan and cut them up pretty small into little bites, but because there is no baking time to adjust, you could really use whatever pan you want - you'll just have different thicknesses of the layers.
 I like mine just the way they are.
Tip of the Day: Though most recipes will call for you to melt your butter, chocolate, peanut butter - you name it - in a saucepan or in a double boiler (meaning a bowl over your saucepan), if you're careful and do it in short sessions your microwave will work just fine for this.
Recipe: (from Cookie Madness)
3.5 ounces chocolate (about a heaping 1/2 cup of chocolate chips), divided
1/2 tbsp butter plus 1 stick (1/2 cup) butter
1 1/2 cups Rice Krispies
1 cup peanut butter, divided
1/8 tsp salt
1 cup powdered sugar (to taste)
 This recipe, which came from cookiemadness.net, makes bars that have three distinct layers, but each layer still has all of the great flavors throughout.
The bottom layer, has chocolate and peanut butter and rice krispies. The trifecta, if you will.
 Mix that up together over heat with some butter, and press it into the bottom of the pan.
Next up is a layer that has butter, peanut butter and icing sugar. Why icing sugar? No idea. But it works. Trust me. Spread that evenly over the bottom layer.
 After that, sprinkle some more rice krispies on top - why on top instead of mixing them in? Got me again! I wouldn't question this recipe though.
 After that is the final step, which involves a chocolate and peanut butter coating for the top. This one is a little more tricky to spread, since the rice krispies you just sprinkled on top really want to mix in with the chocolate. But you can do it.
 After that, just pop in into the fridge for a little while to chill, and voila, you have crispy peanut butter fudge bars. What a treat.
 They were really delicious, and I happen to like mine chilled, but you could eat them at room temperature as well. A few of them separated their layers a little, and lost their tops or bottoms, but most of them stuck together pretty well. I used a 9x5" loaf pan and cut them up pretty small into little bites, but because there is no baking time to adjust, you could really use whatever pan you want - you'll just have different thicknesses of the layers.
 I like mine just the way they are.
Tip of the Day: Though most recipes will call for you to melt your butter, chocolate, peanut butter - you name it - in a saucepan or in a double boiler (meaning a bowl over your saucepan), if you're careful and do it in short sessions your microwave will work just fine for this.
Recipe: (from Cookie Madness)
3.5 ounces chocolate (about a heaping 1/2 cup of chocolate chips), divided
1/2 tbsp butter plus 1 stick (1/2 cup) butter
1 1/2 cups Rice Krispies
1 cup peanut butter, divided
1/8 tsp salt
1 cup powdered sugar (to taste)
Line a 9×5 inch loaf pan with non-stick foil.
Melt 1 1/2 oz chocolate with 1/2 tablespoon of butter.
Stir in 1/2 cup of peanut butter. Add in 1 cup cereal.
Spread in bottom of lined pan and chill for 15 minutes.
Melt the remaining 1 stick of butter and salt together.
Stir in remaining 1/2 cup peanut butter. Stir in powdered sugar to taste.
Pour a little less than half of the peanut butter mixture over the chocolate crispy mixture. Sprinkle remaining ½ cup of cereal on top, pressing it gently into mixture.
Melt remaining 2 oz chocolate. Add to remaining peanut butter mixture and carefully spread over Rice Krispies.
Chill until firm, then cut into cubes.
Friday, May 22, 2009
No-Bake Deliciousness
My friend Sarah studied abroad this past semester, and she's been bugging me the whole time to do a recipe that requires no baking, as she's limited to a toaster oven.
(Which reminds me of the year I lived with only a toaster oven and a communal microwave, but that's another post.)
So now that she's about to leave, I finally got around to making my favorite no bake recipe, that I got from my Aunt Ann a couple of years ago, and have been making ever since. But Sarah doesn't really like peanut butter anyway, so maybe she'll be less mad. Or more mad.
Anyway, these are peanut butter chocolate rice krispie bars, and they are delicious, and so, so easy. Seriously, these can be done in ten minutes, and there are only 5 ingredients, that you probably already have in your pantry.
 First, you dump the peanut butter, sugar and honey together in a bowl. It should look like this.
 Then, microwave it at intervals of 25 seconds, until you can mix it together easily and it looks like this. It should take about 3 bouts of microwaving.
 Once it's well mixed, you're going to pour in the rice krispies - so you should start this recipe out in a big enough bowl to mix. Otherwise you'll end up like I did, with a few stray rice krispies on the counter and floor.
Quickly work the rice krispies into the peanut butter mix until they are all coated, and there is no more mixture stuck to the bottom of the bowl. When I gave this recipe to my friend Tali, she was so concerned about working quickly that she made a friend measure the rice krispies while she mixed the peanut butter and honey. I wouldn't worry that much, but I also wouldn't answer the phone while you're doing this. Only because if the mixture cools down too much, it'll make it much harder to mix.
When all the rice krispies are coated, press the mixture evenly into the bottom of a 9x13" inch pan.
 Then its time to melt the chocolate, and spread it over the base. This helps them stay together when you cut them up, and of course adds chocolate! I used a 12 ounce bag of chocolate chips, but you can use less or more depending on how much chocolate you want. The 12 ounces just about covers the pan well.
Spread it carefully, so that you don't disturb the rice krispies underneath. You could always stick the pan in the fridge or freezer for a little before adding the chocolate, but I certainly don't have that much patience.
 Once you've spread the chocolate, stick it in the fridge or freezer to firm up. I like to leave it there, and enjoy my treats cold, but you can leave it in the fridge or at room temperature as well - it'll just be a little softer.
Cut them into squares, or rectangles, or triangles, or whatever your heart desires.
Now, you're probably wondering what those bars are sitting on in that first shot. I've shown you alot of counters and tabletops and strange places to leave your baked goods in the past couple months. In fact, so far you've seen my old table, my old table covered with a blue tablecloth, my new counter, the range on top of my new oven, the kitchen counter, dining room table and kitchen table of my family home, and even my desk at the office.
 But this, well this is actually the ping-pong table in the basement of my parent's house. That, in the background? Those are my dad's weights. I feel like now I've led you on an true exploration of my life. Through baked goods. It's almost like those commercials, where the dad takes his daughter's stuffed animal on his business trip and photographs it in all the places he goes.
So, in that spirit, here are the peanut butter rice krispie bars in my freezer:
 Yep, that's vegetable soup in the background. Mmmmm.
Tip of the Day: Always use a metal rack to place your cakes and cookies on after you pull them out of the oven - it can cut your cooling time in half. Don't have one? You can stick it on top of the stove in a pinch, but make sure you turn the oven off!
Recipe:
Peanut Butter Rice Krispie Bars (from Aunt Ann)
1 cup peanut butter
1 cup honey
1/2 cup sugar
5.5 cups rice krispies
Approx 12 oz semi-sweet chocolate.
Place the peanut butter, honey and sugar in a large bowl.
Microwave together until easily mixed.
Quickly stir in the rice krispies until completely coated.
Press into the bottom of a 9x13" pan. Melt the chocolate and spread on top.
Refrigerate or freeze until firm.
(Which reminds me of the year I lived with only a toaster oven and a communal microwave, but that's another post.)
So now that she's about to leave, I finally got around to making my favorite no bake recipe, that I got from my Aunt Ann a couple of years ago, and have been making ever since. But Sarah doesn't really like peanut butter anyway, so maybe she'll be less mad. Or more mad.
Anyway, these are peanut butter chocolate rice krispie bars, and they are delicious, and so, so easy. Seriously, these can be done in ten minutes, and there are only 5 ingredients, that you probably already have in your pantry.
 First, you dump the peanut butter, sugar and honey together in a bowl. It should look like this.
 Then, microwave it at intervals of 25 seconds, until you can mix it together easily and it looks like this. It should take about 3 bouts of microwaving.
 Once it's well mixed, you're going to pour in the rice krispies - so you should start this recipe out in a big enough bowl to mix. Otherwise you'll end up like I did, with a few stray rice krispies on the counter and floor.
Quickly work the rice krispies into the peanut butter mix until they are all coated, and there is no more mixture stuck to the bottom of the bowl. When I gave this recipe to my friend Tali, she was so concerned about working quickly that she made a friend measure the rice krispies while she mixed the peanut butter and honey. I wouldn't worry that much, but I also wouldn't answer the phone while you're doing this. Only because if the mixture cools down too much, it'll make it much harder to mix.
When all the rice krispies are coated, press the mixture evenly into the bottom of a 9x13" inch pan.
 Then its time to melt the chocolate, and spread it over the base. This helps them stay together when you cut them up, and of course adds chocolate! I used a 12 ounce bag of chocolate chips, but you can use less or more depending on how much chocolate you want. The 12 ounces just about covers the pan well.
Spread it carefully, so that you don't disturb the rice krispies underneath. You could always stick the pan in the fridge or freezer for a little before adding the chocolate, but I certainly don't have that much patience.
 Once you've spread the chocolate, stick it in the fridge or freezer to firm up. I like to leave it there, and enjoy my treats cold, but you can leave it in the fridge or at room temperature as well - it'll just be a little softer.
Cut them into squares, or rectangles, or triangles, or whatever your heart desires.
Now, you're probably wondering what those bars are sitting on in that first shot. I've shown you alot of counters and tabletops and strange places to leave your baked goods in the past couple months. In fact, so far you've seen my old table, my old table covered with a blue tablecloth, my new counter, the range on top of my new oven, the kitchen counter, dining room table and kitchen table of my family home, and even my desk at the office.


 But this, well this is actually the ping-pong table in the basement of my parent's house. That, in the background? Those are my dad's weights. I feel like now I've led you on an true exploration of my life. Through baked goods. It's almost like those commercials, where the dad takes his daughter's stuffed animal on his business trip and photographs it in all the places he goes.
So, in that spirit, here are the peanut butter rice krispie bars in my freezer:
 Yep, that's vegetable soup in the background. Mmmmm.
Tip of the Day: Always use a metal rack to place your cakes and cookies on after you pull them out of the oven - it can cut your cooling time in half. Don't have one? You can stick it on top of the stove in a pinch, but make sure you turn the oven off!
Recipe:
Peanut Butter Rice Krispie Bars (from Aunt Ann)
1 cup peanut butter
1 cup honey
1/2 cup sugar
5.5 cups rice krispies
Approx 12 oz semi-sweet chocolate.
Place the peanut butter, honey and sugar in a large bowl.
Microwave together until easily mixed.
Quickly stir in the rice krispies until completely coated.
Press into the bottom of a 9x13" pan. Melt the chocolate and spread on top.
Refrigerate or freeze until firm.
Subscribe to:
Posts (Atom)