Wednesday, June 30, 2010

Lemon Tartlets

I have a new toy. No, it's not the American Girl Doll I begged for for most of my childhood (and never got.) And it's not this iPad I've been hearing so much about but can't quite think of a use for. No, instead it's my new mini-muffin pan that's got my heart all a-flutter. Now while I bought the pan to make mini cupcakes (which you'll be seeing in the future), I decided I really, really need to make some adorable lemon tartlets first.
Mission accomplished! Now on to the cupcakes. Oh - you want to hear more about these? Fine.

Well I did run into a little difficulty...see the recipe called for a "tart shaper" - which is about as extraordinarily single-use as you can get (Alton Brown would not be pleased) but does the specific task of forming the dough into the shells.
Now of course with my superior intellect and talent I figured I could accomplish it quite alright on my own, with the use of my fingers and perhaps the handle of a wooden spoon. Well I did manage, but it took forever and was not that easy. Then I spent 20 minutes panicking that they would never come out of their shells, it simply wasn't possible, how would they ever be removed cleanly and then....oh. They did. And how.
Tip of the Day: Perhaps invest in a tart shaper? Or perhaps ask your blog readers for advice on a suitable alternative?

Recipe:

Shells:
1/2 cup (1 stick) butter or margarine, softened
1/3 cup sugar
1 egg white
1 1/4 cups flour

Filling:
2 eggs
1/3 cup sugar
1 tbsp butter or margarine, melted
2 tsp lemon zest
3 tbsp lemon juice
Powdered Sugar

Beat the butter and sugar until light and fluffy.
Add the egg white and blend well.
Add in the flour until just blended.
Press about a tablespoon of dough into each greased tart shell of a 24-cup mini muffin pan - preferably with a tart shaper.
Set aside.

Whisk the eggs and sugar together. Add in the melted butter.
Add in the zest and juice and blend well.
Divide evenly among tart shells.

Carefully transfer to 325 F oven and bake for 20 to 22 minutes or until edges and light brown.
Cool on a wire rack for 5 minutes, then remove from pan and cool completely.
Sprinkle with powdered sugar immediately before serving.

Monday, June 28, 2010

Tips and Tricks

Hey guys -

If you've been around a while you know that the majority of posts here end with a "Tip of the Day" - ranging from time saving tips to suggestions for specific products.

Well now you can see them all in one place on the "Tips and Tricks" page, which will have a permanent home in the sidebar.

The tips are divided into categories like "frosting and filling a cake," for easy browsing.

It's certainly not comprehensive, so if there are other things you want me to cover - ask away. Though I can't promise I have all the answers.

Well, see you later this week with a new recipe!

Amy

Friday, June 25, 2010

A Tale of Two Crumb Cakes

Entenmann's Ultimate Crumb Cake has long held a special place in my heart. I'd never turn down a piece of all-butter loaf or cheese danish, but bring me a box of crumb cake and I'll love you forever. Or until I finish the cake.

So I started out on a quest to recreate my favorite cake in the kitchen. Usually when I'm looking for a recipe for something specific, I'll head to RecipeZaar to see what I find. Well it didn't disappoint, and I located a recipe for New York Crumb Cake with almost all positive reviews.
Well maybe I did something wrong but I sure wouldn't give it a positive review. The cake layer was so thick and there was barely any of it - I had to struggle to spread it across the bottom of the pan.
Then the topping was dry and crunchy - nothing like the soft, thick crumbs I'd been yearning for. It certainly looked pretty, and a few pieces got eaten, but I was left quite unsatisfied.

So when I saw this recipe on Piece of Cake for, once again, New York Crumb Cake, this time with the seal of approval from America's Test Kitchen, I figured I would give it another shot.
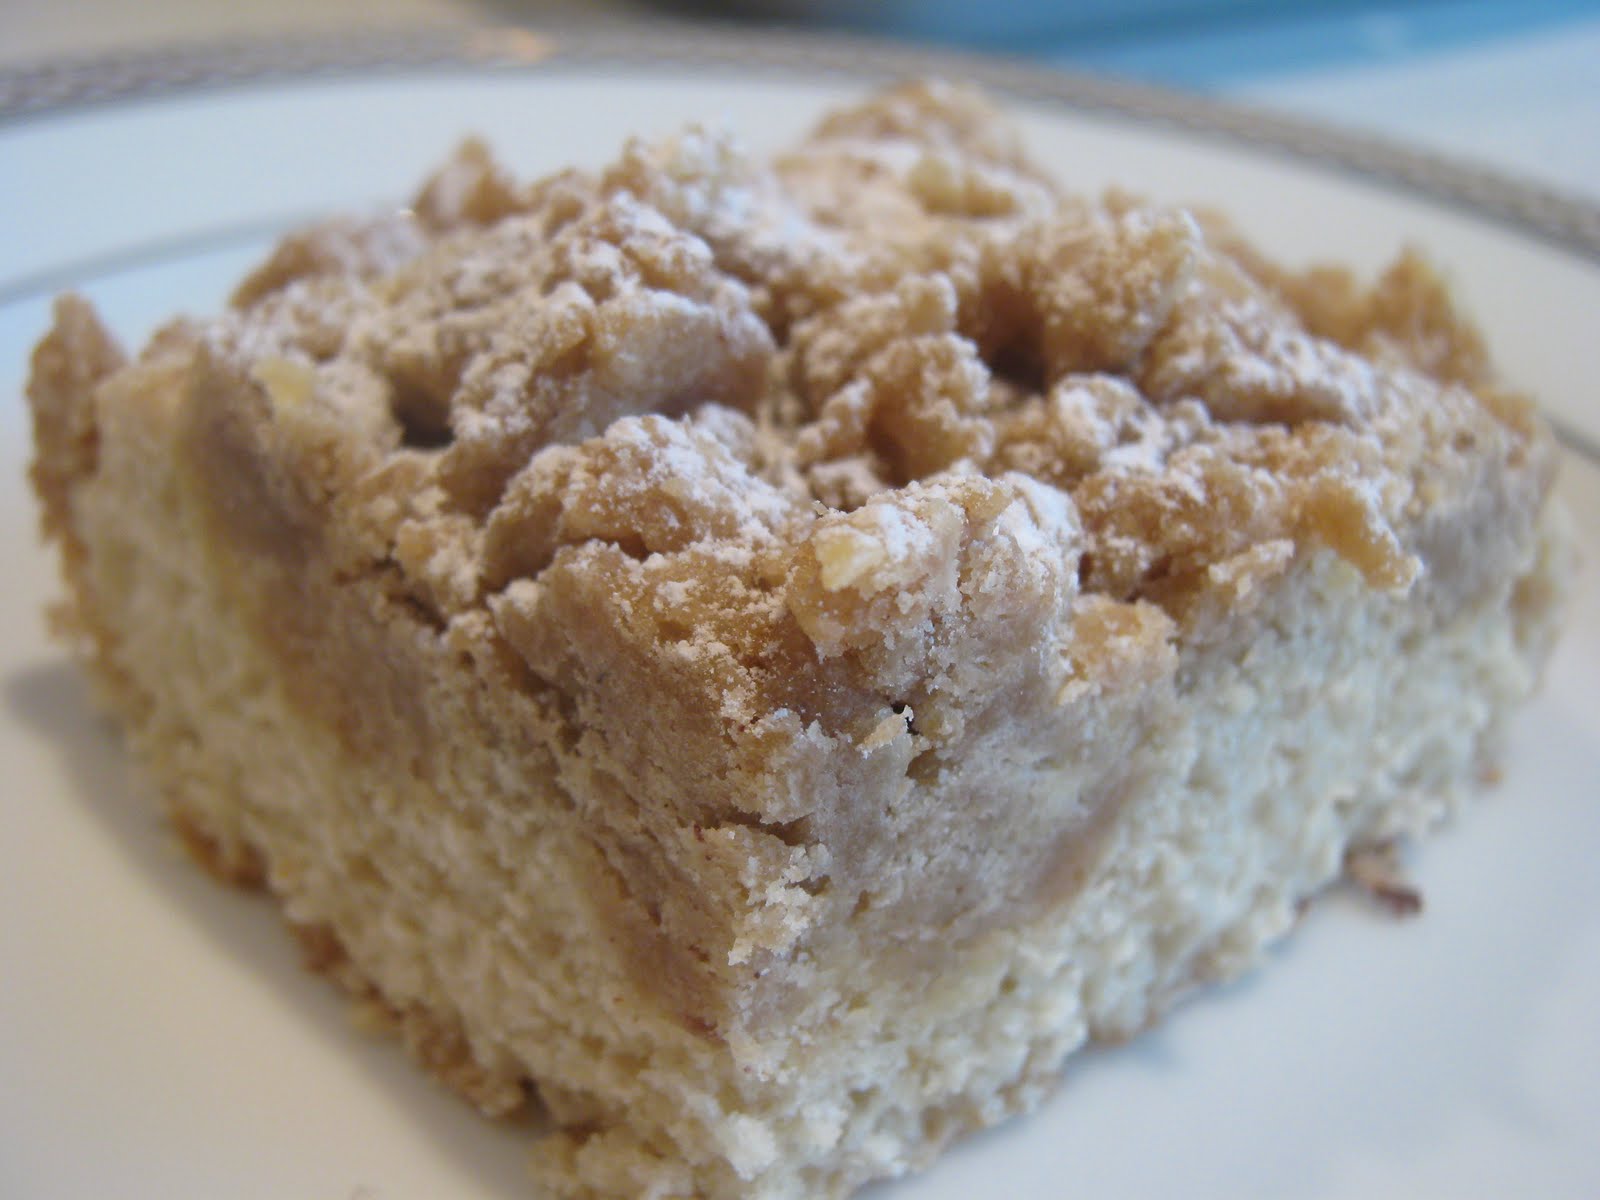
Of course since I rarely follow instructions, I made this in a round pan which was all I had on hand. Please don't question the emptiness of my kitchen. It makes me cry. Anyway, this was certainly a marked improvement, but with a great deal of effort - as I was warned on Piece of Cake. The topping is formed by carefully rolling the topping into little pieces and placing them on the batter. I hoped that this step could be skipped, but I was assured otherwise.
As I said, this still didn't quite hit the Entenmann's mark for me, but it was good, and my friends devoured it. That is basically a theme on this blog - I made a recipe, it was OK, and then it was consumed in thirty minutes. I imagine that an Entenmann's worthy recipe would have enough butter for a three-course Paula Deen feast, so I'll be satisfied with this for now.

P.S. If you've been paying attention, you'll notice Baking and Mistaking has had a little bit of a facelift! Let me know what you think, and what else you'd like to see around here - leave me a comment or shoot me an e-mail at Bakingandmistaking [AT] gmail [DOT] com.

Tip of the Day: A 9-inch round pan has the same area as an 8-inch square, so you can substitute them without any changes to temperature or baking time. You can use your high school algebra to prove me bright!

Recipe:
I won't rewrite the first, unsuccessful recipe here, but feel free to follow the link above and see if you can tell where I may have gone wrong. Below is the second recipe, from America's Test Kitchen.

Topping:
1/3 cup white sugar
1/3 cup dark brown sugar
1/8 tsp salt
3/4 tsp cinnamon
1/2 cup (1 stick) butter or margarine, melted
1 3/4 cups cake flour [I used all-purpose, perhaps I shouldn't have]

Cake:
1 1/4 cups cake flour
1/2 cup sugar
1/4 tsp baking soda
1/4 tsp salt
6 tbsps (3/4 stick) butter or margarine, softened
1 egg
1 egg yolk
1 tsp vanilla
1/3 cup buttermilk

Stir together the topping ingredients until they come together. Set aside.

Stir the flour, sugar, baking soda and salt together. Gradually add in the butter, beating until combined.
Then add the egg, egg yolk, vanilla and buttermilk. Beat until light and fluffy.
Spread the batter into the bottom of a parchment paper or foil-lined 8-inch square pan.

Break apart the crumb topping into large pea-sized pieces, rolling them between your fingertips to get them to hold their shape. Spread the crumbs in even layer over the batter.

Bake on 325 F for 35 to 40 minues, until the crumbs are golden. Cool on wire rack for 30 minutes, then dust with confectioner's sugar before serving.

Tuesday, June 22, 2010

Easy Jam Tart?

I really don't like to follow instructions. I always read them, and then choose to follow or ignore them at will. When it comes to recipes, it generally concerns what ingredients/tools/pans I have on hand. Which, depending on where I'm baking, can be quite limited. That's how I've ended up using a Pam lid for a cookie cutter, dropping my cake, and having not-really-lime-tasting lime cookies.

It's also how I ended up with this slightly deformed David Lebovitz Jam Tart.
The original recipe calls for a tart pan or springform pan, neither of which I had on hand. The closest thing I had was a 9-inch foil pie pan. So of course I went on with the recipe.
I think the pan substitute doomed me in ways I hadn't forseen. The slant of the sides of the pan produced a much too thick crust - as did the too-small pan. That wouldn't be so bad with a standard pie crust, but this cornmeal version was a little heavy with the added bulk.
Then there was the topping - I love the idea of topping a tart with discs of crust, but for a recipe labeled "easy jam tart," this was a little labor intensive. I found cutting the discs quite difficult even when frozen - though again, this was likely due to my lack of even a remotely decent knife.

Anyway, while I didn't love this dessert my friends certainly seemed to, most even going for seconds, so there was obviously some redeeming factors. I'd be happy to experiment with the formula again with some tweaks and changes - plus a real pan!

Tip of the Day: A sharp, thin-bladed serrated knife like this one works best for cutting slices off a log, like in this recipe or most standard icebox-cookie recipes.

Recipe: (from David Lebovitz)

9 tablespoons butter or margarine, softened
1/2 cup sugar
1 egg
1 egg yolk
1/8 teaspoon almond extract
1 1/2 cups flour
1/2 cup stone-ground cornmeal
1/2 teaspoon sea salt
2 teaspoons baking powder
1 3/4 cups apricot, raspberry or other jam

Beat together butter and sugar until well-combined. Mix in the egg, egg yolk and almond extract.
Gradually add in the flour, cornmeal, salt and baking powder, just until combined.
Divide the dough into 2/3 and 1/3. Press the 2/3 into a disc and refrigerate, and roll the remaining dough into a 2-inch log and freeze it.
After a 1/2 hour press the refrigerated dough into a 9 or 10-inch tart pan.
Spread the jam evenly on top.
Slice discs from the frozen log and lay on top of the jam. Sprinkle with sugar - coarse is best.
Bake at 375 F for 20 to 25 minutes or until golden brown.

Thursday, June 17, 2010

Chocolate Peanut Butter Surprise Cookies

I've got a secret.....well these cookies do. Cleverly disguised as a run of the mill chocolate cookies, they hide a deep, dark secret. Actually it's a sweet, orange-colored secret: a peanut butter filling!
Despite the fact that I claim to almost never repeat a recipe, I've made these cookies twice in the past month. The first was for my friend Sharon, who has asked me for months to make something chocolate and peanut buttery. And I don't know what took me this long. Then I made a batch to take across the world with me to my Aunt Ann, who prefers to go by the moniker "Doda Matbea," since she thinks Aunt Ann makes her sound like "an ancient spinster." Which she is not.
I digress. These cookies make a great impression I think, and though they look like they took hours they're really not too time consuming.
They start with the peanut butter filling, which I roll into balls and flash freeze. The freezing doesn't make any difference in the cookie, it just makes the cookies 1000 time easier to form.
Because after you create the filling you take each ball and form the chocolate dough around it. Then you give them a good smashing with the bottom of a glass (OK, be gentle) and bake them up. Delicious! And let everyone enjoy the hidden surprise inside. Although perhaps warn anyone with allergies. Baking and Mistaking: not killing anyone since 2009. With the exception of death shards.
Tip of the Day: If you bake two trays of cookies in the oven at one time, they may not bake exactly the same, so when you check in, make sure to check the top and bottom racks for done-ness. Generally the top rack bakes quicker since heat rises.

Recipe: (from Allrecipes)
Filling:
3/4 cup confectioners' sugar
3/4 cup peanut butter

Cookie:
1/2 cup sugar
1/2 cup packed brown sugar
1/2 cup (1 stick) butter or margarine, softened
1/4 cup peanut butter
1 tsp vanilla
1 egg
1 1/2 cups flour
1/2 cup cocoa powder
1/2 tsp baking soda

For the centers, mix the peanut butter and sugar together (you may need to use your hands). Form into approximately 30 balls and flash freeze on a baking sheet.

While they're chilling, make the cookie dough:
Beat the butter, sugars and peanut butter together until mixed.
Add in the vanilla and egg and beat to combine.
Gradually add in the flour, cocoa powder and baking soda until blended.
Remove the peanut butter centers from the freezer, and shape the cookie dough around the ball until completely covered.
Flatten the cookies with a sugar-dipped glass.
Bake on 375 F for 7 to 9 minutes, until tops of cookies just begin to crack.

Monday, June 14, 2010

Jam Cake

Summer is upon us, or so says the humidity frizzing my hair, the bug bites on my legs and the decadent smell of Manhattan above 14th Street.
But, in fact, summer brings us good things - like outdoor weddings, barbecues with friends, tanning on the beach...and fruit! Delicious things like cherries and peaches and plums and berries. Now granted, this recipe doesn't call for any fresh fruit per se, but you can get fresh jam at your local farmer's market or even make your own if you are feeling adventurous. And then there's always trusty Smucker's....
Either way, this cake is equal parts simple and interesting, a winning combination. The batter is classic and moist, and you can use whichever and how ever many jams you would like for a tasty blend.
Then the simple topping adds another dimension - the original recipe also called for chopped nuts which you can include if you're so inclined.

Tip of the Day: Because this cake is topped with jam, it may appear to not be set even though the cake itself is - so be careful not to overbake.

Recipe:
(Adapted from Framed)
Cake:
2 cups flour
1/2 cup sugar
1 tbsp baking powder
1/2 tsp salt
1/3 cup (5 1/3 tbsps) butter or margarine
1 egg
3/4 cup milk
1 cup jam of any variety, or mixed

Topping:
1/3 cup light brown sugar, firmly packed
2 tbsps flour
2 tbsps butter

Stir together the flour, sugar, baking powder and salt.
With a pastry cutter or a fork, cut in the butter until crumbly. Or use a food processor.
Stir in the egg and milk until combined.
Spread the batter evenly in a greased 9 inch square pan.
Dollops spoonfuls of jam on top and swirl it into the batter.

With a pastry cutter or the tips of your fingers mix the topping ingredients and sprinkle over the cake.
Bake at 400 F for 20 to 30 minutes.

Thursday, June 3, 2010

Chewy Lime Sugar Cookies

I love coconut. In cookies and bars and macaroons and anything in between. And I love these cookies. But you know who else loves these cookies? People who don't love coconut.
In this cookie the coconut is not an overpowering flavor, but it's a way to make the cookie even chewier and more delicious.
The cookies are lime flavored, and they call for lime zest and lime juice. Juice I had, zest I did not, but still I forged on. Some samplers of these cookies said that they couldn't really taste the lime, and others said they could. Next time, I'll get the zest.
These cookies call for toasted coconut, which I would strongly recommend doing, both for the kitchen scenting side bonus and the added flavor and texture it gives to the cookies. To toast, spread your coconut out on a rimmed baking sheet and place in the oven on 350 F. Check and stir every few minutes, as they can burn quickly.
Tip of the Day: If you're looking to halve a recipe that calls for an odd number of eggs, when you get to the "half" beat the egg a little and pour half the mixture in, so you get an equal amount of yolk and white.

Recipe: (from My Baking Addiction)

1 cup (2 sticks) butter or margarine, softened
1 1/2 cups sugar
1 egg
1/2 tsp vanilla extract
2 3/4 cups flour
1 tsp baking soda
1/2 tsp baking powder
1/2 tsp salt
Zest of one large lime, finely minced
3 tbsp lime juice
½ cup unsweetened toasted coconut
1/2 cup sugar for rolling cookies

Beat the butter and sugar together until light and fluffy.
Beat in the egg, then the vanilla, lime juice and lime zest.
Blend in the flour, baking powder, baking soda, salt and coconut.
Roll teaspooonfuls of dough into a ball and roll in sugar.
Place on a parchment paper lined cookie sheet and bake on 350F for 8 to 10 minutes, until just starting to brown.
Let sit before two minutes before moving to racks to cool.